


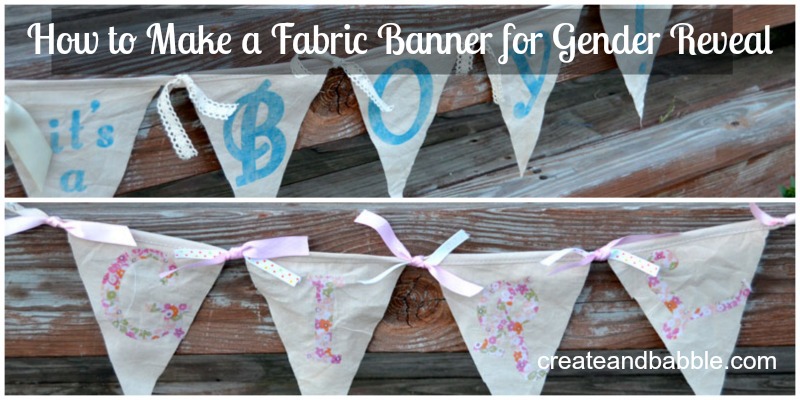
Today I want to show you how I made a gender reveal fabric banner using my Silhouette Cameo. I have been wanting to try cutting fabric with my Cameo and since it was time for another Silhouette Challenge, I did.
The Silhouette Challenge is a monthly blog hop that was started by the ever-so-creative Lauren from The Thinking Closet. A group of us Silhouette owners get together once a month to challenge ourselves to create something using our Cameos or Portraits using a medium or technique we haven’t tried before. This month, I chose to work with fabric using the Silhouette Fabric blade and the Clean Cut Fabric Interfacing.
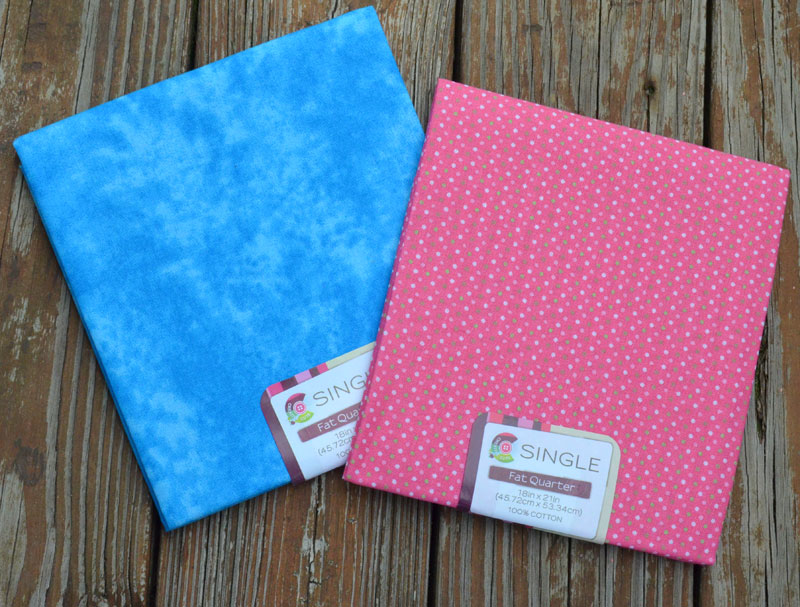
So what to make? The possibilities are endless, but since one of the things that has been in the forefront of my mind is the fact that there’s a new baby on the way! My daughter and son-in-law are expecting my second grandchild in February! Of course I want to help her decorate the nursery once they find out if they are having a boy or girl. Since I can’t make anything gender-specific yet, I thought: how about making two of something: one for a boy and one for a girl and using it to reveal the gender! I wanted to come up with a way to make two banners that were super cute, yet inexpensive to make. I went to my fabric stash and found some unbleached muslin. The only fabric I had to buy was for the letters. I found fat quarters at Wal-Mart for 97 cents. Perfect. Well almost perfect. I wanted a sort of shabby look and these fabric pieces were a little too bright.
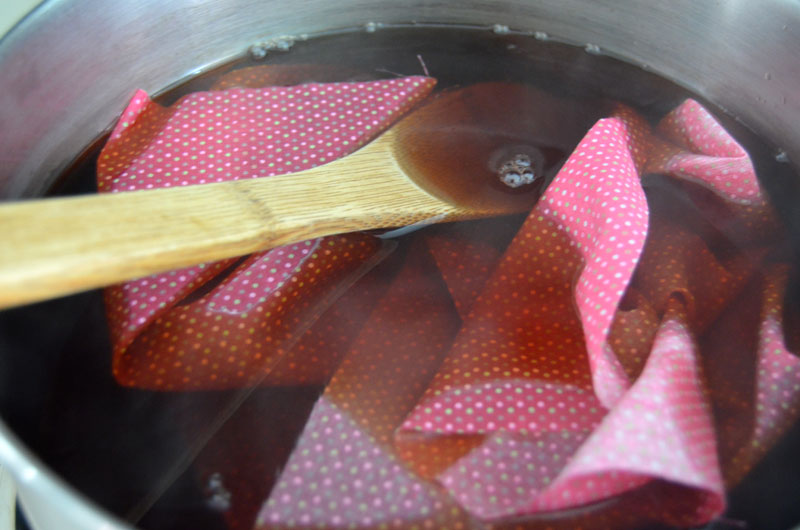
I gave them a bath in some tea water to see if that would help subdue the brightness of the colors a little. To tea stain them, I brought a big pot of water to boil and added about 10 tea bags. After the tea bags steeped for about 10 minutes, I added the fabric and let it soak for about 20 minutes. It didn’t really help darken them. Plan B: use the back of the blue fabric and go to fabric stash for a different pink!
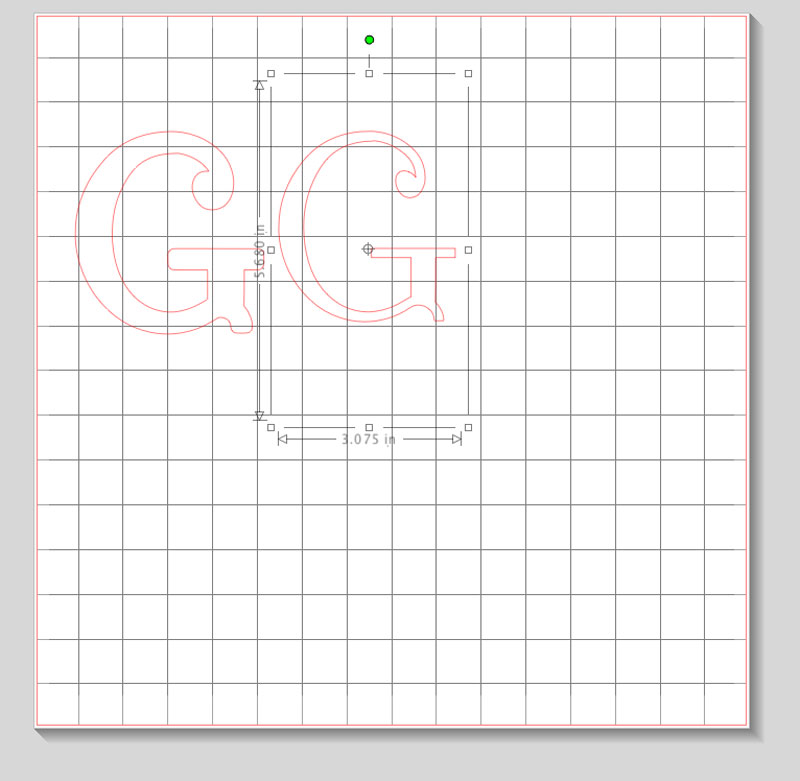
After the tea-stained fabric was rinsed, dried and ironed, it was on to making the banner. I cut the triangles from the muslin fabric. To make the triangle shapes for the banner, I went back into Silhouette Studio and made a triangle shape and welded a rectangle to the top of it. I then cut it out of card stock to use as a pattern.

I folded over the top rectangle part of the triangle and clipped the corners. Now they’re ready for the letters to be attached.
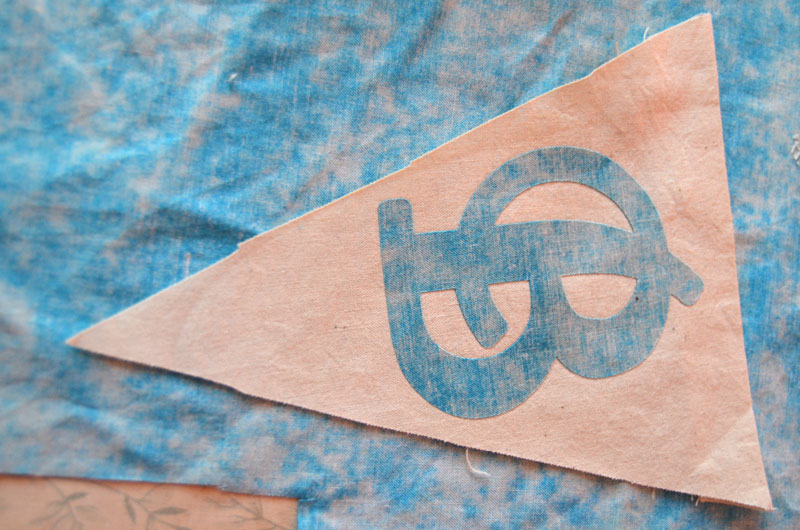
I chose FontleroyBrown font and to be sure the letters wouldn’t be too thin, I added an external offset of .10
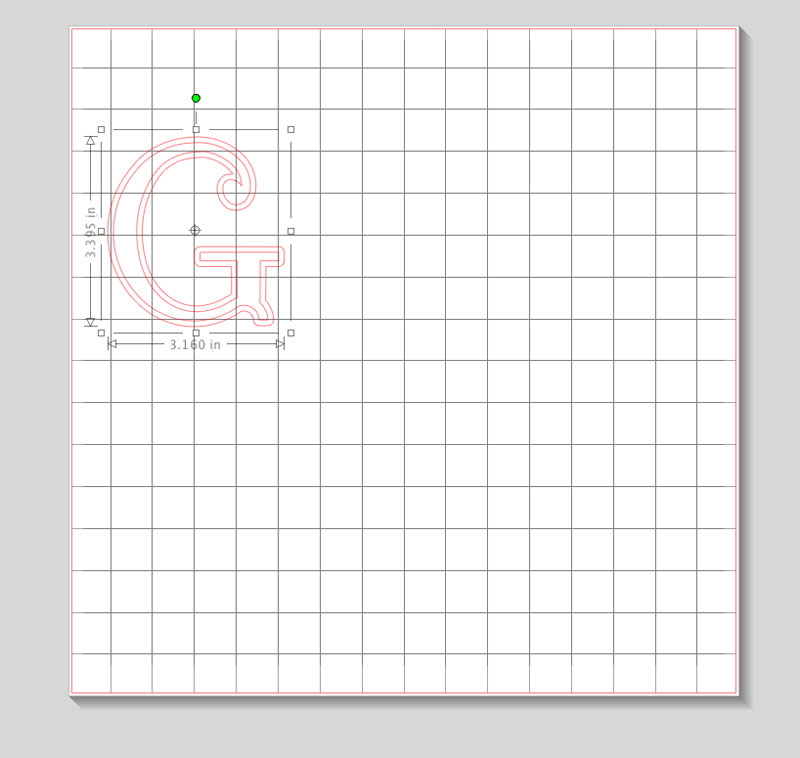
To offset a shape in Silhouette Studio, make sure the shape is selected, then open the Offset window in the tool bar. It’s the fifth icon from the right. Click on Offset and then adjust the distance in the slider. You will now have two shapes. Select the inner shape (move it to be sure you have the right one selected!) and then delete it.
I followed the directions on the package of the fabric interfacing. I was pleasantly surprised at how easy it was to use and I was even more pleased with how the Silhouette cut the fabric. I was expecting to have to clip in places where it didn’t cut the whole way through, but I didn’t have to. It cut the fabric so cleanly! Nice.
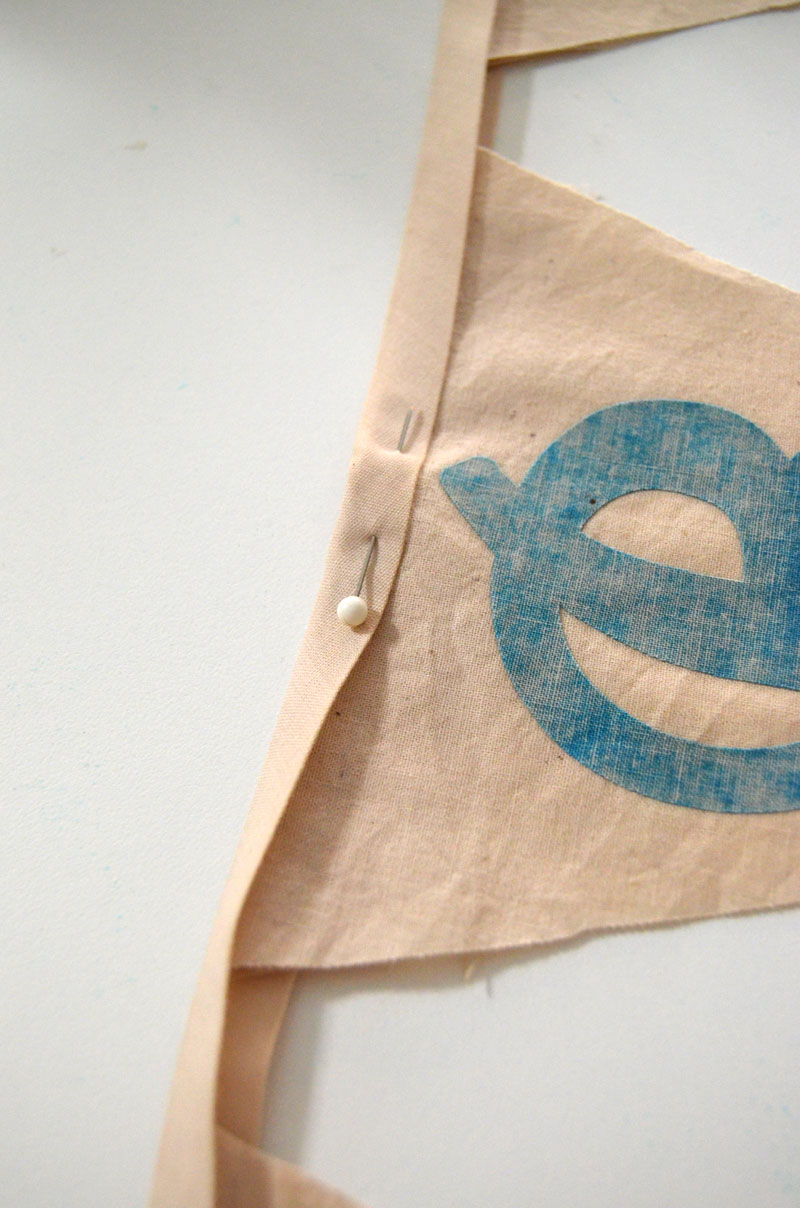
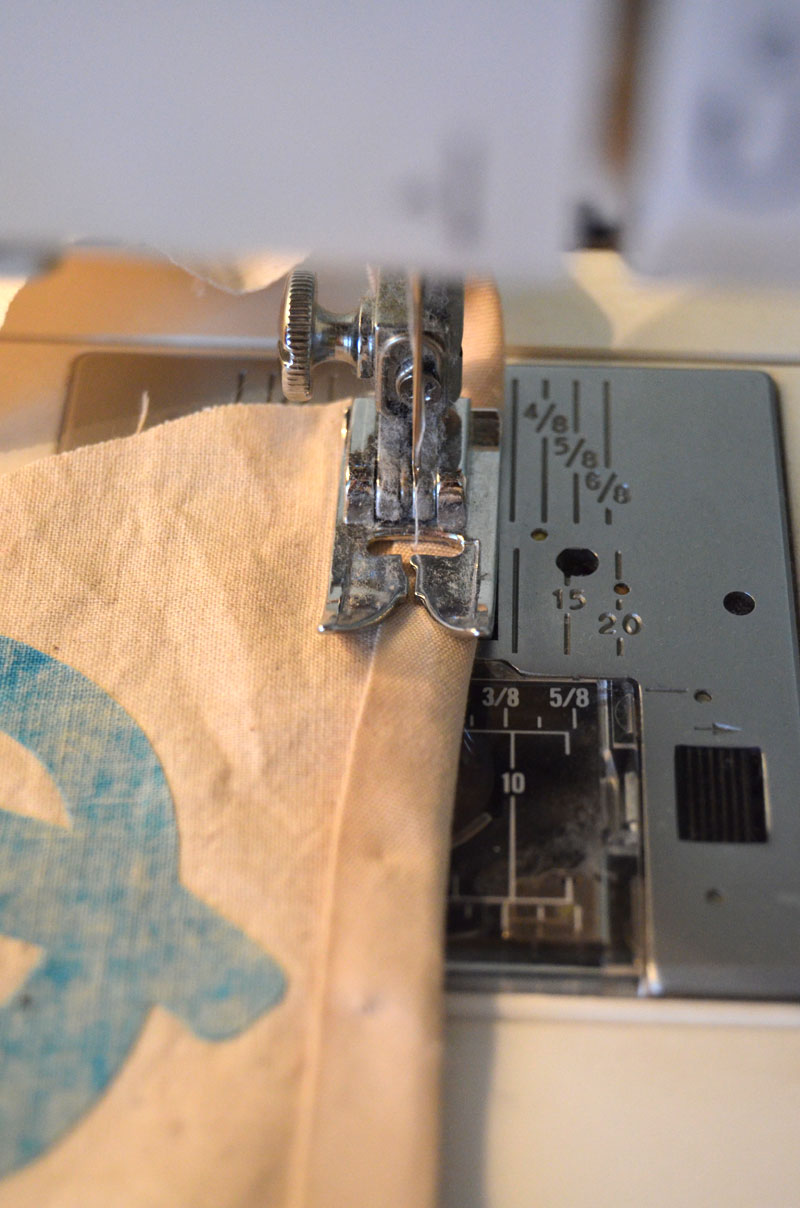
To assemble the banner, I used bias tape by sewing the pennant shapes into the fold of the bias tape.
To finish the banners, I tied some coordinating ribbons between the pennants.
 It’s a boy!
 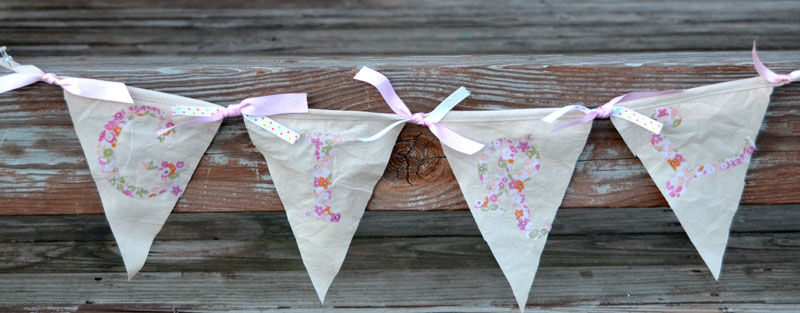 It’s a girl!
Please visit the links below to see what my Silhouette friends have made for this month’s challenge:
Organizing for Preschool by Life After Laundry
Strawberry Shortcake Party Favors with Silhouette Seed Packets by It Happens in a Blink
Look At Me! Vinyl Decal with Free File by Get Silvered Craft
Stamped Wrapping Paper Tutorial by The Thinking Closet
Titi’s Freezer Paper Stenciled Butterflies Onesie! by TitiCrafty
Monster Crossing Test Tube Holder by My Happy Place
Preschool Lovey Book by A Tossed Salad Life
Front Door Sign by Cutesy Crafts
Paper Pumpkin Banner by Chicken Scratch NY
A Stache Bash Shower by Home At Eight
Fall Decor with the Silhouette by Coley’s Corner
Happy Fall Y’all by Tanya’s Creative Space
Crafting for Disney: Stroller Signs & Kid Shirts by From Wine to Whine
Halloween Lights by Lil’ Mrs. Tori
Customized Disney T-Shirts by DailyDwelling
Craft Room Labels by Super Sweet Life
Tried & True Coloring Print In 3D! by Tried & True
Clean Eating Menu Planning and Magnet Board by The House on Hillbrook
Toddler Growth Chart by Joy and Gladness of Heart
DIY Anthropologie Inspired Chalk Board Storage Jars by 4 You With Love
“Let’s Hear it For the Boys!” by An Elegant Touch


Amazing job! I love this banners. The possibilities are endless! So vintage and pretty! Great Job!
Thank you Stephanie! I’m anxious to make more projects with fabric!
This is such a cute idea. I loooooove it! I imagine something like this even for a 1st year old of a baby! too cute! Hope you have a great day
Hugs
Cami @ TitiCrafty.com
Sunday Bewitch Me & Titi {Link Party}
Thursday Titi’s Spot for the Silly HOP
Thanks Camila! That is a good idea, to make one for a first birthday! I’ll remember that!
Awh:) I love banners and yours turned out so cute! Such a great idea for a gender reveal!
Thank you Tori! I love banners, too!
What a cute banner!
Thanks Coley!
I love them! I can’t wait to use one! Thanks, mommy!
What a cute idea! I haven’t cut fabric yet, but you made it sound soooo easy. Gonna have to give it a try!
Oh, you’re going to love it! And it is easy!
Really cute project – Great to have the tutorial! Thanks for sharing – ;-}
Lynden
http://aneleganttouch-lynden.blogspot.com
https://www.facebook.com/Lynden.AnElegantTouch
Thanks Lynden! It was fun to make; I’m glad you liked it!
What a great project to reveal the sex of a newborn. I love how you used your silhouette to create this beautiful banner!
Thanks Marilyn! It was a fun project!
That’s really cute, my cutter is the KNK zing I love doing fabric
Thanks Mel! Yes, I’ll be doing more fabric projects now that I know how easy it is!
Wish I saw this for the gender reveal we did for my sister a few months ago. It’s absolutely adorable!
Thank you Vanessa! I had fun making them. Now all I have to do is wait and see which one gets used!
these are so sweet 🙂 what a fun thing to have at the shower!!!
way back when i was having kids you didn’t know the sex until the little one popped out 🙂
This turned out super cute, Jeanie! And like you, I’m really impressed by how cleanly the Silhouette can cut fabric. Your grandson or granddaughter is going to be so blessed to have such a creative and loving grandmother as you! Thanks so much for being a part of our Silhouette Challenge group post this month! I’m inspired yet again.
What a great project to make when you don’t know what the baby is yet! I love cutting fabric with the Silhouette. Doesn’t it make life so much easier? Super cute, excited to find out what they are having!
Thank you Alisha! I’m hooked on cutting fabric with my Cameo now. I can’t wait to find out the gender of the baby!
Helpful info. Fortunate me I discovered your web site by accident,
and I’m surprised why this twist of fate didn’t happened in advance!
I bookmarked it.
Love these banners. The helpful info you have shared. Thank you for posting.
If you want gender reveal poppers buy on amazon visit here.
Thanks for sharing! This is awesome 🙂
To be noticed by customers in your area, your branding needs to be visible. What’s more, information about a business that is available at a customer’s eye sight level stands more of a chance of capturing their attention when they’re out shopping.
Because banner stands are so lightweight, taking them with you wherever you go is convenient and hassle-free. Beyond being light in weight, they also condense into small bags. For this reason, companies don’t have to utilize valuable square footage to store them.