


I am thrilled to be participating in the BYOF (bring your friend) Event at the Ikea store in Baltimore, Maryland this Saturday. There will be demonstrations, food samplings, drawings for prizes and freebies! I’ll be there demonstrating creative ways to use picture frames. Here’s a peek at one of the projects I’ll be demonstrating: How to Use One Photo in a Collage Frame.
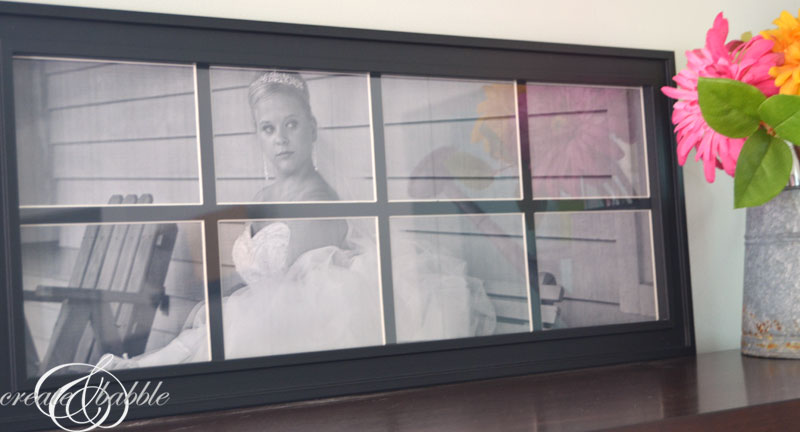
Even though the ORKENED frame is designed to hold eight photos, I thought it would be fun to try something different. Just use one photo instead of eight. I like that it has the appearance of looking through an 8-pane window.

The frame is fairly large (12″ x 30″) so I would need a big photo. Photos enlarged to the size I needed can be fairly pricey so I had the photo printed as a black and white engineering print at my local Office Max on 27# paper.
First I chose the photo that I wanted to use. I knew I needed to use a landscape oriented photo since I wanted to hang the frame horizontally versus vertically.
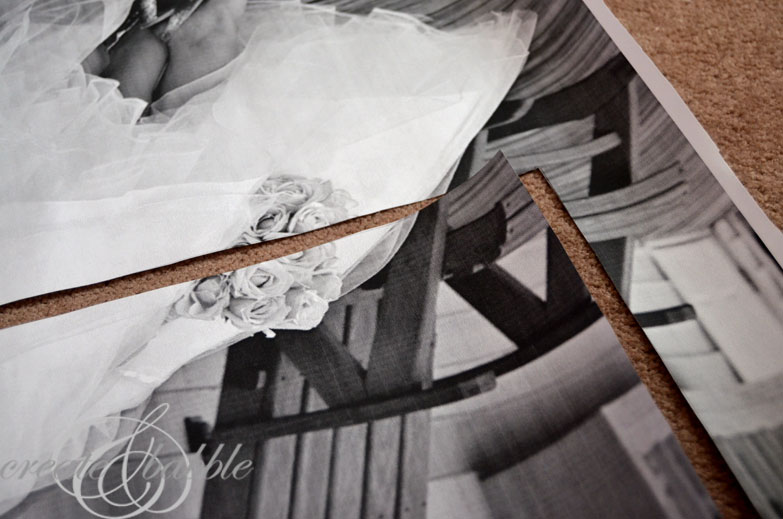
I opened the photo in Photo Shop Elements and changed the height of the photo to 24″. I made sure to check Constrain Proportion and the width became 36″. I intentionally made the print bigger than I needed. I’ll explain why in a minute. I went online to Office Max and ordered a black and white engineering print and it was ready in about an hour. Cost: $3.90
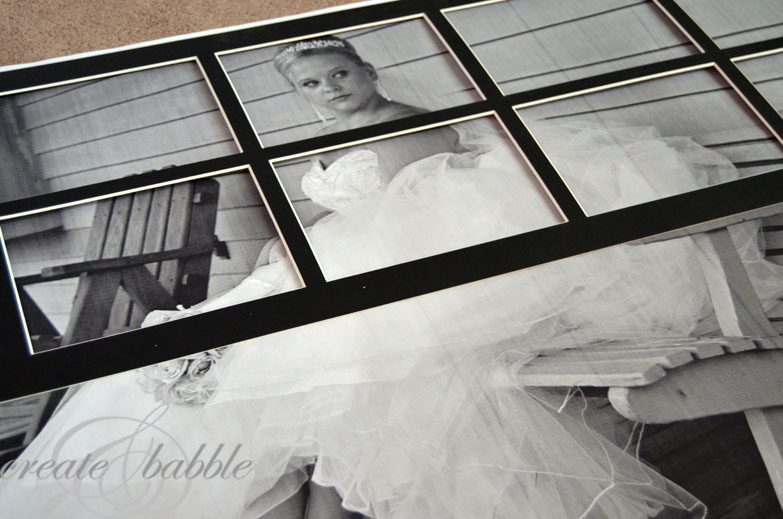
Because I wanted my daughter’s face to fall within one of the “panes” of the mat, I needed enough “play” room with the photograph. That’s why I ordered the print in a size way bigger than the size of the frame. I placed the mat on the photo moved it until I had her face inside one of the rectangles. Then I traced around the outside edge of the mat with a pencil.
All that was left to do was cut on that pencil line.

Office Max did call and ask if I wanted them to print the photo using a photo printer and photo paper. The cost would be about $88. I declined since I was using the engineering print as more of a “template” to get the size and space worked out with the frame before shelling out the big bucks on a higher quality photo. But I thought it was nice of them to ask!
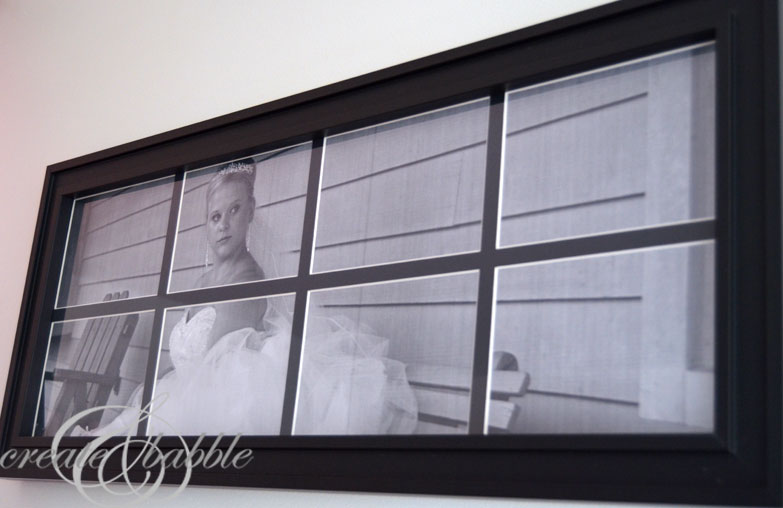
The look of the engineering print is so much better than I thought it would be. And since I like to change out the photos in my frames, it makes more sense for me to go with the inexpensive engineering prints. And I happen to love black and white photos, so win, win!
If you are in the Baltimore area, I’d love to see at the Bring Your Own Friend event at Ikea. I’ll be joined by a few of my Looksi blogging friends. Amy from A Nest for All Seasons, Amy from One Artsy Mama, and Susan from Organized31.


I love this Jeanie! I wish I lived in Baltimore. I hope you share more of these projects. Our Ikea is a bit of a drive so I only go a couple of times a year! Had heard a lot about engineering prints but always afraid to try it. I think I might just give it a try now.
Ummm this is such a cool idea. Love the black and white photo. Pinning for future use!
Thank you Katie!
Such a great project Jeanie!! …and SO wonderful meeting you!!! 🙂 🙂 🙂
Thanks Amy! And it was wonderful to finally meet you, too! I’m looking forward to doing this again!
Having seen your photo and frame in person, I can tell you that it’s absolutely gorgeous! It was such a pleasure meeting you and I will be following your tutorial soon with my baby’s graduation pictures.
In most of the images the image behind the frame is very stark and contrasty, however the final product looks softer. Did you do anything to the glass or print to make it appear softer and further away from the glass? i am amazed at how little it cost you! Haven’t ever heard of an enegerring print. Not sure we have anyone locally that makes them.
Tanya
Tanya, no, I didn’t do anything to it. It must be that the glass (it’s not really glass, but some type of acrylic) is causing the print to look softer. Do you have an Office Max or Staples near you? They both make the engineering prints.
The step-by-step instructions provided in this blog are clear and easy to follow, making the process of creating a collage frame with a single photo seem effortless.
Best Auto Ceramic Coating Services Fort Worth TX