• Home
  • About
  • Contact
  • Partner
  • Privacy Policy
    • Facebook
    • Instagram
    • Pinterest
    • Twitter
    • YouTube

Create and Babble

  • DIY
    • Home Improvement
    • Upcycle
    • Furniture Makeovers
    • Build It
  • Craft
    • Silhouette
    • Sewing
    • Wedding DIYs
    • Seasonal
    • Gifts
  • Lifestyle
    • Bicyling
    • Travel
    • shopping

STAY UP TO DATE

Get the latest crafting and DIY tips, tricks and tutorials delivered straight to your inbox!

Learn Cricut Print Then Cut in Three Easy Steps

March 24, 2017

If you like it, please share it!Share on pinterest
Pinterest
Share on facebook
Facebook
Share on twitter
Twitter
Share on stumbleupon
Stumbleupon
Share on google
Google
Share on linkedin
Linkedin
Share on reddit
Reddit

This is a sponsored conversation written by me on behalf of Cricut. The opinions and text are all mine.

Using the Print Then Cut feature in Cricut Design Space is super-duper easy! Let me show you why I used this feature, then I’ll show you the three easy steps! (And one of them is choosing an image to print!). Learn Cricut Print Then Cut in three easy steps!

Learn to Use Cricut Print Then Cut
I’m still learning my way around my Cricut Explore Air 2 and Cricut Design Space. I find the easiest way for me to learn is by watching the videos that are available on Cricut.com. Another thing I like to do is use the designs that are available in the Design Space Image Library. This week I made an Easter card that was a Make it Now Project – found at www.cricut.com/design).

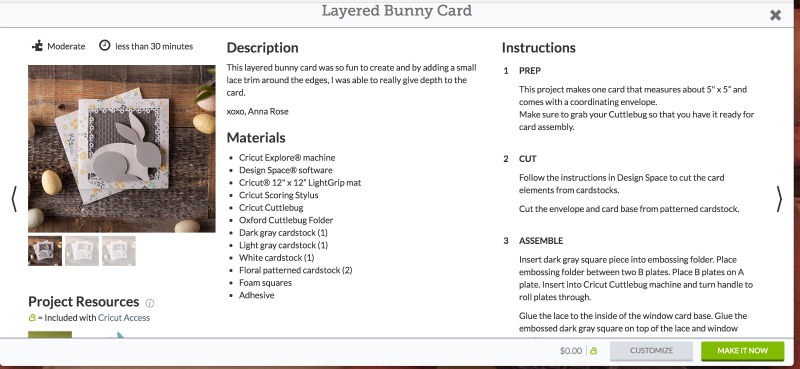
This layered Bunny Card is the “Make It Now” project that I decided to make. You’ll see the Make It Now projects as soon as you log into Cricut Design Space. Once you click on one of the projects, a detailed page opens that looks like the image above. I love how it tells you right off the bat how long it will take you to make the project and the skill level. Right away you can check the Materials list to see if you have everything you need and if you may need to substitute an item. I didn’t have the Oxford Cuttlebug Folder (I do now ; ) so I used a different embossing folder.

As you can see, the instructions are very clearly explained. The only minor complaint I had about this particular project was that the materials list did not mention lace. Yet in Step 3, the second paragraph instructs to “glue the lace” What lace??? So my card doesn’t have any lace. NBD.

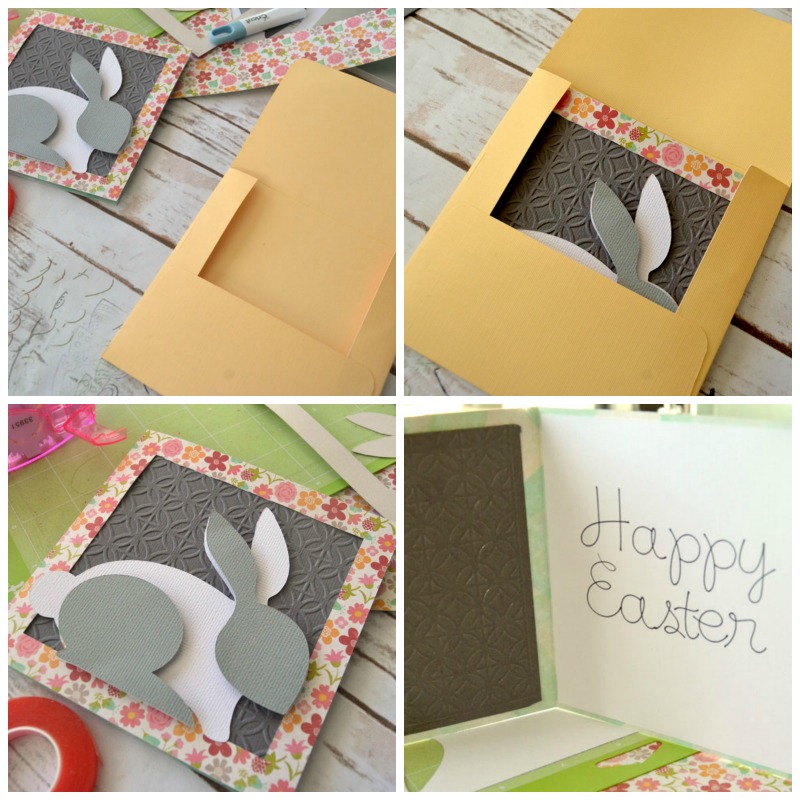
Okay so what does this Easter card have to do with Print then Cut? I’m about to tell you. In the collage above, see the photo in the lower right corner?

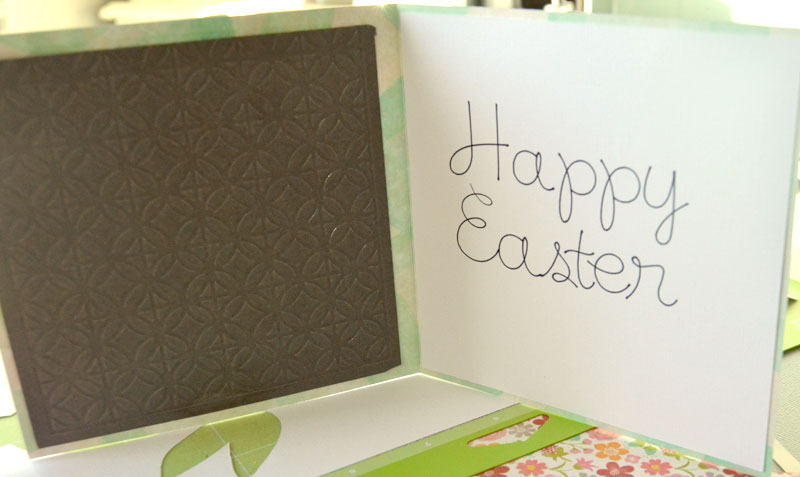
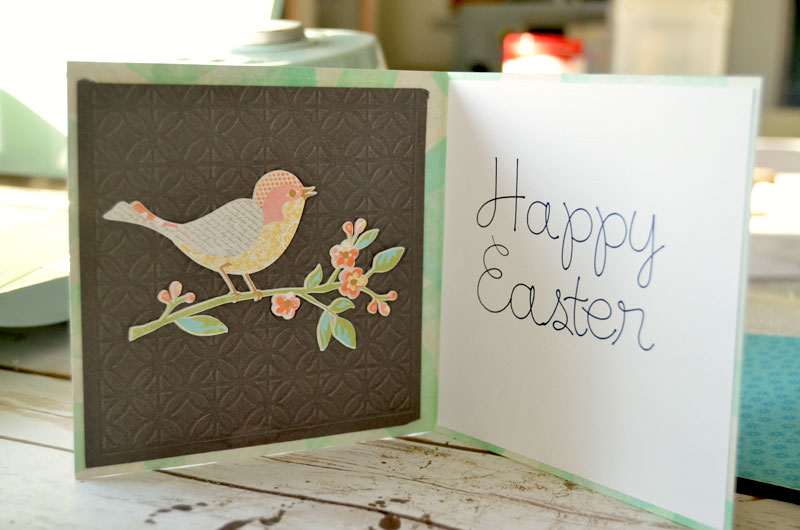
I thought that the inside of the cover of the card need a little something. So I went back to the Cricut library and found just what this card needed. A printable of a bird on a limb.

By the way, you get to the library by clicking on “Insert Images” once you are logged into Design Space.

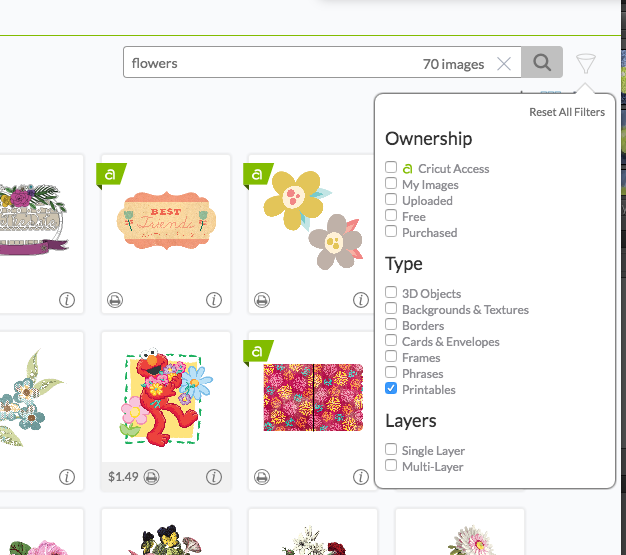
I did a search for “flowers” and then filtered for “Printables” to narrow the search.

(NOTE: If you do NOT use a “printable” image, you will have to “flatten” the file to make it into a printable. Do this by highlighting the image and then clicking on the FLATTEN button in the LAYERS Panel.)

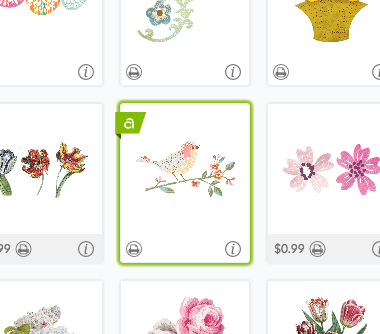
That’s how I found this cute little bird on a flowering branch. And that is step one!

Step One – Choose an image for Print then Cut
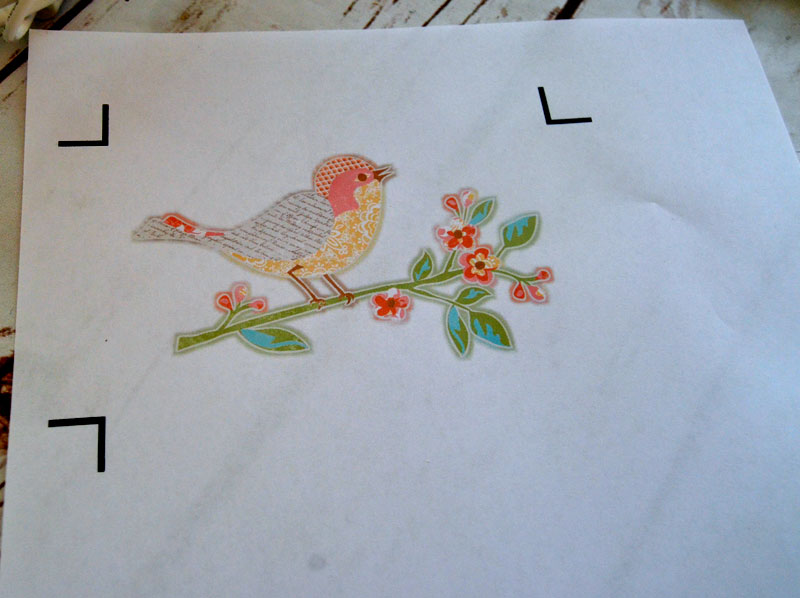
Step Two – Print

Step Three – Then Cut!

Learn to Use Cricut Print Then Cut

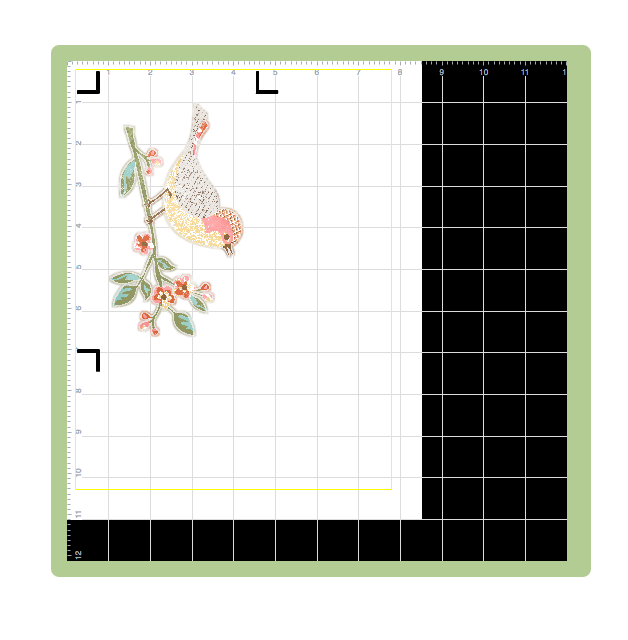
You will notice that the registration marks are printed also. The Cricut will “read” these marks before cutting once you insert the mat into the machine.

Yes, it’s as easy it as sounds: print then cut!

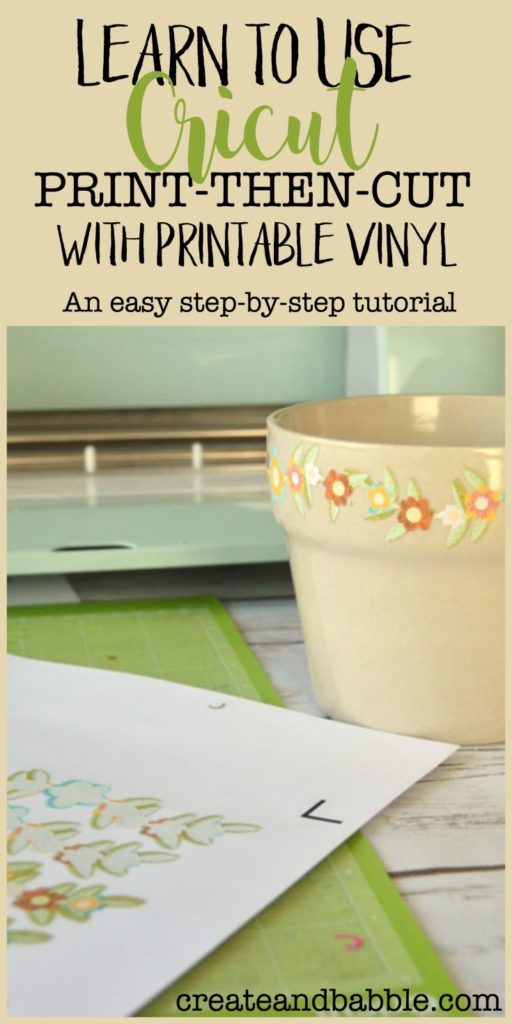
Since I was in a Print Then Cut mood, I decided to try out the Cricut Printable Vinyl.

Learn to Use Cricut Print Then Cut

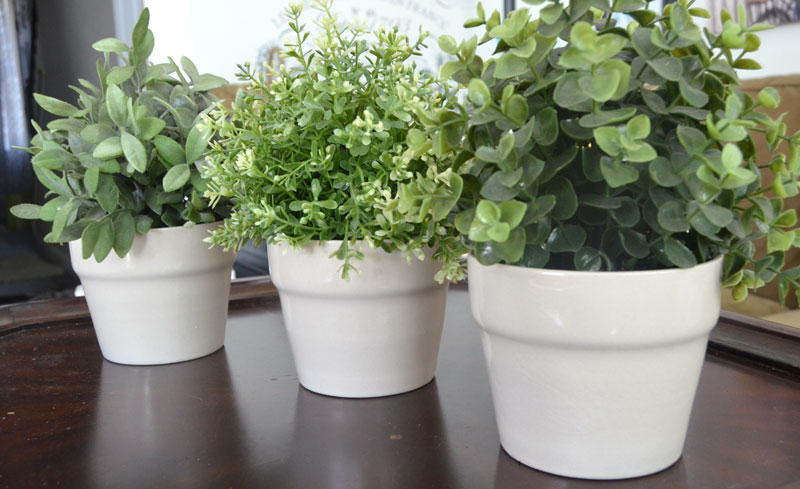
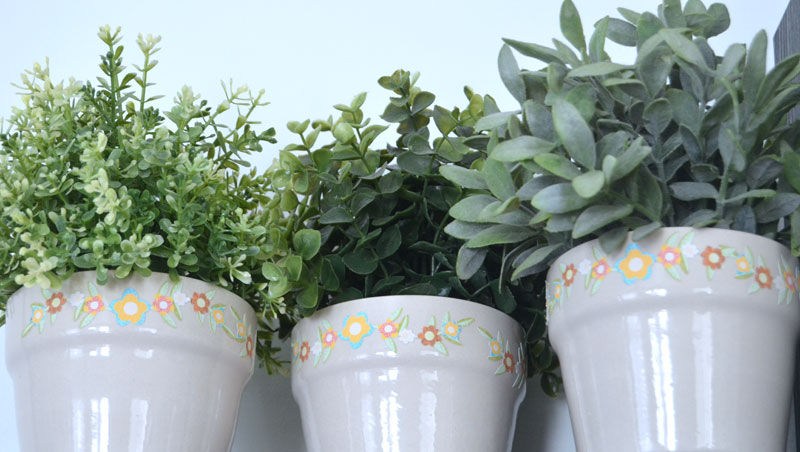
See these plain ceramic pots. All of you Ikea shoppers out there might recognize them ; ) I think they need a little jazzin’ up, what do you think?


Learn to Use Cricut Print Then Cut

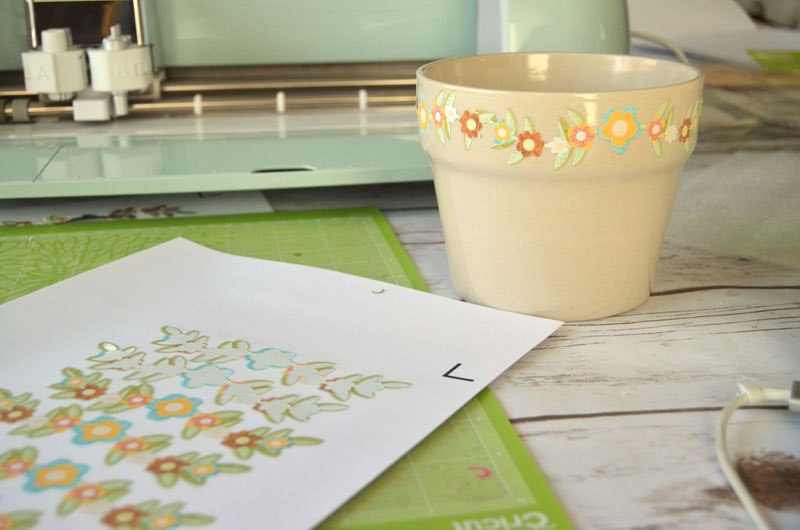
I found this pretty flower border in the Cricut library and printed it out onto the Cricut Printable Vinyl. (Notice in the image above that there is a “bleed” around each image? I love that! No extra white space around the cut image – brilliant!


Cricut® Printable Vinyl
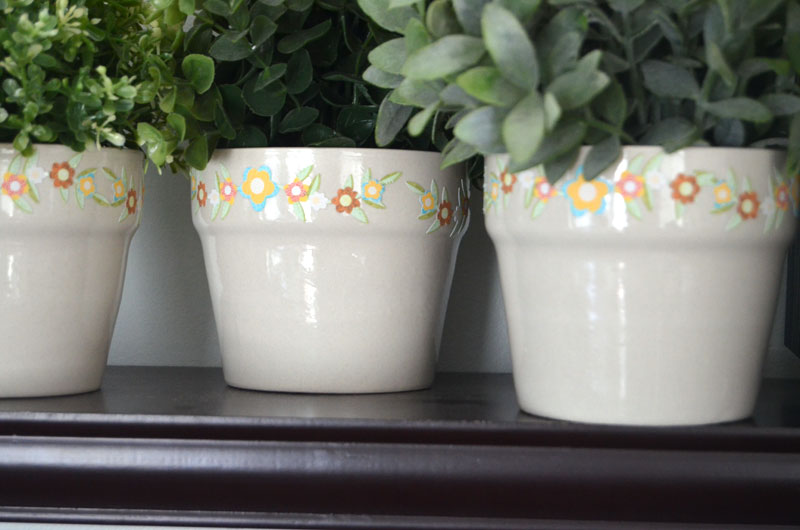
 

Much better!

Have you tried Cricut’s Print Then Cut feature yet? How would you use it?

I just bought some glass cannisters today and I’m going to making labels for them using Print Then Cut.


Learn to Use Cricut Print Then Cut


This is a sponsored conversation written by me on behalf of Cricut. The opinions and text are all mine.

 I party here.

If you like it, please share it!Share on pinterest
Pinterest
Share on facebook
Facebook
Share on twitter
Twitter
Share on stumbleupon
Stumbleupon
Share on google
Google
Share on linkedin
Linkedin
Share on reddit
Reddit

Filed Under: Crafts, Cricut

« New Bedding from BeddingStyle
How to Make 3D Butterfly Wall Art »

Trackbacks

  1. How to Use Cricut Printable Iron-On - Create and Babble says:
    May 13, 2018 at 8:00 am

    […] it be nice to be able to print any design you want onto iron-on vinyl (HTV)? Well, you can. Use Print then Cut with your inkjet printer and Cricut cutting machine to create custom iron-on pieces. Silhouette […]

  2. samples of essay writings says:
    April 6, 2019 at 6:34 pm

    samples of essay writings

    Learn Cricut Print Then Cut in Three Easy Steps

  3. Wood Projects With Cricut Maker – TonyWoodsArt says:
    November 20, 2019 at 3:13 am

    […] Download Plan More @ createandbabble.com […]

About Jeanie

About Jeanie

Welcome to Create & Babble. This is where I share my loves: crafting, hiking and camping

Read more about me here

Categories

Archives

AntiqueFarmHouse
Zots Craft Adhesive Dots

Amazon Associates Disclosure

Jeanie Hevener Emmert is a participant in the Amazon Services LLC Associates Program, an affiliate advertising program designed to provide a means for sites to earn advertising fees by advertising and linking to amazon.com.


hobby lobby

Copyright © 2025 · Site by Pretty Pink Studio

Copyright © 2025 · Glam Theme on Genesis Framework · WordPress · Log in

This website uses cookies to improve your experience. We'll assume you're ok with this, but you can opt-out if you wish.Accept Reject Read More
Privacy & Cookies Policy

Privacy Overview

This website uses cookies to improve your experience while you navigate through the website. Out of these, the cookies that are categorized as necessary are stored on your browser as they are essential for the working of basic functionalities of the website. We also use third-party cookies that help us analyze and understand how you use this website. These cookies will be stored in your browser only with your consent. You also have the option to opt-out of these cookies. But opting out of some of these cookies may affect your browsing experience.
Necessary
Always Enabled
Necessary cookies are absolutely essential for the website to function properly. This category only includes cookies that ensures basic functionalities and security features of the website. These cookies do not store any personal information.
Non-necessary
Any cookies that may not be particularly necessary for the website to function and is used specifically to collect user personal data via analytics, ads, other embedded contents are termed as non-necessary cookies. It is mandatory to procure user consent prior to running these cookies on your website.
SAVE & ACCEPT