


As promised here is the tutorial on how I easily transfer photos onto wood with no mess.
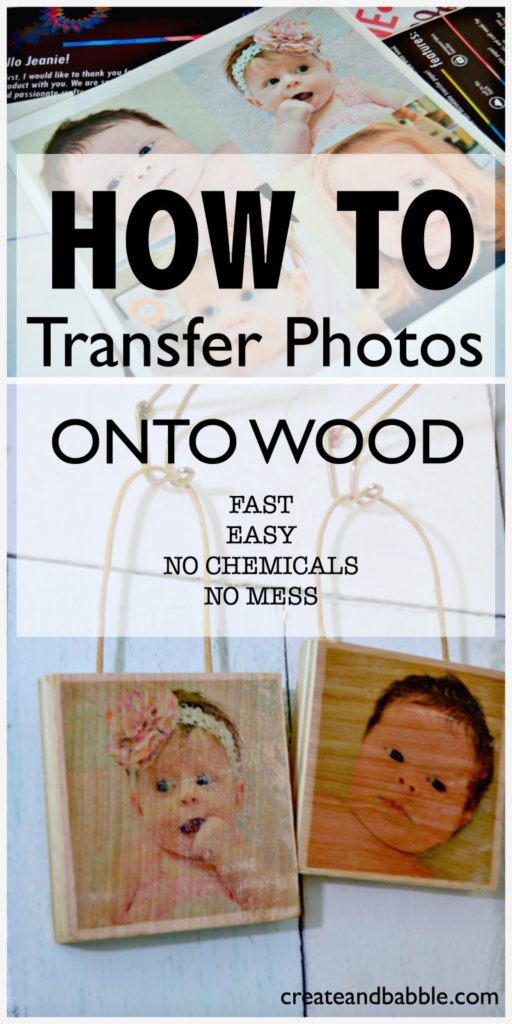
Did you see the Valentine subway art on wood that I shared on Tuesday? This is the exact same process. The only difference is that I made a collage of photographs instead of words.
How to Transfer Photos onto Wood
This post contains affiliate links.
Materials:
- computer
- NuFun Activities Transfer paper
- inkjet printer (I have one similar to this, a wide format printer and I love it!)
- iron
- scrap wood
- small paper bags with twine handles
- glue gun (this is the one I used)
- scissors or paper trimmer
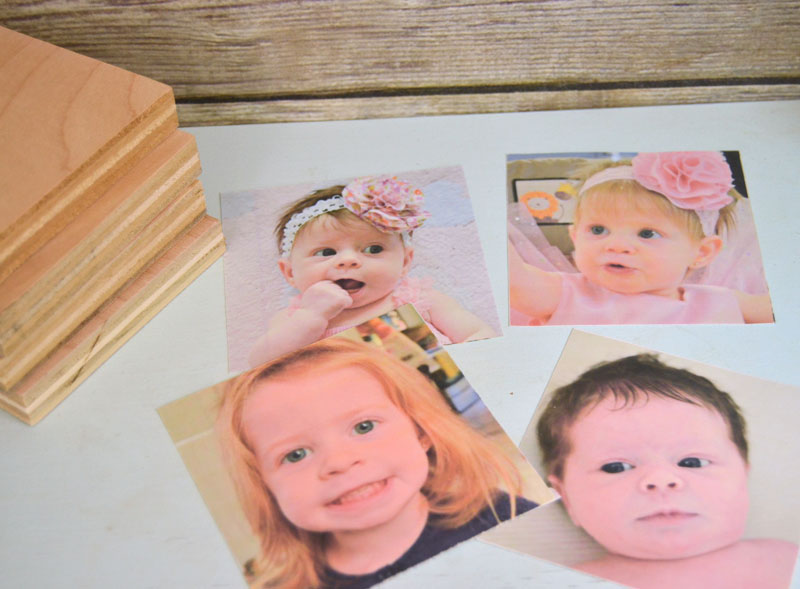
Step 1 – Choose photos
This will take the longest and is the hardest out of all of the steps – choosing which photos to use. Seriously you will become addicted to this and will want to transfer every single photo!
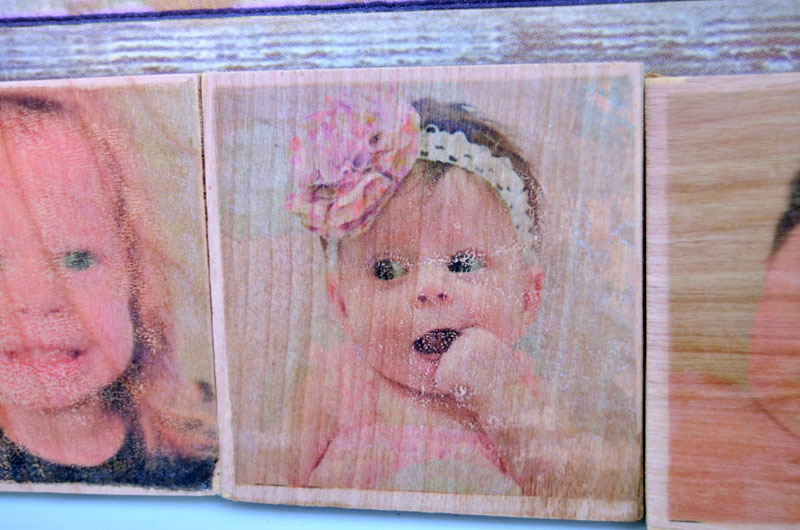
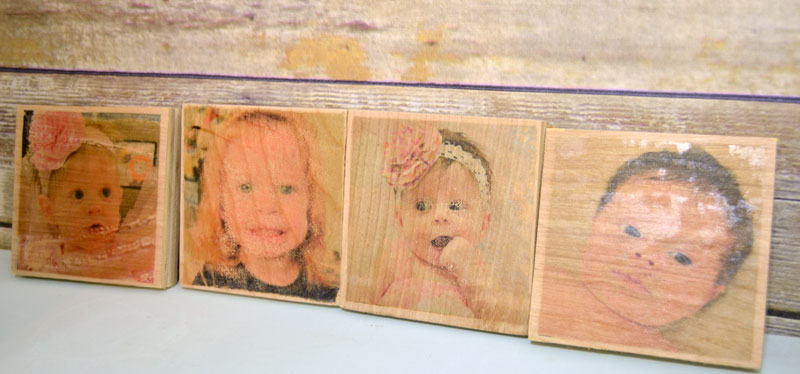
I showed some restraint (it wasn’t easy) and only chose four photos of my granddaughter for this project. Once you choose the images, put them into a collage (or just print them out separately). I chose to print 4 small, square images to put on blocks of scrap wood so I adjusted the size of each photo and put them on one sheet of the transfer paper. (I used PicMonkey to create my collage.)
Load a sheet of the NuFun Activities Iron-on Transfer paper into printer. (Please know in advance which direction you need to place the paper. Mine is placed face up.) You want the image to print on the unlined (matte) side of the transfer paper.
Print photo(s) our on the NuFun Activities Iron-on Transfer paper.
Use scissors or paper trimmer to cut around the image if it doesn’t take up the entire sheet.

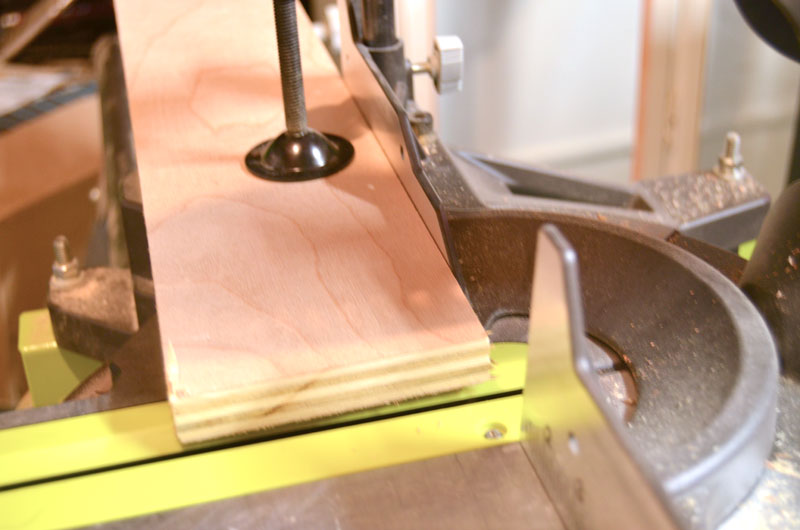
Step 2 – Prepare the wood
I found a 4-1/2″ wide piece of 3/4″ plywood in my wood pile that I cut down into 4-1/2″ squares.
Step 3 – Transfer the photo
Preheat the iron to “Linen”.
Place the printed transfer face down (lined side up) on the wood.
Using FIRM, STEADY pressure, glide the iron over the entire transfer for about 5 minutes. Lift corners to see if transfer is complete. Paper will lift easily when transfer is completed.
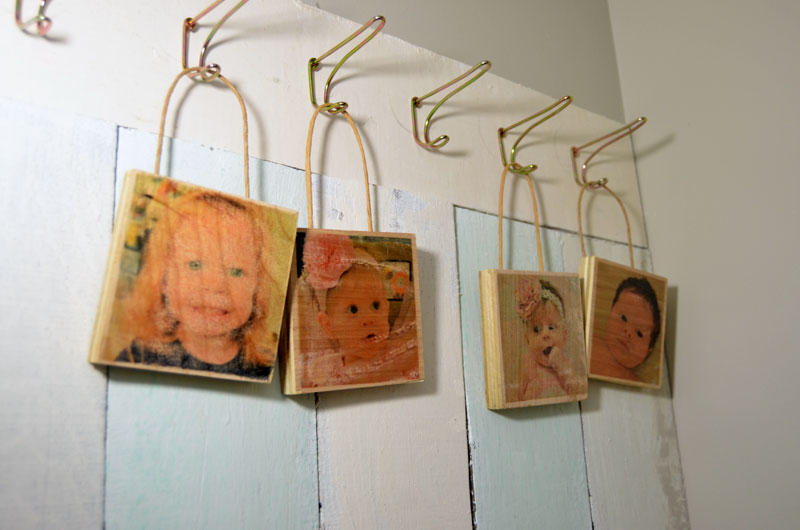
Step 4 – Hang
I was looking around trying to figure out what to use as a hanger for these photo blocks. I looked in my craft supply closet and found a bunch of those small kraft gift bags with the twin handles. Perfect!
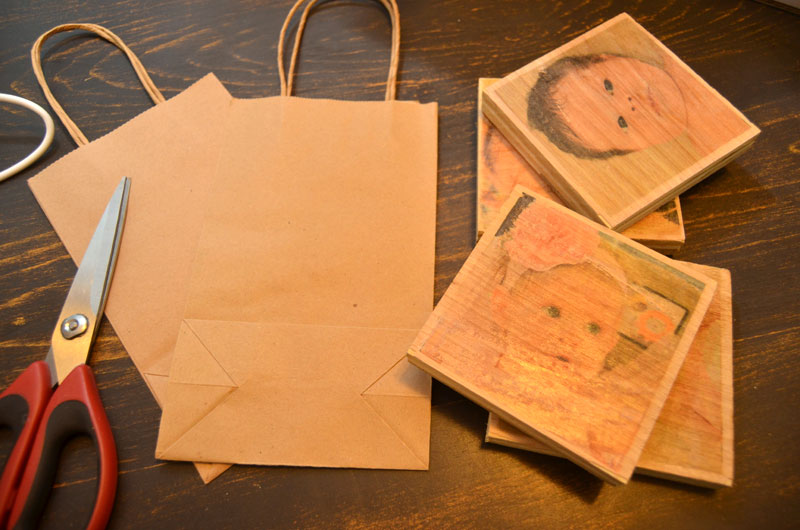
I just cut off the tops of the bags and attached the handles to the back of the blocks with wood glue.
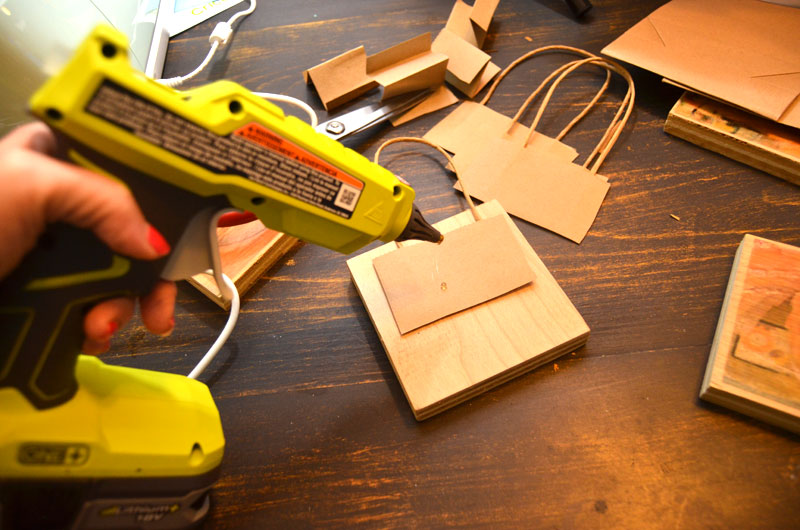
This clever idea saved me from having to run out to the hardware store for hooks.
How cute they look hanging on my entryway bench/coat rack.
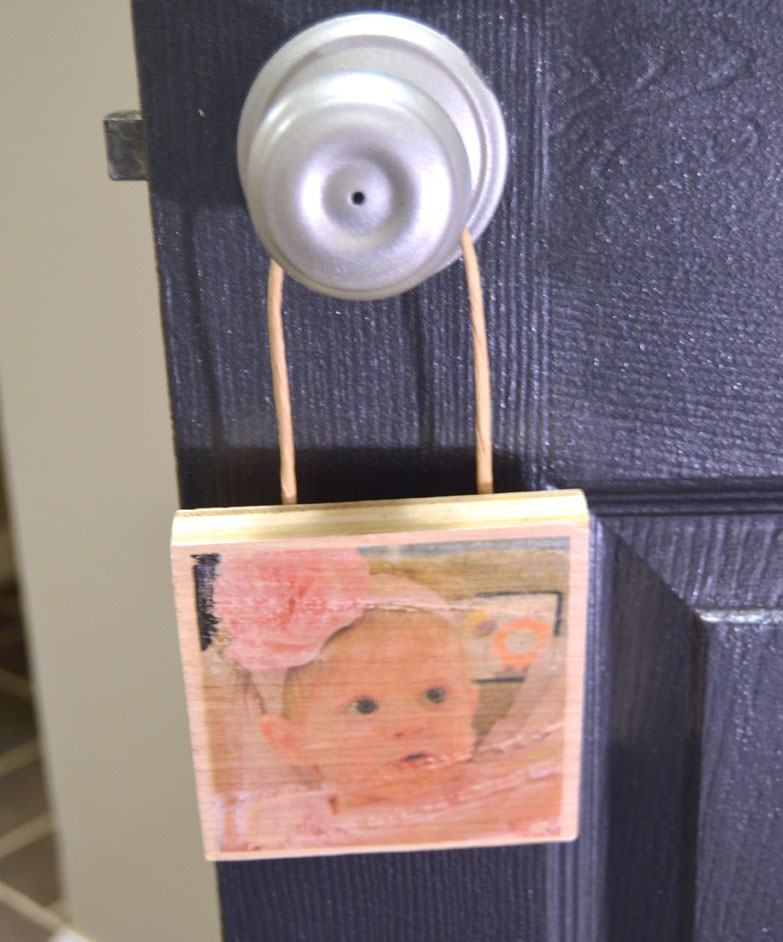
Here’s another idea: hang from child’s bedroom doorknob!
What do you think? Do you think you’ll try this method of transferring photos to wood? I’m telling you I am addicted to this. I can’t wait to try transferring a very large image – I’ll be sure to let you know how that goes.
These also would make wonderful gifts, too. Don’t forget to pin this post for later!


Print your images on solid 2 x2 wooden cubes with our popular PhotoBlock product. Each block has 2 custom sides where you can print photos or place letters to spell a name or important date. You will then choose from our library of patterns for the remaining 4 sides.
Such a great idea! I will have to try this!
Your grand daughter is adorably sweet, beautiful photos.
I have never tried to transfer using transfer paper and I am going to give it a try. I find the mod podge method leaves so much unwanted residue behind that it always takes me several attempts before I like the final product.
Thank you for the advice. Leanna
Your grandaughter is adorable and I love this project I tried another method of wood transfer it went horribly wrong !!
I want some oriental photo’s on wood and how to make it
Very nice blog thanks you so much for craft so good blog. !!
It will force you to grow for sure. However, I’m an introvert so it’s much easier. I prefer talking to the locals on wherever I go to get to know their culture as I really don’t hang out with travelers too much but it always happens anyway!!
I want to make this. It’s nice to be given as a gift.
It’s always fun to find alternatives to the usual tools, especially when it’s something as cool as Pixelmator Pro. While discussing its capabilities, I wondered how often we underestimate the features that are already in our gadgets. For example, I discovered HDR on the iPhone, and the article https://skylum.com/blog/whats-hdr-on-iphone helped me understand how to get the most out of this feature. This made my photos brighter and sharper, even when the lighting wasn’t perfect.