


This month’s Power Tool Challenge is a little different. Oh we’re still making a project using our favorite power tools to encourage you to learn and use power tools. The difference this month is that we’re sending the project that we make to a fellow participant in the challenge. How fun!
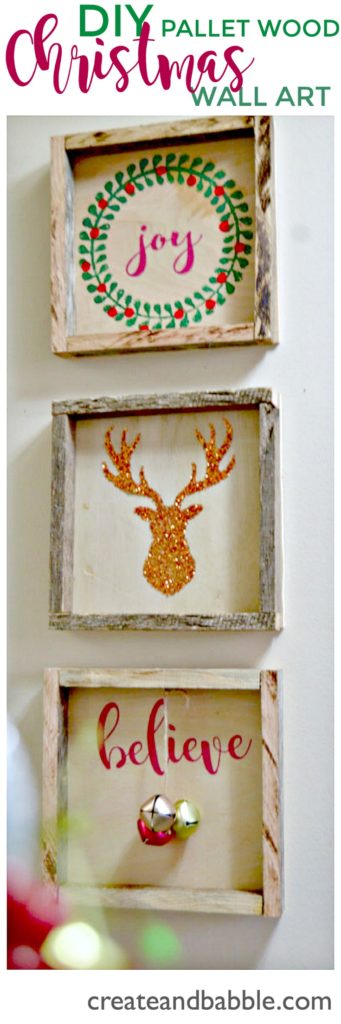
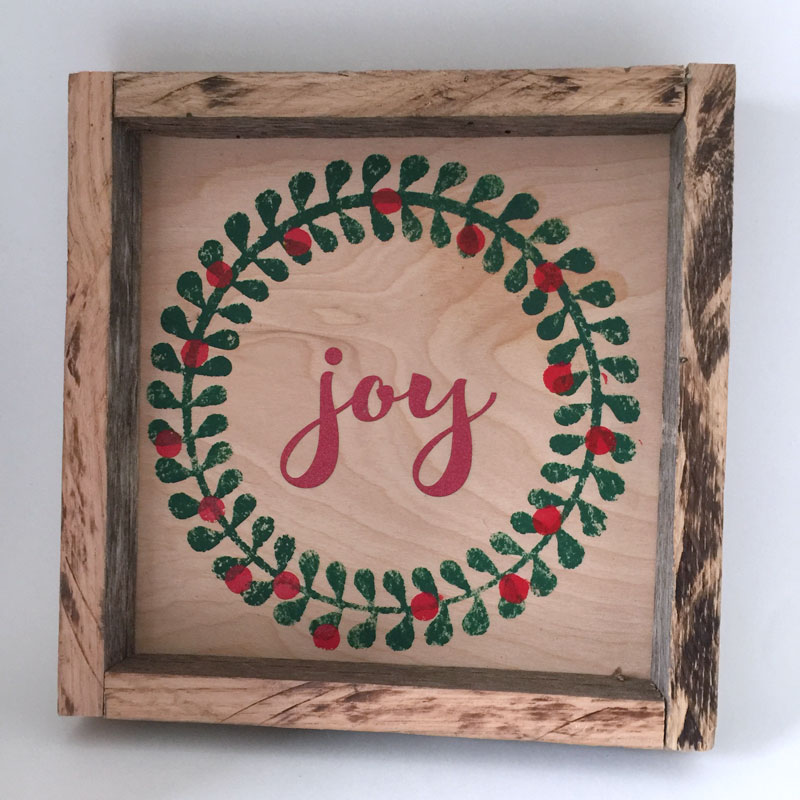
I made some DIY pallet wood Christmas wall art. I don’t really know what to call them. Reclaimed wood shadow box? Framed shadow boxes? Pallet wood wall boxes? I don’t know. But anyway, I want to show you how to make them. For free.
Yup. Free. As long as you have some pallet wood and plywood scraps laying around.
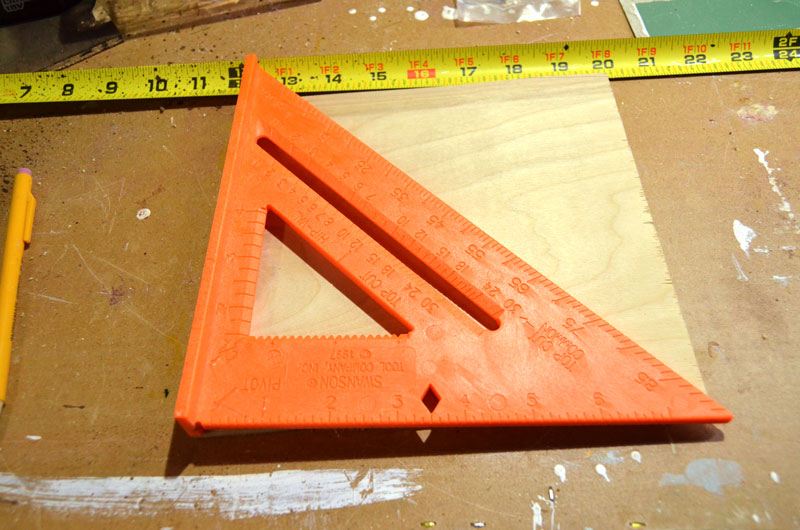
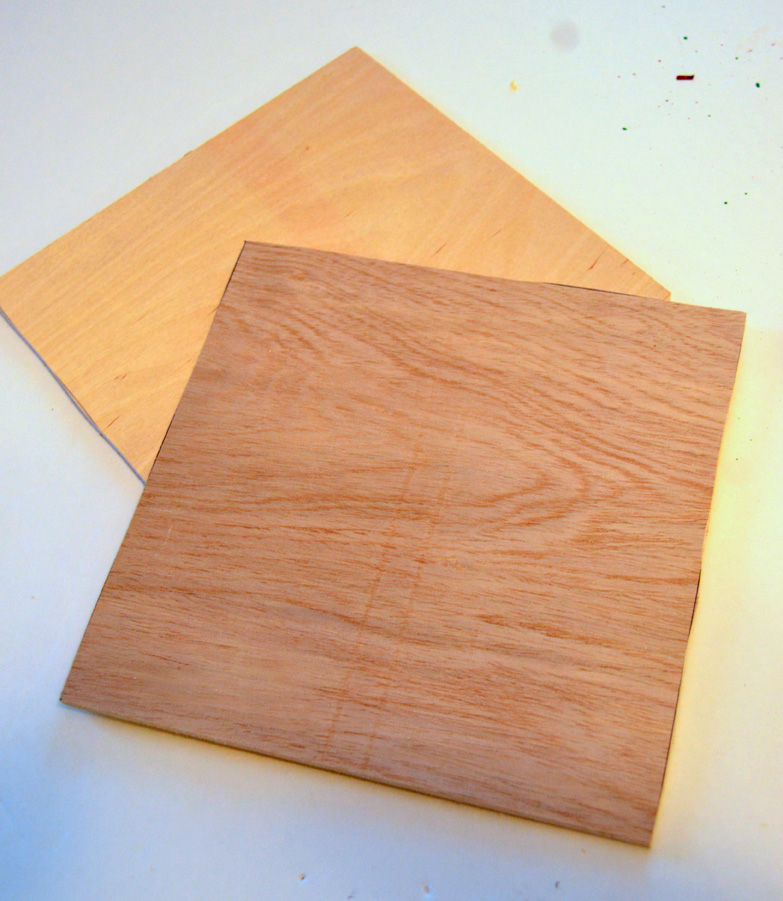
So first you need to cut the plywood backing for the box. This can be any size and shape you want. I made three that are 8″ square. And I also made some bigger rectangular ones. It just depends on the size of your plywood scraps.
This post contains affiliate links.
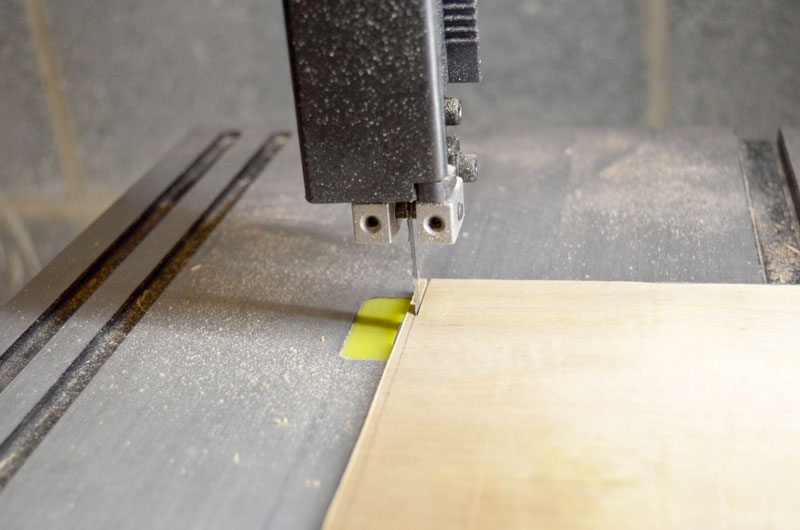
I used my bandsaw to cut my pieces. I want to stop right here and say something about my Ryobi Band Saw. Why did I wait so long to get one of these???? This is now my most favorite power tool. It is by far one of the least intimating ways to cut wood. If you don’t have one I highly recommend that you put this on the top of your list for Santa!
In fact, you may be able to get one for free! WHAT???? Ryobi Power Tools and I are giving away $300 worth of YOUR CHOICE of power tools! See all the deets at the bottom of this post.
Okay, now back to the shadow boxes. You’ve got the backing cut. Now you need to make it pretty. Here’s what I did.
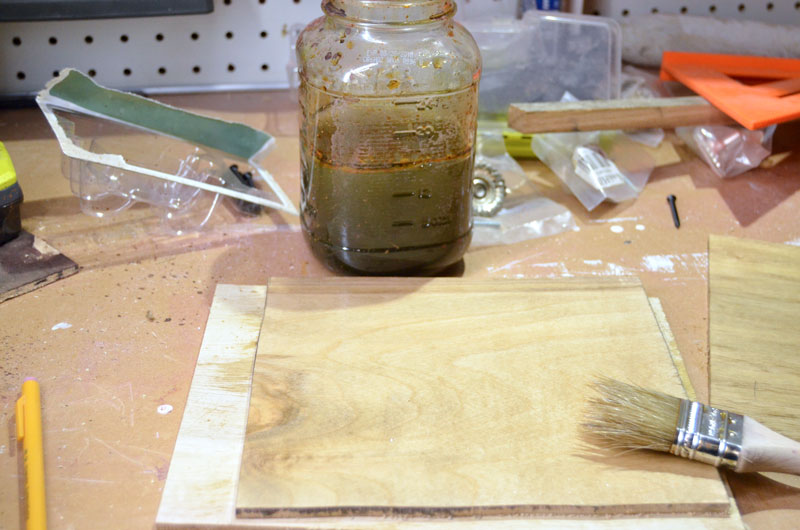
I made some of the backing pieces look as old as the pallet wood by brushing on some homemade stain. You’ve probably heard of that concoction of vinegar and steel wool. After it dries the wood looks old!
Others I left in their natural state.
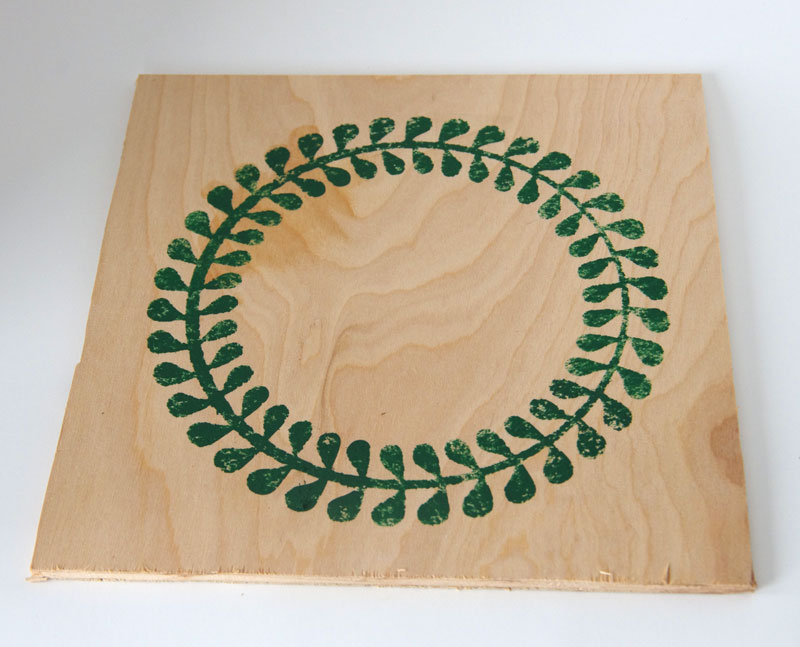
This one was made using a stencil that I made with my Silhouette® machine. I consider my Cameo® to be one of my power tools, too!
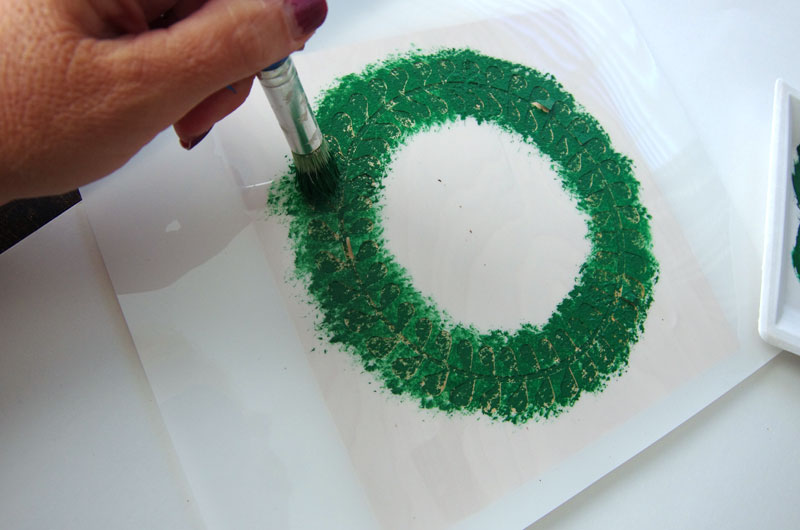
Stencils can be made from vinyl, contact paper, or in this case stencil blanks.
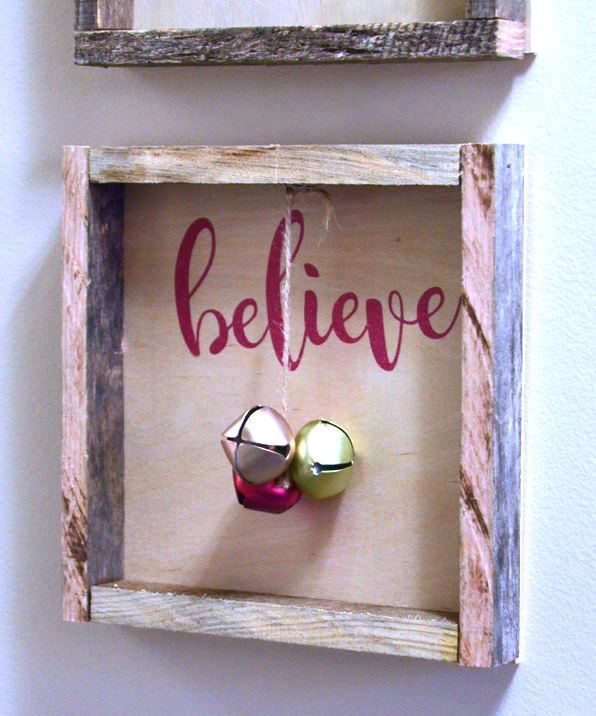
Do you like this one? Again using my Silhouette® machine, I cut “believe” out of glitter vinyl and then I hung three bells from a length of twine.
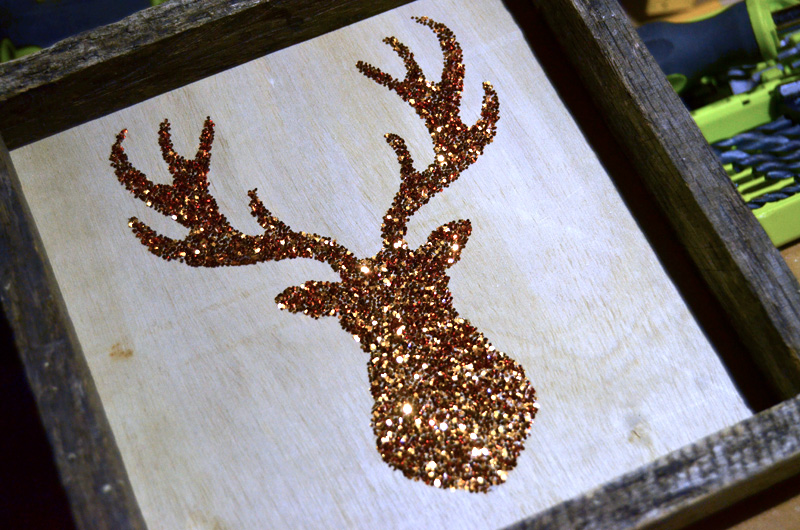
How about some glitter!!!
To make this one, I cut the reindeer shape out of Silhouette’s double-sided adhesive.
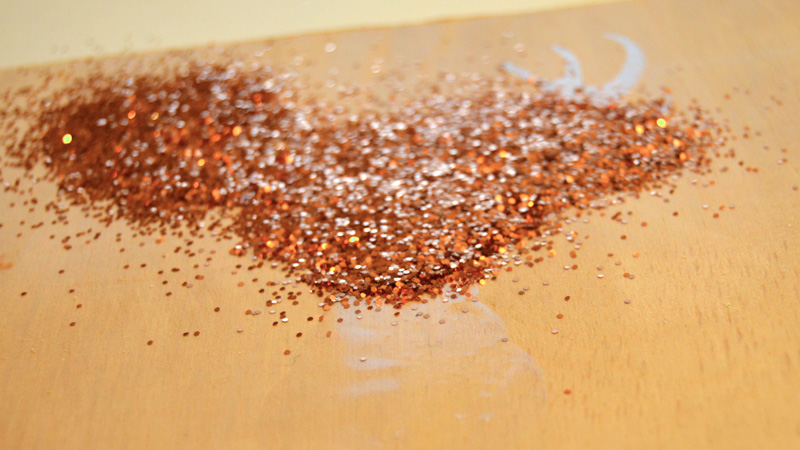
If you look closely at the photo above, you can see the clear adhesive shape on the wood. You just dump on the glitter and tap the excess off.
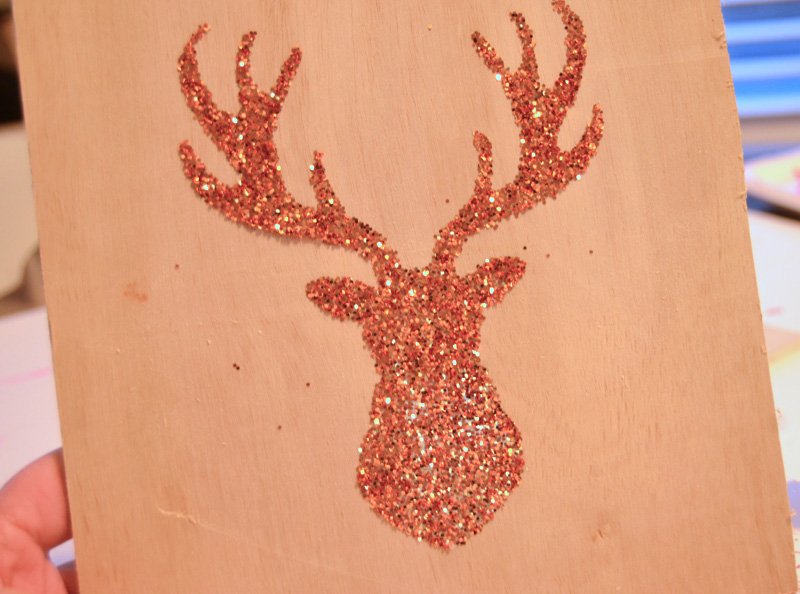
I love using this method of applying glitter. No messy glues and look at those sharp lines!
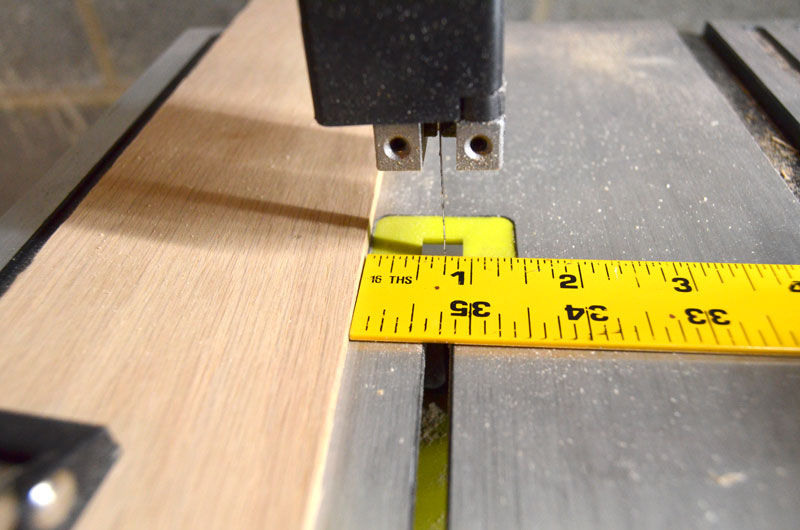
Next it’s time to make the frames. Again I used my bandsaw. TIP: To make sure that the width off all of the frame pieces were consistent, I clamped on a straight piece of wood onto the bandsaw table, 3/4″ away from the bandsaw blade.
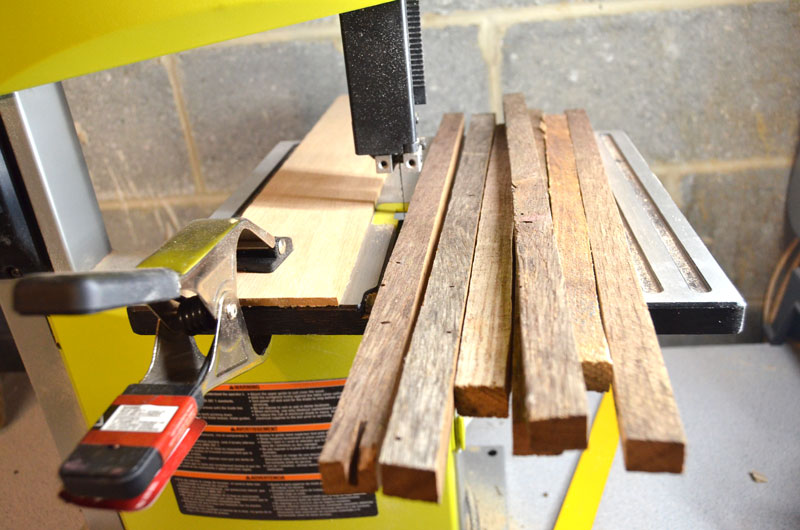
Now I have a bunch of pieces of frame ready to cut to size.
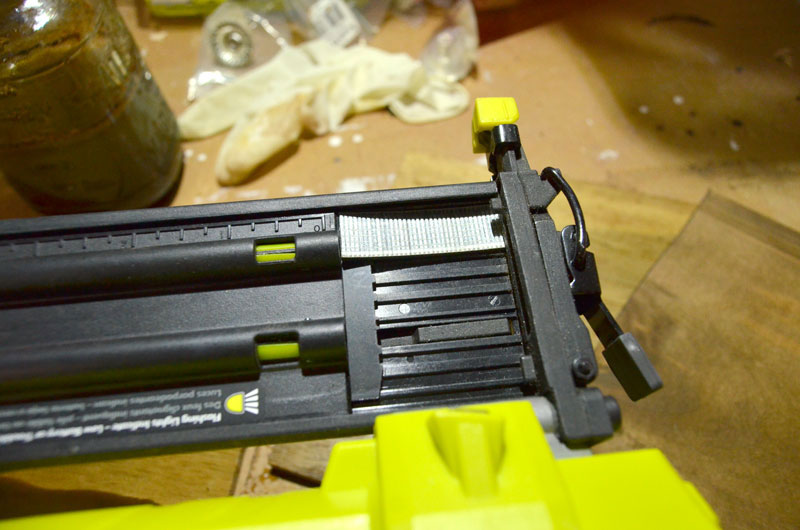
The last thing to do is cut the frame pieces to size and attach to the plywood backing. I used my Ryobi Airstrike Brad Nailer with 3/4″ brad nails.
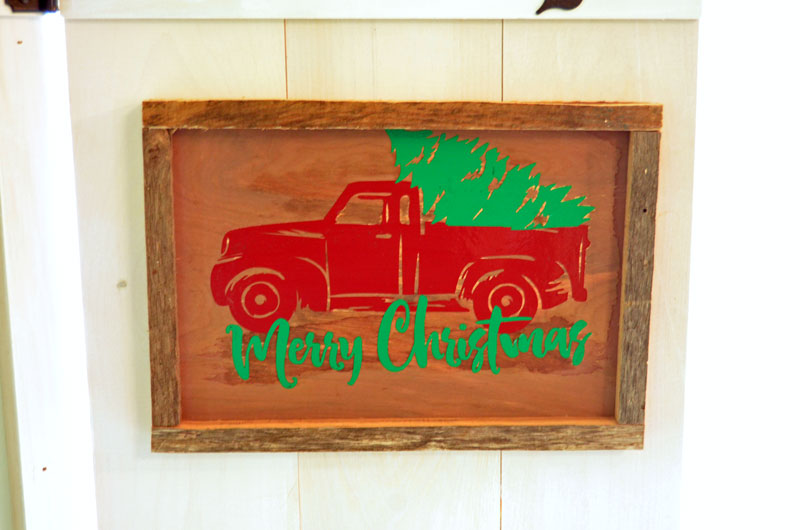
The red truck design is vinyl cut with my Silhouette® Cameo.
Now it’s time to see the gifts that my friends have made:
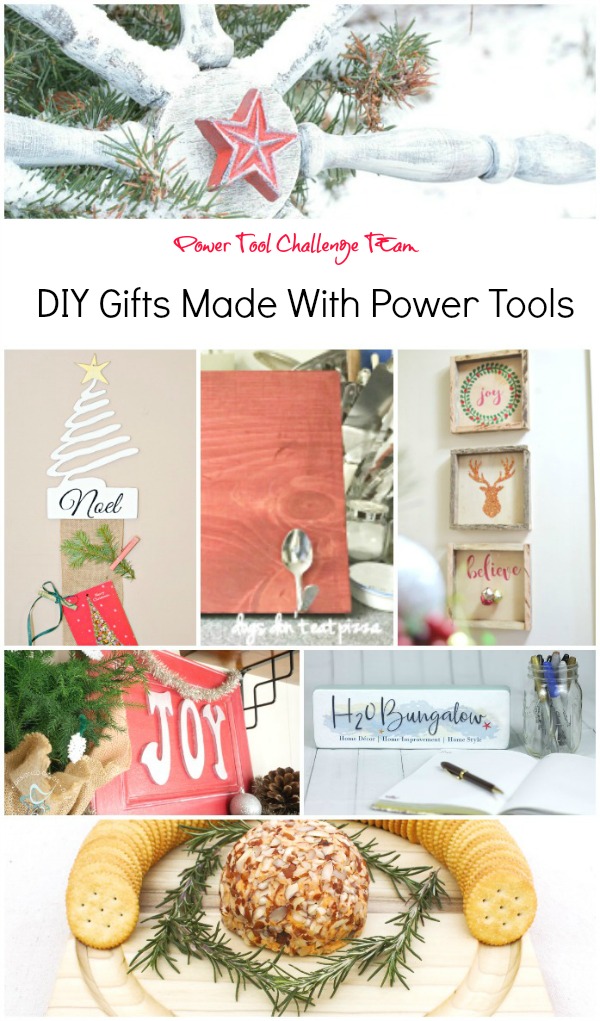
Wooden Chair Spindle Snowflake by Interior Frugalista
Hanging Christmas Card Holder by H2OBungalow
DIY Cookbook Stand by Dogs Don’t Eat Pizza
Repurposed Cabinet Door Joy Plaque by Designed Decor
Textured Photo Transfers To Wood Blocks by The Kim Six Fix
DIY Cheese and Crackers Serving Board by Virginia Sweet Pea
Now about that $300 worth of power tools! As I said, RYOBI and I have teamed up to give one of my readers their choice of $300 worth of power tools. There are a couple of rules: you must live in the continental United States, be at least 18 years of age, and choose power tools only – not outdoor tools.
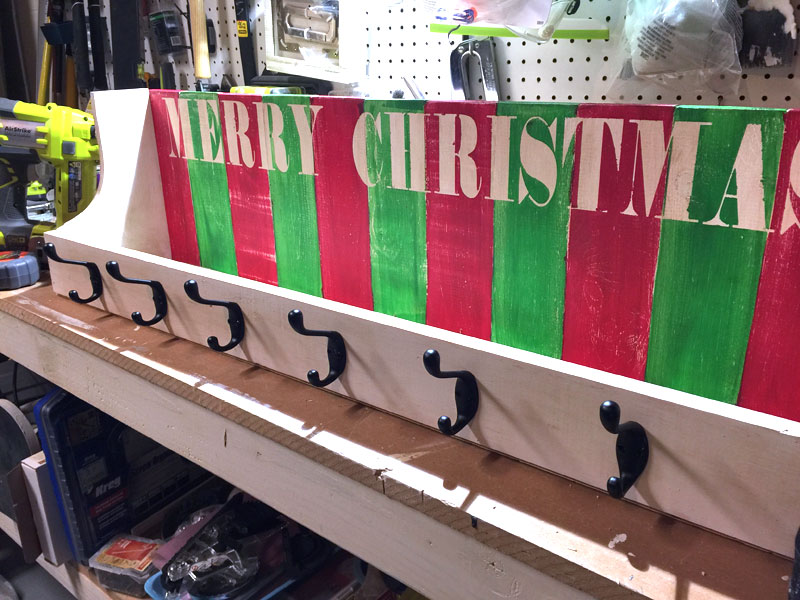
Before you enter below, please check out my latest project on RYOBI NATION. I made this extra large Christmas coat rack. This will not only hold a houseful of guest coats, it will also hold their hats, gloves and scarves.

And when the party is over, use it to hang Christmas stockings!


This is too cute! Love the reindeer! I know someone will be super happy when these show up on their doorstep! Super chance for a Ryobi tool set too! Sharing!
These holiday shadow boxes are ADORABLE Jeanie! I love their rustic charm. Whoever on the team receives these in their mailbox is very lucky. I am proudly displaying the holiday blocks you made last year in my kitchen bay window and I receive so many compliments about them.
Jeannie, I love the shadow boxes. The deer head is my favorite! I need to try the double sided vinyl. You did a great job on this one! Pinning and sharing!
I love these! The “joy” one is my favorite…hmmm…just in case you’re sending them my way! 😉
What cute projects! I truly can’t pick a favorite as I love all three!
Your Ryobi coat rack project is super clever. I love that you added storage for hats and gloves.
I love your shadow boxes! And your Christmas coat rack is cute and functional. I wish I was a creative as you! 🙂 I’d love to win the Ryobi power tools. Thanks for the chance.
I pinned the xmas coat rack project. LOVE IT!! https://www.pinterest.com/pin/161988917827034521/
LOVE LOVE LOVE the shadow box of the old truck with the Christmas tree in the bed..it reminds me of an old fashion Christmas!!! and your coat rack….wow to make that and to just paint it plain it could be used all year long!! then you could create boards to slide or just set in painted up for various holidays (Christmas, Happy New Years, Halloween, Thanksgiving, Valentines Day, Happy St. Patrick’s Day, Easter, Memorial Day/4th of July etc) even painting those boards double sided…. I just bought hubby a battery operated drill and and a reciprocating saw both Ryobi for Christmas because this momma wanted them!!! I was also looking at the air strike brad nailer and their sander!!!
Love the Christmas Coat Rack Project. The colors and style are definitely me.
I’m in total love with the CHRISTMAS COAT RACK/SHELF. It’s so creative and festive.
So cute. Thank you for linking with us at #HomeMattersParty . We would love to have you again next week.
Jeannie, those are super cute! And I love my band saw too!!!
Just wondering where to get the svg for the truck? Love all your projects. had your pin about the heat press and it is great to refer to when I start doing some of my heat press vinyl work .Thank you!
Hello Jeanie, Your wood shadow box looks amazing. You are so creative to bring up such DIY projects. Coating homemade stains on the wood gives that vintage look. The reindeer one is my absolute favourite. Where can I buy the Silhouette machine? Is it available in the local stores?
This was really cute ^_^ I started working in my garage after a long break. This time I have the Makita 120k bandsaw. This is like getting back to memories after years. I am going to nail it this season.
It was really insightful.
Thanks for such a nice content.
Cheers
BTW if anyone interested more have a look sawfinder thanks