


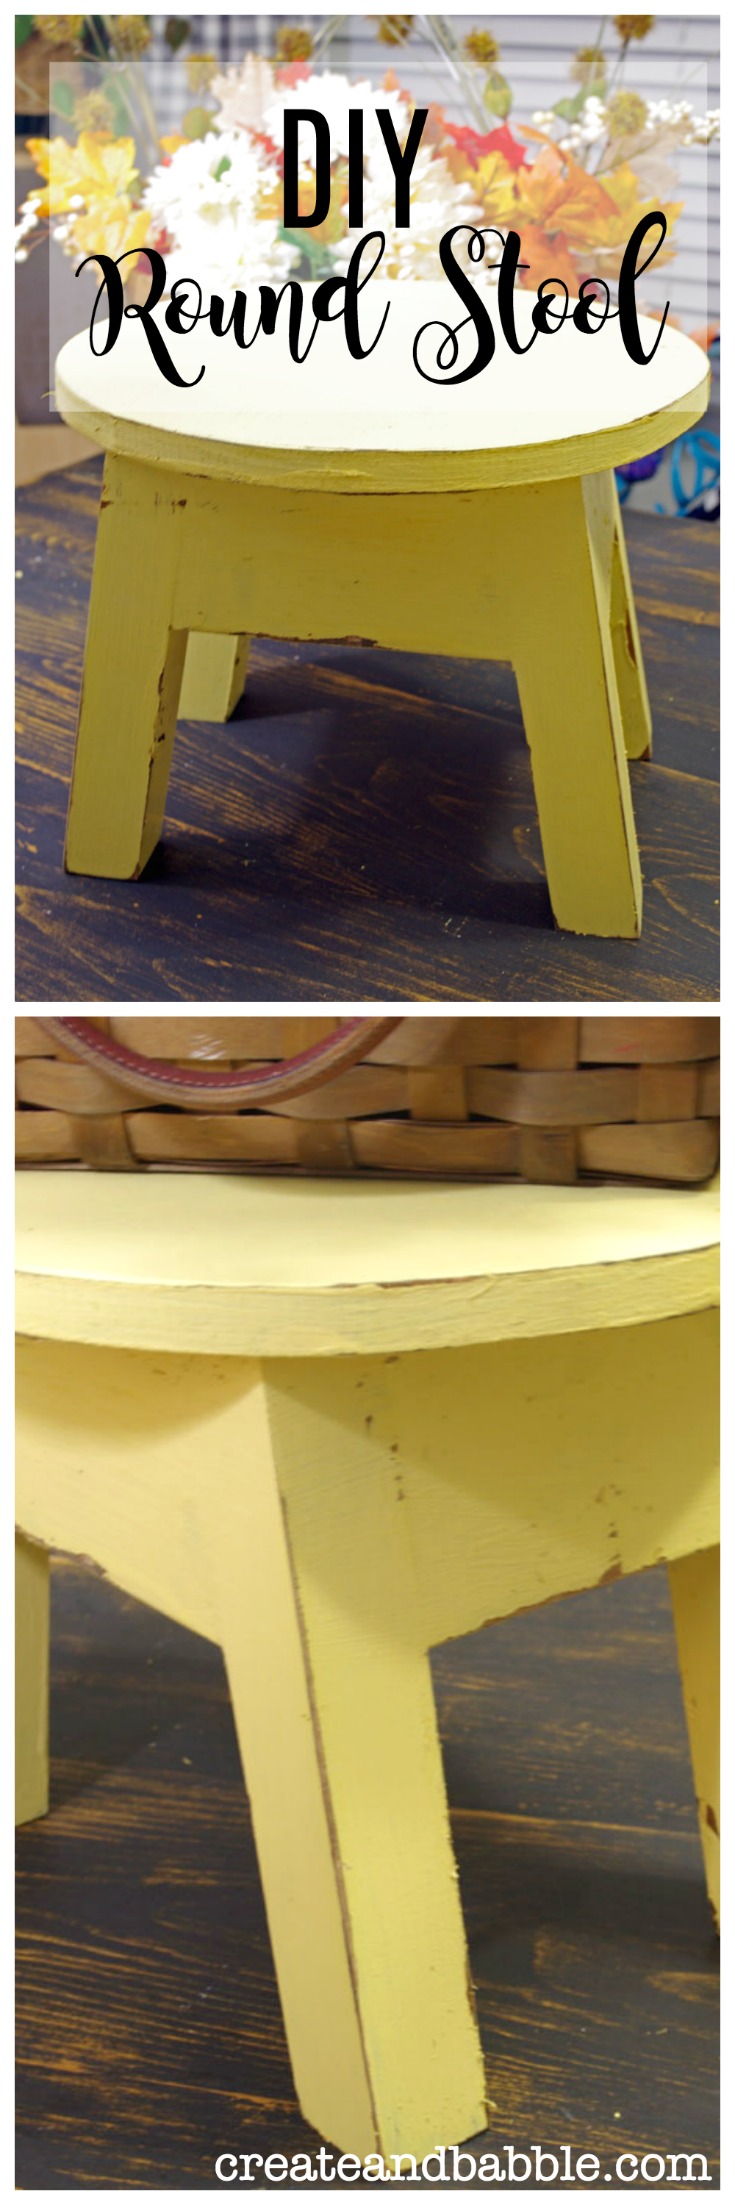
I’ve been wanting to make a little round stool for the longest time but wasn’t sure how. I made a cute little yellow round stool for today’s Power Tool Challenge. But it’s not exactly what I wanted. It’s close. Let me explain.
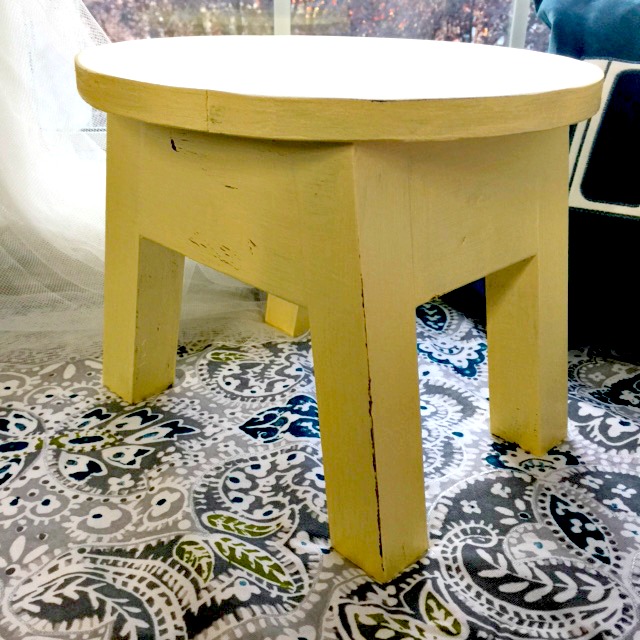
Picture a little, round stool used for milking a cow back in the day. Not that I ever milked a cow but that’s what I picture in my head ; ) A small, round-top stool with four legs attached at an angle. THAT was the problem: the angle!
Then I thought: no problem! I could cut beveled angles on the four legs at the top and bottom.
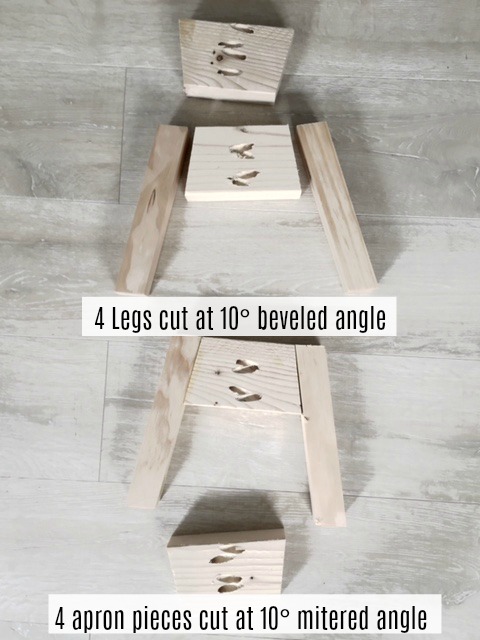
And cut four apron pieces at a 10° angle.
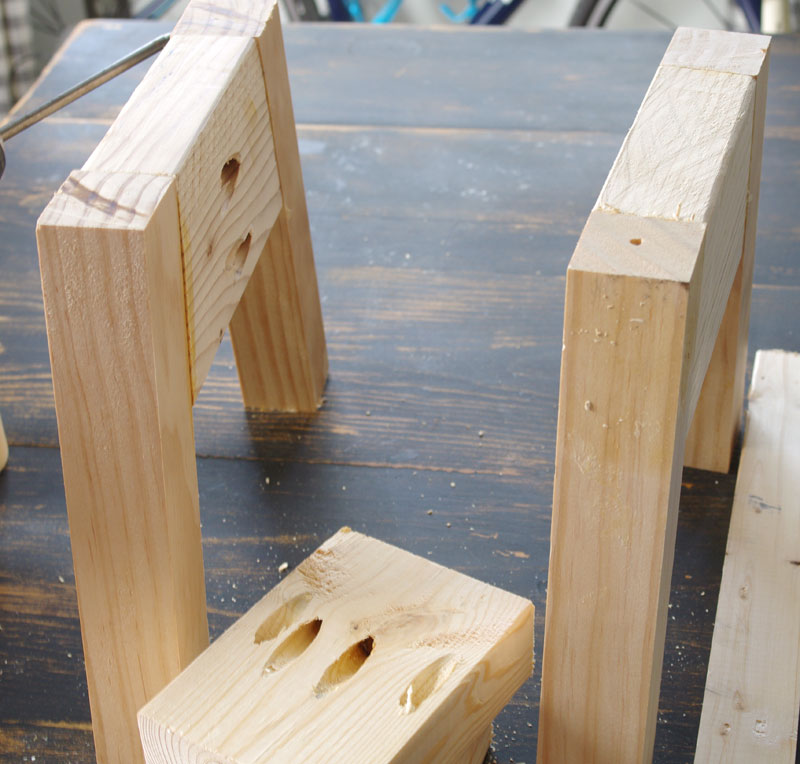
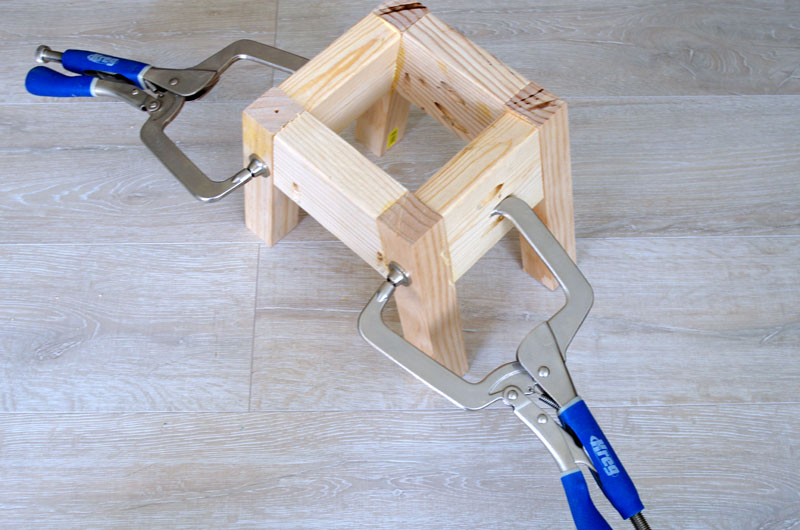
I attached two legs to an apron piece with wood glue and pocket screws as you can see in the image above. I then proceeded to do the same thing with the other two legs and an apron piece. Which was fine.
Then I tried putting those pieces together with the remaining apron pieces. This is when I discovered my problem. This wasn’t going to work. I needed to double bevel the ends of the legs! With a double bevel miter saw. Which I do not have. And I don’t really need. So. If there is a way to double bevel the ends of the legs without a double bevel miter saw, I want to find out what it is! If you know, please tell me!
Until someone tells me how I can do this, (or I figure it out) I’ll just continue on with my version of the little round stool!
I used the following tools for this project:
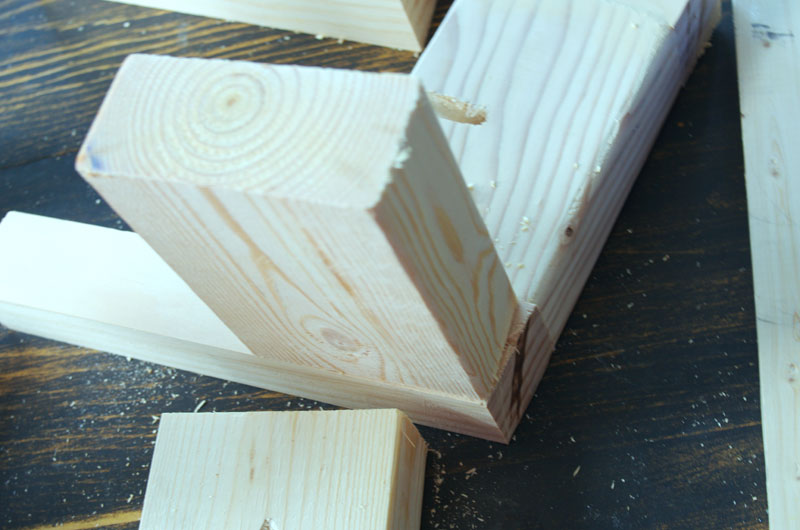
What I did after discovering that the remaining two angled apron pieces wouldn’t work, I cut two more apron pieces with straight cut edges and put my stool base together with wood glue and pocket screws.
I made the round top by cutting out a circle using my RYOBI Band Saw.
To attach the round top, I had pre-drilled pocket holes into the apron pieces. Then all I had to do was turn the base and top upside down and use wood glue and pocket screws.
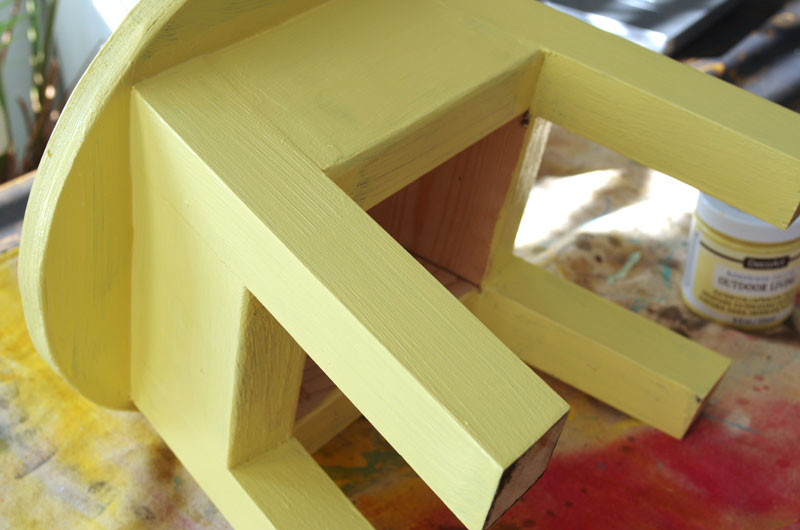
Now all that was left to do was fill the holes and gaps with wood filler, let that dry, then sand and paint.
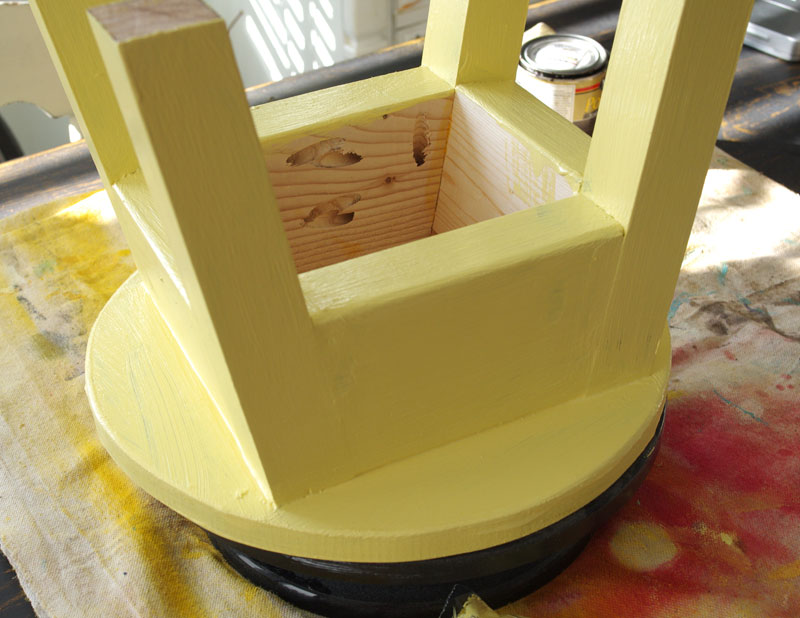
I had already brushed on the first coat of paint (I used DecoArt® American Decor® Outdoor Living™ paint in Lemonade) when I remembered to use my HomeRight Turn Table. That sure made the painting easier and faster.
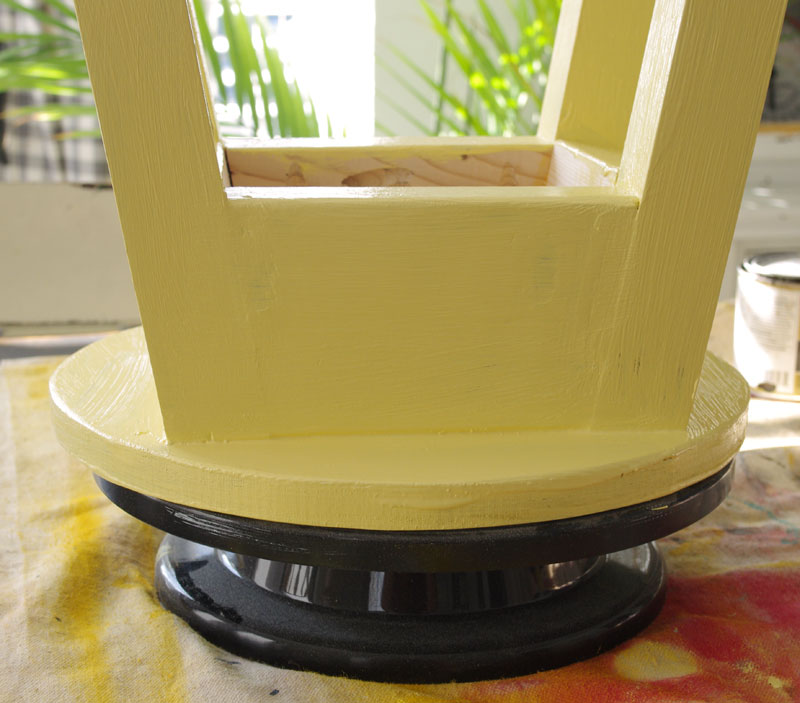
After waiting for the paint to dry thoroughly, I roughed up the edges with a sanding sponge to give it an aged, worn look.

While it may not be exactly what I had in mind, it really is cute and I love it!
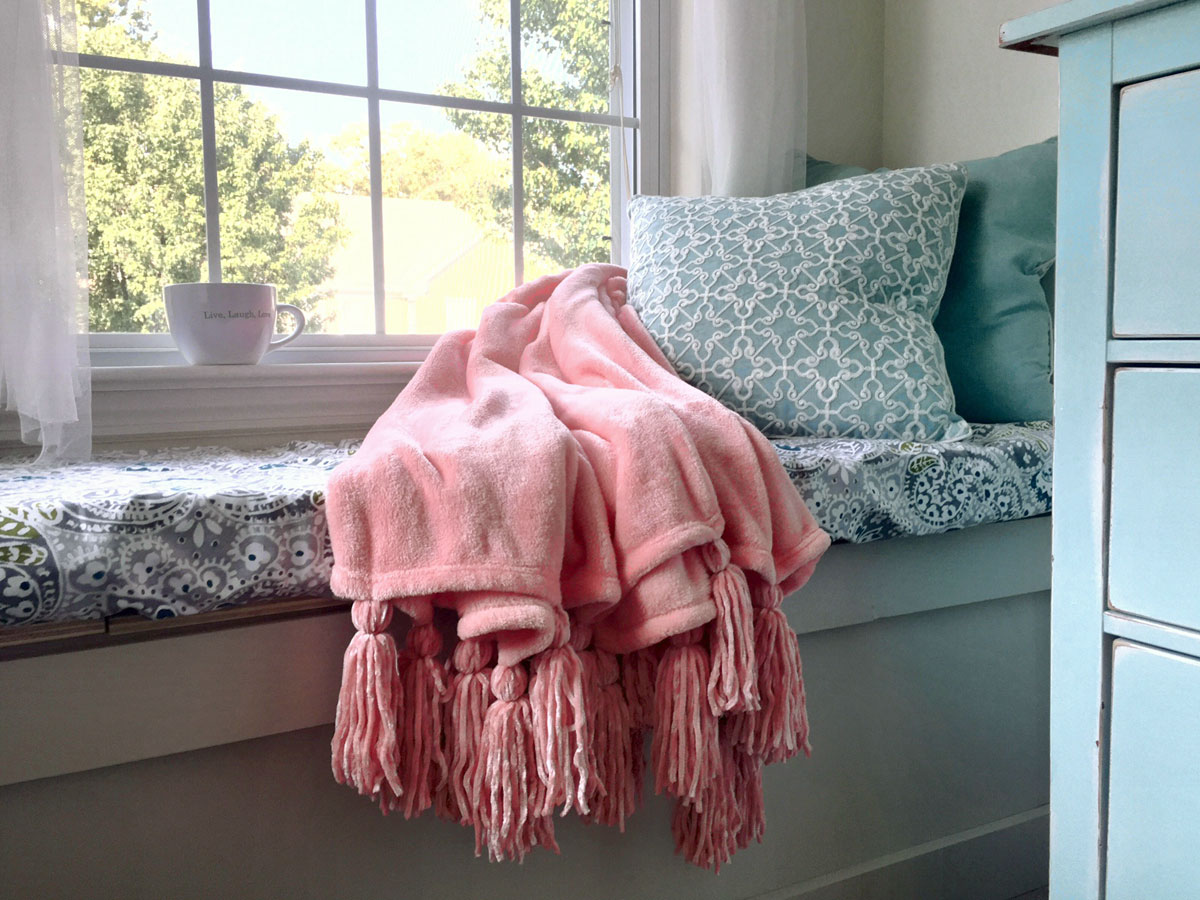
This stool will be perfect for my granddaughter to use to climb up on my new window seat.
 You may also like the following simple projects:
Now let’s see what my friends have made this month:

The Kim Six Fix Vintage Surveyors Tripod Lamp
Virginia Sweet Pea DIY Candlesticks Using Upcycled Bedposts
H2OBungalow Upcycled Metal and Wood Table
Create and Babble Little Round Stool
My Love 2 Create Small Decorative Caddy
My Repurposed Life Easy One Pallet Project
Designed Decor Build Your Own Tufted Bench


This stool does look like a milking stool! My grandmother had one in her kitchen and the grandchildren liked to sit on it. The lemon colored paint that you used is so pretty and I can picture a pumpkin sitting on top of this stool for fall.
What a great idea to put a pumpkin on it! Thanks Paula!
You did an awesome job on your tutorial, very easy to understand. It turned out great and live the pop of color.
Jeanie,
I love your small stool! The color and the distressing is perfect. You did a marvelous job, and at this time I’m confused about what it “should” have looked like so I have no words of wisdom to offer you. (it’s been a long day)
Pinned your cute yellow stool!
gail
This is cute and I love the petite size! It would be perfect in my kitchen where I’m just a few inches too short to reach the top shelf. Pinned and on my radar for a future project!
This is absolutely adorable!! It very much reminds me of the milking stool we used on the farm when I was a child. I am wondering if you had tried using a 15 degree cut on the tops of the legs if this may have helped. It’s hard for me to figure this out unless I go out and build one which I am thinking of doing as I have been wanting one of these for quite some time now. I am also in the process of building stools out of cable spools for a child’s table, which I will be putting more work in to than I want to put, therefore, since seeing this, I am rethinking things and may opt for this instead. I will figure this out!! Love your stool!!
Thanks for the detail of the assembly process, saved me a ton of time! I appreciate it!
This is so cute. The size and color are so special. I can think of many uses for it.
This is definitely a cool addition to your home.
The small shaped stool will give your house more cozy feel 🙂
That is a cute stool. Loved the detailed instructions. I’ll definitely try build one just like that. Thanks and keep up the good work.
Here is a link to the one Ana White built which perfectly gives you the instruction you are looking for. Her stool is a bit different but I’m sure you can understand for your stool.
https://www.ana-white.com/woodworking-projects/simplest-stool
Thank for sharing . I like your idea it’s lovely and cute. 🙂