


I was thrilled when my friend Wendi asked me join in this month’s Power Tool Challenge. The challenge is to create something using a designated power tool. There is also a theme to follow. This month’s tool is the jig saw and the theme is “back to school”. So, in other words, I need to make something using a jig saw – which is a tool that I’m admittedly not that good at using. And that “something” has to be related somehow to “back to school”. This IS a challenge!
It took me a while to come up with my idea. My kids are grown and “back to school” doesn’t really affect me too much anymore. My days of back-to-school shopping are over – YAY!!!!
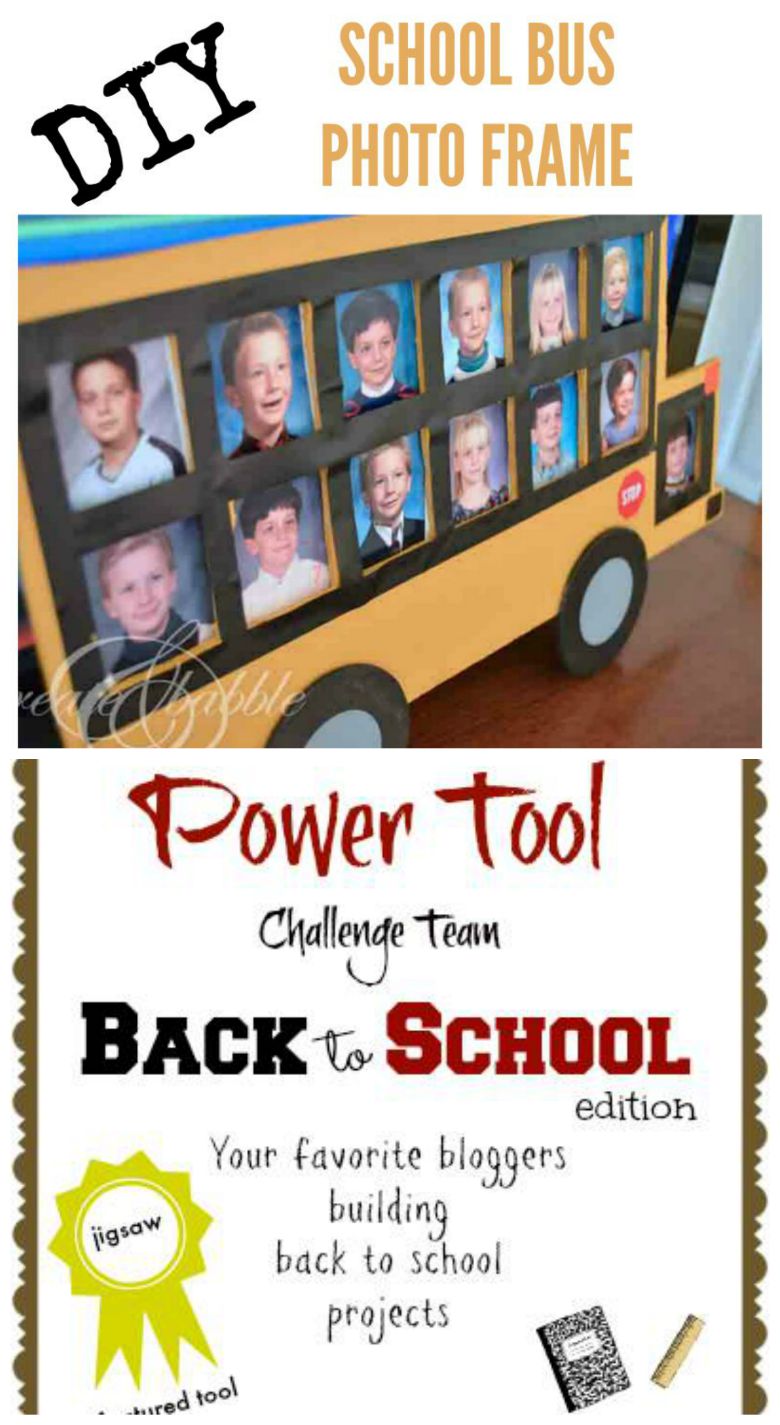
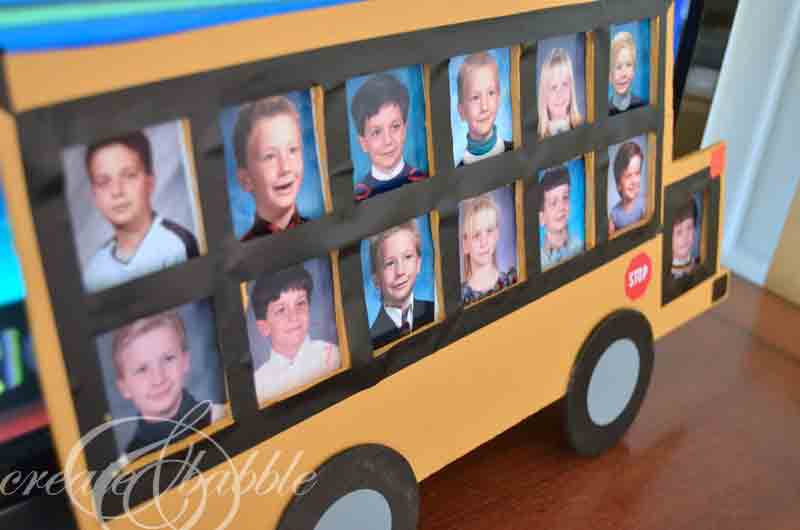
Anyway, here’s how I made my school bus photo frame.
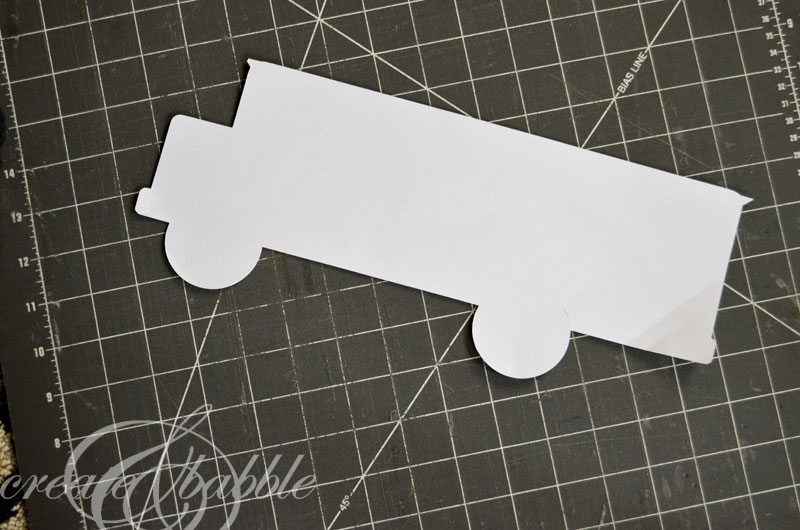 First, I cut out a paper template of a school bus.
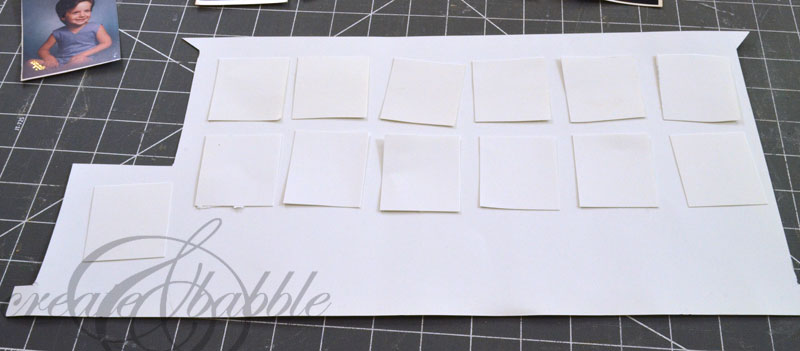
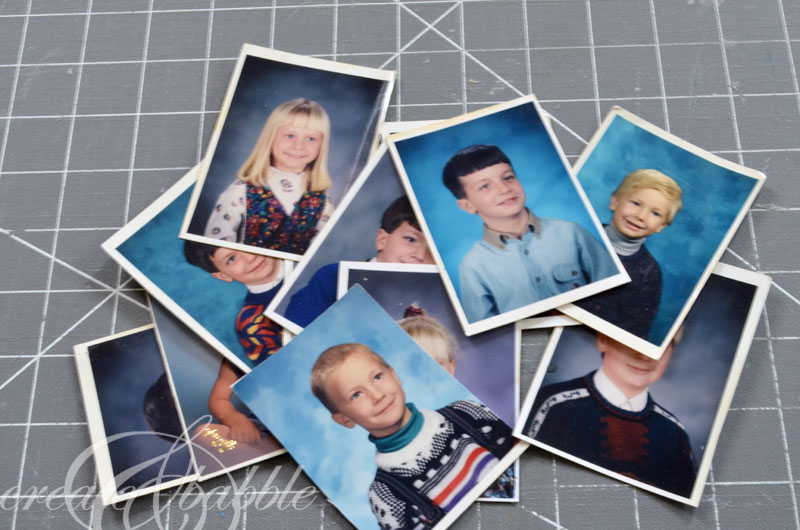 Then I gathered up school pictures of my kids.I managed to dig up 12 wallet-sized school photos. (That was a fun stroll down memory lane ; ) OMG, look how cute they were! (They’re going to hate me for this).
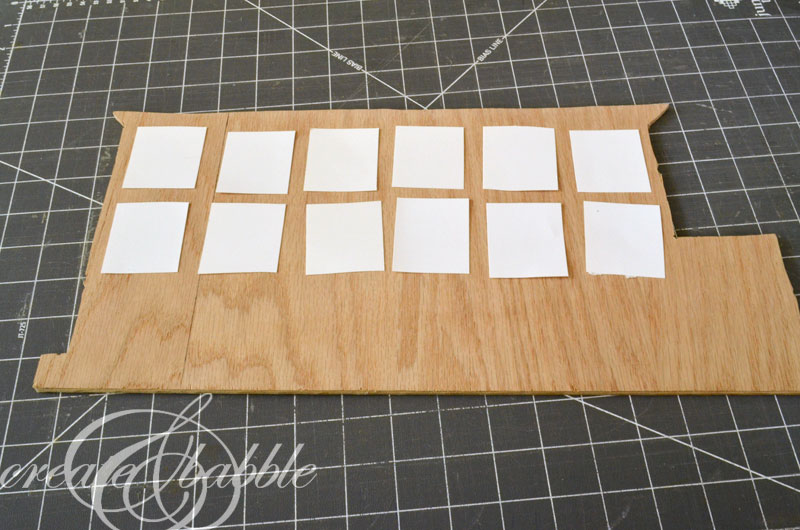
I had to make some adjustments to the bus template once my photos were all lined up.
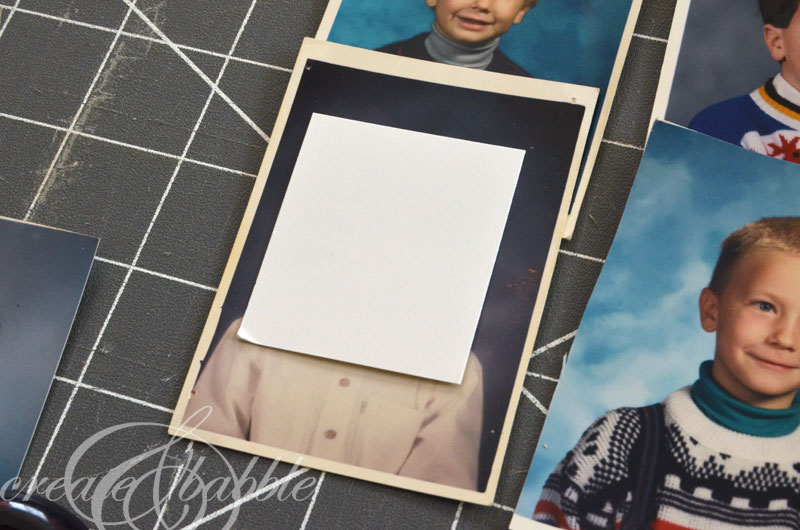
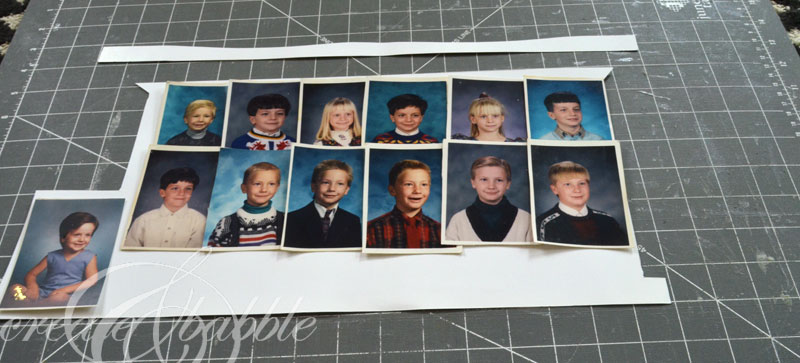
I made 13 paper templates for each cute, little face that would be showing through the school bus windows . . .
. . . and laid them out on the paper bus template to make sure they would all fit.
Then it was time to cut out the bus. This was fairly easy because of all the cut were straight and were on the outside. The windows however, were going to be a challenge.
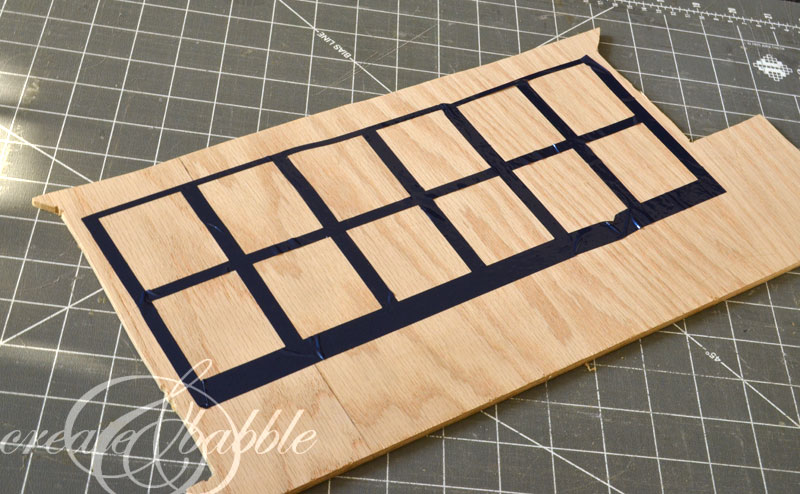
Instead of drawing around each paper window template, I designed the window shapes on my Silhouette Cameo® and cut out the “frame” using adhesive vinyl. This way all of the rectangles (windows) would be the same. I simply traced around the inside of each frame with a pencil.
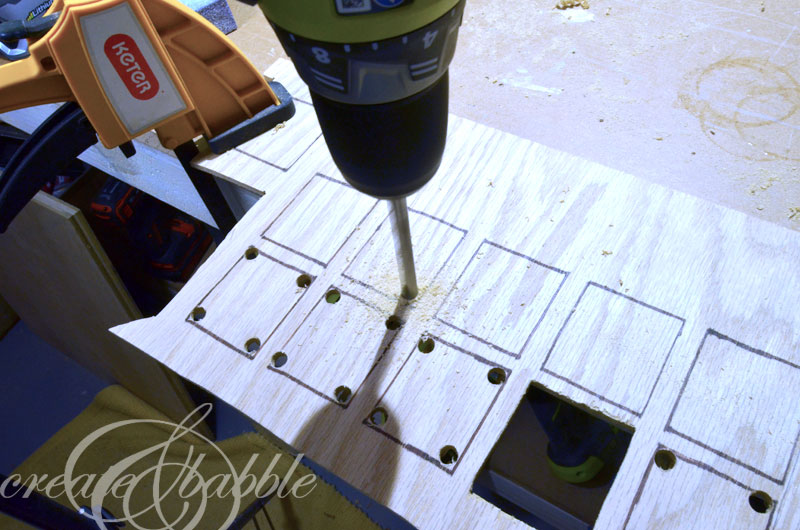
To cut out the windows, I first drilled holes into each corner.
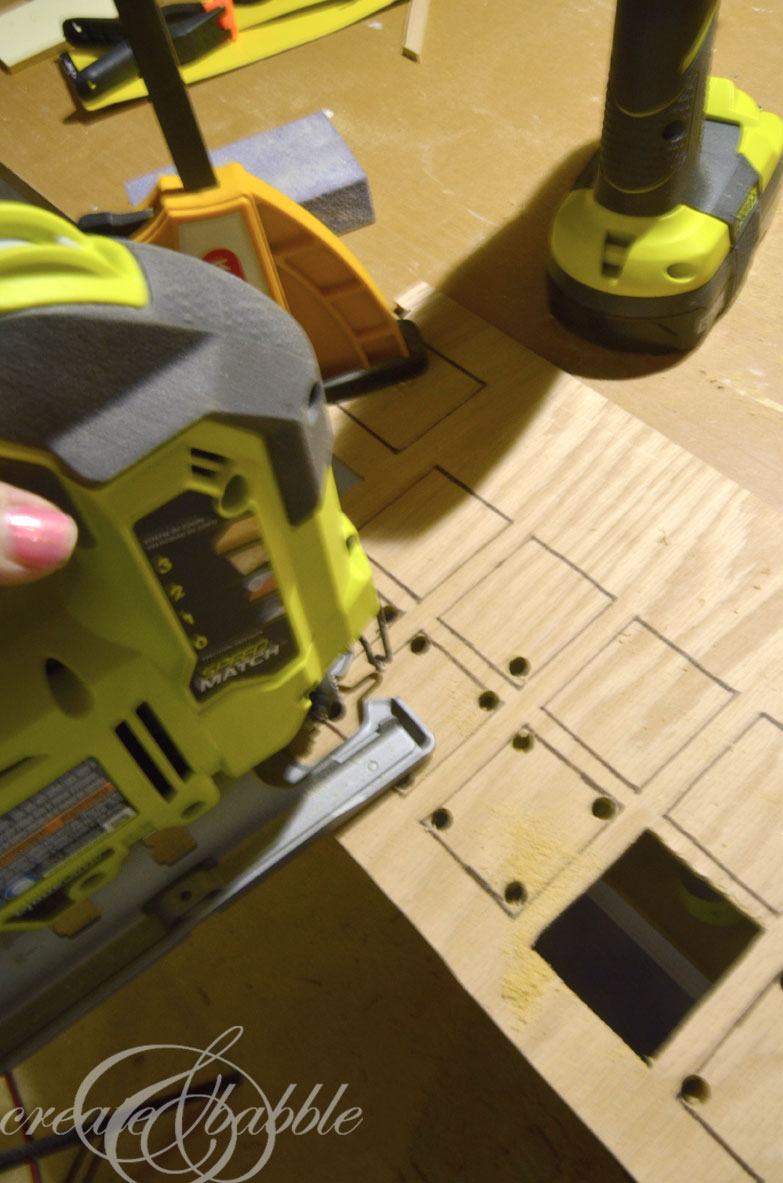
Then I could slide the blade into each drilled hole and cut out each rectangle. I’d love to say that each window came out perfectly. They did not. I need more practice with the jig saw ; )
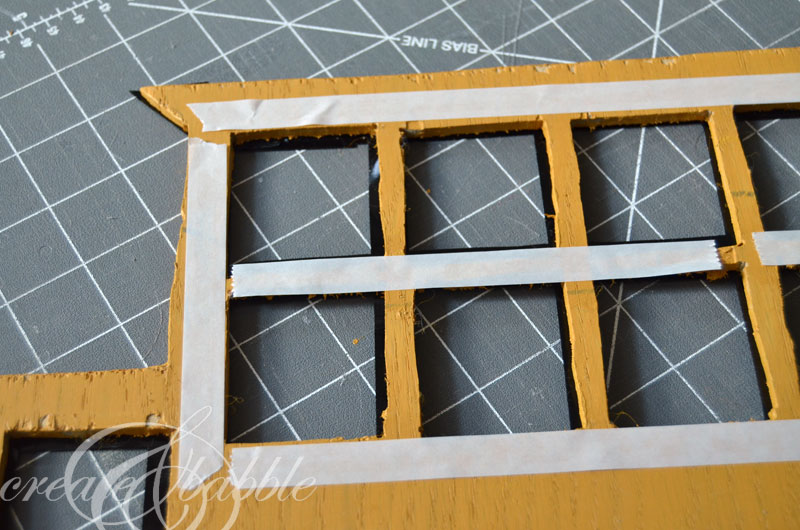
Okay, so once all of the windows were cut out and the entire bus was sanded and painted, I applied strips of double-faced tape to the back of the frame to hold the photos in place.
I used strips of black adhesive vinyl (black tape could also be used) to define each window (and also hide the unevenness of those windows – shhh, don’t tell anyone!)
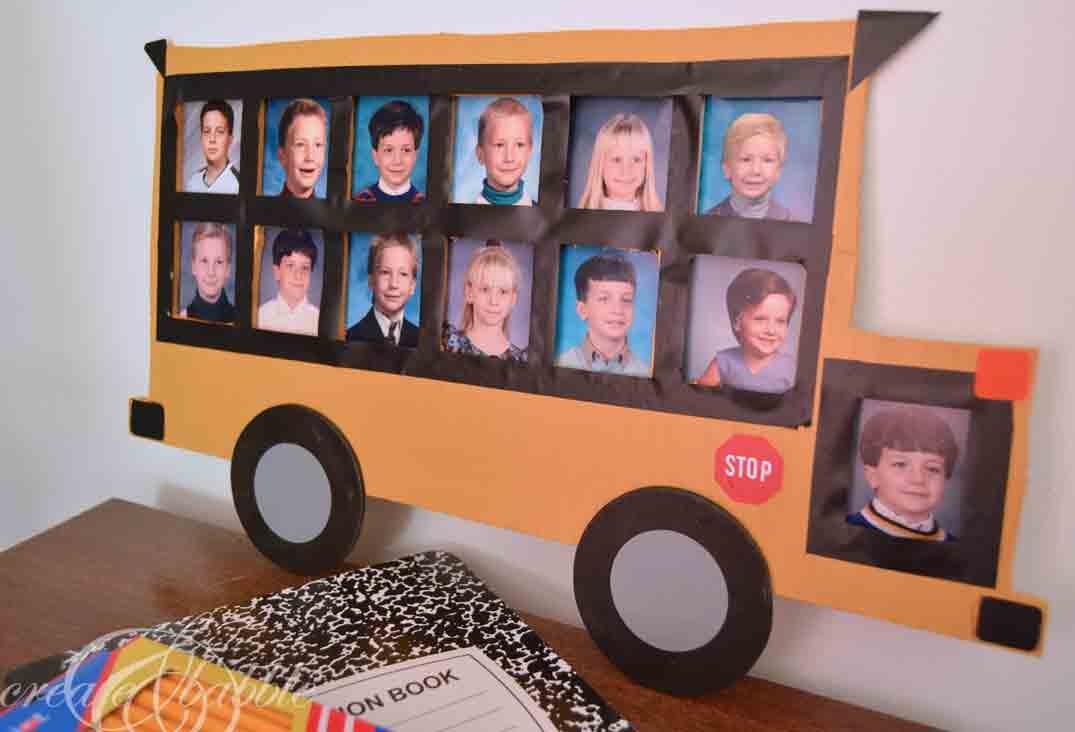
I just have to smile every time I look at these pictures. What memories they bring back!
I think I’ll have to make another for my grandson (after I get more practice time in with my jig saw ; ) It will be fun to see it fill up with a new photo each year. He’s going to second grade this year so it will be a while before it’s filled up. But we all know how fast those years go by!

Please visit my friends in the links below to see more Back to School projects!


How sweet is that?! It’s creative, fun, and functional. Great job, Jeanie!
This is so creative and such a good idea for displschool aying photos of all the years! So creative..Love!
The cutest idea ever! I love how you created it – such a great project!
I was thinking…I know she didn’t cut all those tiny windows out, but you sure did! I think you win for the most detailed jigsaw project lol…super cute! XO
This is the best idea! Now i wish mine where little so i could do this! Great idea!
This is so cute! You definitely need to make a second one for your grandson.
For someone who claims to not have a lot of experience using a jigsaw, you took on some difficult cuts and did good girl! What a great idea Jeanie – just love your creativity!
Wow! I am shocked that you even attempted to cut out the windows. That was very tedious but you did great! I also love how creative you were in covering up the uneven lines – very clever! You definitely need to make another for your grandson, it will be quite a treasure!
Happy Friday!
Tami
Wow! I’m so impressed with your jigsaw skills! Great project!
I am a student and I have been studying for the past four years. I have to submit my final project in the form of a school bus photo frame. The theme is “Our Future”. I would like to use this opportunity to pass on my knowledge as well as help others in need. I have prepared both sides of the picture so that you can print them on your own printer or any other one that you may use.
This photo frame is so beautiful. I really love it.