• Home
  • About
  • Contact
  • Partner
  • Privacy Policy
    • Facebook
    • Instagram
    • Pinterest
    • Twitter
    • YouTube

Create and Babble

  • DIY
    • Home Improvement
    • Upcycle
    • Furniture Makeovers
    • Build It
  • Craft
    • Silhouette
    • Sewing
    • Wedding DIYs
    • Seasonal
    • Gifts
  • Lifestyle
    • Bicyling
    • Travel
    • shopping

STAY UP TO DATE

Get the latest crafting and DIY tips, tricks and tutorials delivered straight to your inbox!

Silhouette Tutorial: Glitter Vinyl Christmas Pillow

November 11, 2013

If you like it, please share it!Share on pinterest
Pinterest
Share on facebook
Facebook
Share on twitter
Twitter
Share on stumbleupon
Stumbleupon
Share on google
Google
Share on linkedin
Linkedin
Share on reddit
Reddit

For this month’s Silhouette Challenge, I am working with one of my favorite mediums: Glitter Heat Transfer Vinyl. I use it instead of rhinestones and I love this stuff. I guess it’s not fair to really call it a challenge since I’ve worked with it before. But this is my first “glitter vinyl instead of rhinestones” Christmas Pillow.

christmas pillow-createandbabble

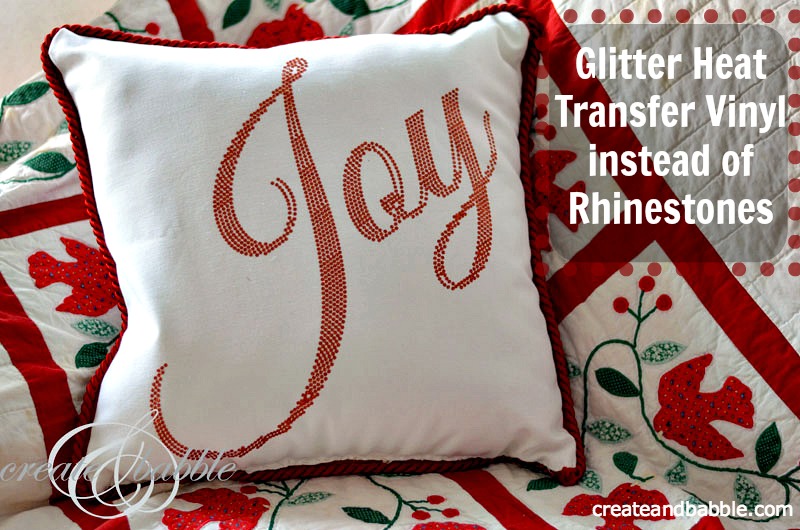
It’s been Christmas craft crazy here at Create & Babble. I’ve got so many projects going on at the same time. But I’m excited to have this Christmas Pillow done and tell you how I did it.

Here are the steps to create a rhinestone word design in the Silhouette Designer Edition software:

  • use the “text” tool and type your word using the font of your choice (I used typed Great Vibes)
  • weld the letters together
  • adjust to the size you need
  • open the Rhinestone window and chose the style of your rhinestones (I used linear fill)
  • adjust the size and spacing of the rhinestone holes until you get the look you want
  • flip the shape horizontally (don’t forget that part!)
  • load vinyl without cutting mat into Silhouette with the sparkly side down (use load media – not load cutting mat)
  • cut heat transfer vinyl using speed: 3  blade: 3  thickness: 33

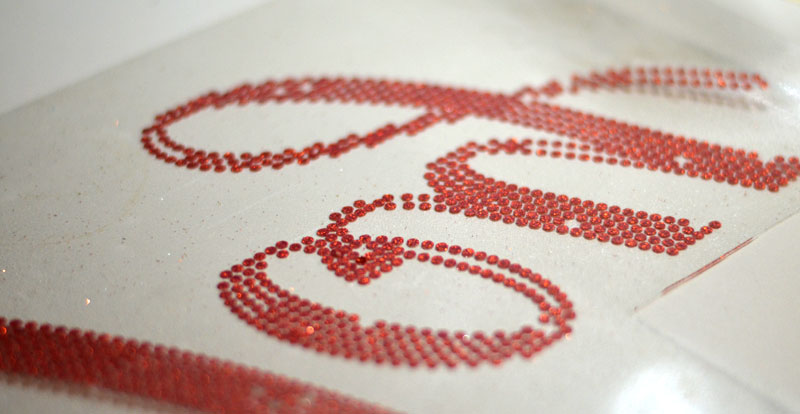
I find that weeding heat transfer glitter vinyl is so much easier than regular wall vinyl. I did lose a couple “rhinestones” in the weeding process, but I just cut a few extra and popped them into place.

glitter vinyl pillow_createandbabble
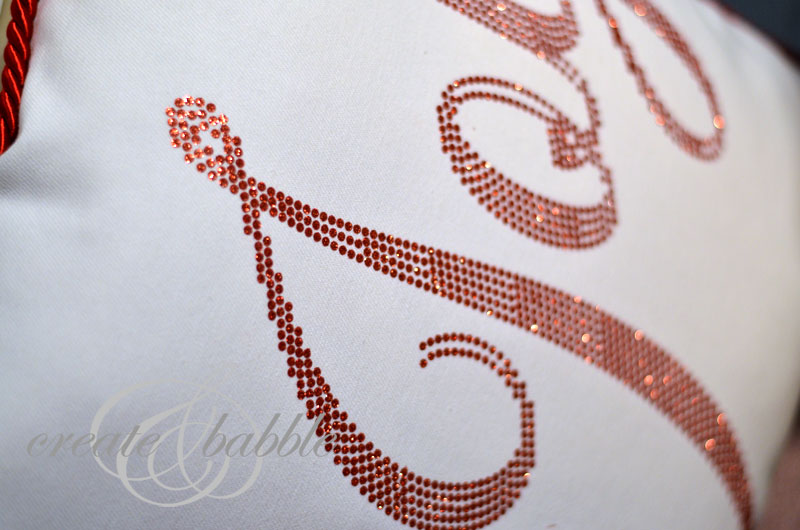
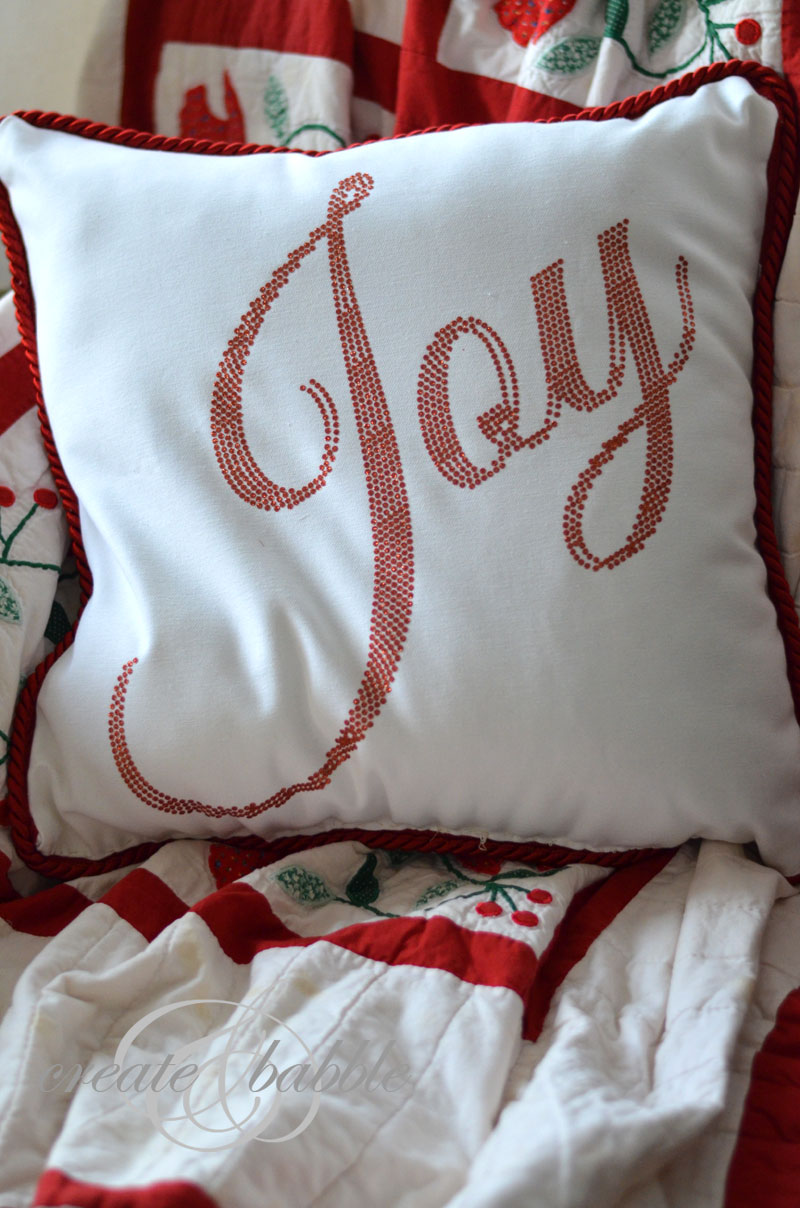
After the weeding was done, I placed the design, plastic backing side up, on my  20″ square piece of white cotton fabric and covered it with another piece of the same fabric that would be the back of the pillow. (You have to cover it with something or the iron will melt the plastic backing) Then using a lot of pressure, I pressed down and held the hot, dry iron for about 10-15 seconds. Then I repositioned the iron and repeated the pressing until the entire design was pressed. The plastic backing of the glitter vinyl releases very easily and the little circles of glitter vinyl that are adhered to the fabric look so much like rhinestones! Look at the sparkle!

glitter vinyl christmas pillow_createandbabble
Now I don’t know about you, but I have no desire to set all the rhinestones that would be needed for a design like this. I tried it once and failed miserably. I just don’t have the “touch” or patience.

Now here’s where I got fancy: to finish the pillow, I machine-stitched a red cording trim to the edges of the back section of the pillow. This is the first time I have ever done that and I must say it was a little tricky around the corners! Then with right sides together, I machine-stitched three sides of the four sides of the pillow, leaving one side open to insert the pillow form. The last step was to hand sew the bottom opening.

glitter pillow cording_createandbabble
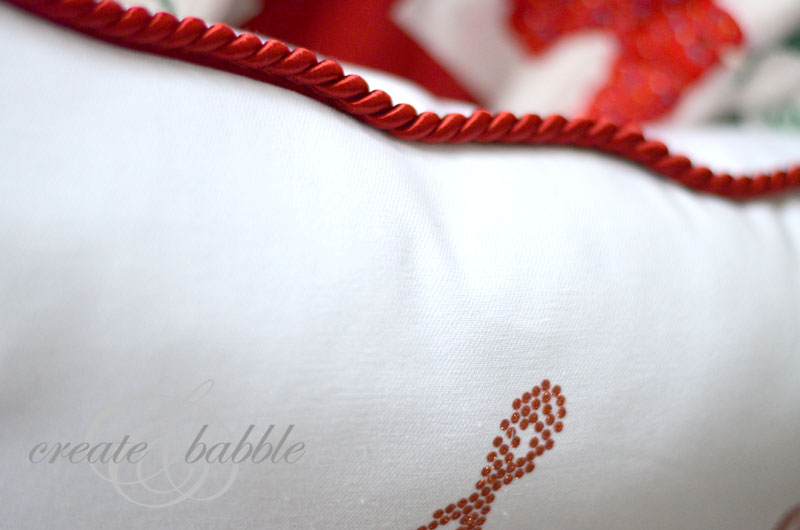
I got out my old Partridge quilt and put it on the big green snuggle chair in the corner of my living room. This will be a nice, cozy spot to snuggle up and read with my grandson.
joy christmas pillow_createandbabble

Want to Check Out More Silhouette Projects?

My Silhouette Challenge buddies are all sharing projects today on their blogs, so peruse the links below for a blog-hopping good time.

DIY Ironing Board Hangerby The Turquoise Home
Silhouette Challenge: Time Zone Bathroom Artby Nearly Handmade
Santa’s Christmas Countdownby Tried & True
Nautical Anchor Pillow Tutorialby The Thinking Closet
Christmas Card Ornament with Free Cut Fileby unOriginalMom
Thanksgiving and Christmas Dual Signby Architecture of a Mom
Itching to Etchby Get Silvered
Snowman Tag ~ Silhouette Challengeby Whats Next Ma
Thanksgiving Signby Chicken Scratch NY
DIY Horse Silhouette Pillowby Rain on a Tin Roof
Sketching on Fabricby The Sensory Emporium
Paper Leaf Garlandby Lil’ Mrs. Tori
DIY Blessing Board – Silhouette Challengeby One Tough Mother
Glass Painting with Reverse Stencilsby Givemeapaintbrush
Chalkboard Thankful Treeby Cutesy Crafts
Bottoms Up! MYO Wine Tagby From Wine to Whine
‘Happy Holly-days’ Tags for the Swapby An Elegant Touch…
Thank You for Dinner (Card)by Everyday Paper
Advent Star Christmas Countdownby My Favorite Finds
Geometric Fabric Bowlsby Please Excuse My Craftermath…
Paper Carnivalby Home At Eight
Silhouette Cameo Tutorial: Dual Sided Business Cardsby Black and White Obsession
In Case of Emergency Baby Bag Tagsby Tossed Salad Life
Christmas On My Mindby Creative Turn
Jingle all the Way!by My Paper Craze
Christmas Lights Garlandby Making Home Base
We Are Thankfulby 4 You With Love
Seattle Skyline Silhouette by Sowdering About in Seattle
DIY Stenciled Mugsby Coley’s Corner

Do you have a Silhouette machine?

Looking for Silhouette inspiration, support, trouble-shooting? Interested in joining us for our group posting event next month? Then, we’d love to have you join our Silhouette Challenge Facebook group. To join, simply fill out the new member request form, and Lauren from The Thinking Closet will get you squared away.

TheSilhouetteChallenge-TTC&Friends
I link to these great parties:

Make It Pretty Monday / Project Inspired / In and Out of the Kitchen / The Scoop / Give Me the Goods / Tutorials & Tips / You’re Gonna Love It / Inspire Me Tuesday / From Dream to Reality / One Project at a Time / Twirl and Take a Bow / The Fun in Functional / Nifty Thrifty Tuesday / Power of Paint Party / Tuesday’s Treasures / Whimsy Wednesday / Throwback Thursday / Tutorials, Tips & Tidbits / Whatever Goes Wednesday / Catch a Glimpse / Show & Share / Wow Us Wednesdays / Weekly Creative / Grace at Home/ Ladies Only Blog Share / Freedom Fridays / Feathered Nest Friday / Link Party Palooza / The Party Bunch / Furniture Feature Friday / Party Junk / what’s shakin / Anything Blue Friday / Shabbilicious Friday/ Think Pink Sunday / Finding The Pretty & Delicious / Making Monday / Our Sunday Best / Ger Your DIY On / Monday Funday / Make the Scene / That DIY Party / Bewitch Me & Titi / Inspiration Monday / nifty thrifty Sunday /
If you like it, please share it!Share on pinterest
Pinterest
Share on facebook
Facebook
Share on twitter
Twitter
Share on stumbleupon
Stumbleupon
Share on google
Google
Share on linkedin
Linkedin
Share on reddit
Reddit

Filed Under: Christmas, Silhouette, Tutorials

« Christmas Cookies – Old Family Favorites – Apricot Pinwheel Cookies
Dear Santa Giveaway »

Comments

  1. Meredith @ unOriginalMom says

    November 11, 2013 at 10:21 am

    Oh my goodness, this is so pretty! I had no idea that glitter vinyl even existed…but I am definitely getting some! Love how this pillow turned out!

    Reply
    • Jeanie says

      November 11, 2013 at 12:51 pm

      Thanks Meredith! Warning: you will get hooked on glitter HTV!

      Reply
      • Janice @ NearlyHandmade says

        November 11, 2013 at 5:21 pm

        Wow! I’m with you Meredith! I had no clue that stuff existed! I’m beyond excited to have found out about glittery vinyl, Jeanie and your project couldn’t have turned out any cuter! Way to go!

        Reply
        • Jeanie says

          November 11, 2013 at 5:28 pm

          Thank you Janice! You sound just as excited as I was when I first heard about it!

          Reply
  2. Kirsten @ One Tough Mother says

    November 11, 2013 at 10:49 am

    This is so beautiful and festive! I love it! I’m going to have to steal your idea 😉

    Reply
    • Jeanie says

      November 11, 2013 at 12:51 pm

      Thanks Kirsten! Steal away!

      Reply
  3. Kristy gd says

    November 11, 2013 at 11:00 am

    Oh wow! That came out amazing! The piping around the edge really gives it that extra umph. I never thought I’d find a use for rhinestones, but it looks like you just found one for me!

    Reply
    • Jeanie says

      November 11, 2013 at 12:50 pm

      Thanks Kristy! That piping does give it a finished look.

      Reply
      • Kristy gd says

        November 11, 2013 at 6:48 pm

        Hm.. I think I’m only *just* realizing that there are no rhinestones in this project. That’s just htv?!? Wow! Sure fooled me!

        Reply
        • Jeanie says

          November 11, 2013 at 8:48 pm

          Yep, just HTV!

          Reply
  4. Jessica says

    November 11, 2013 at 11:19 am

    What a great idea! It turned out so pretty!

    Reply
    • Jeanie says

      November 11, 2013 at 12:49 pm

      Thanks Jessica!

      Reply
  5. Carrie @ My Favorite Finds says

    November 11, 2013 at 11:40 am

    I LOVE glitter HTV. I haven’t even used Rhinestones yet because I love the glitter HTV so much! I love your pillow very cute!

    Reply
    • Jeanie says

      November 11, 2013 at 12:49 pm

      Thanks Carrie! Ever since I discovered glitter HTV, I won’t touch another rhinestone!

      Reply
  6. Rachel @ Architecture of a Mom says

    November 11, 2013 at 12:39 pm

    I love how you used the rhinestone setting for something else. Gives me hope–I have a great idea for that setting, and I’m hoping that it will work! Love how this turned out!

    Reply
    • Jeanie says

      November 11, 2013 at 12:48 pm

      Thank you Rachel! I’d love to see what you make!

      Reply
  7. Lauren @ The Thinking Closet says

    November 11, 2013 at 12:43 pm

    Whoa, Jeanie! This might be one of my favorite projects of yours EVER (and I have a lot of favorites). What a fantastic finished look. And I’m a rhinestone fanatic, but I’m also impatient, so I love that you can achieve a rhinestone look without all the meticulous steps of using actual rhinestones.

    Do you have recommended source for your glitter HTV? I’ve heard it’s not the easiest to work with, but your tutorial has me itchin’ to try this method out! (Glitter does have certain powers over me.)

    Thanks for participating in this month’s challenge and for inspiring us with your creativity (yet again)!

    Reply
    • Jeanie says

      November 11, 2013 at 12:47 pm

      Thank you Lauren, you’re so sweet! I get the glitter HTV from Expressions Vinyl or Specialty Graphics (whichever has a special going!) It is sooo easy to work with – you will love it!

      Reply
  8. Deidre~ says

    November 11, 2013 at 1:12 pm

    LOVE your festive pillow! I too made some pillows 🙂 Great job!

    Reply
  9. Randi Sowders says

    November 11, 2013 at 2:25 pm

    So amazing! I really love it! Great job!

    Reply
  10. Gracie says

    November 11, 2013 at 2:42 pm

    That’s a really nice project. I don’t have one of those machines but boy I wish I did.

    Reply
    • Jeanie says

      November 11, 2013 at 4:30 pm

      Thanks Gracie! I hope you get a Silhouette one of these days! You will love it!

      Reply
  11. Lynne Fenbert Neumann says

    November 11, 2013 at 4:31 pm

    Wow, just Wow. That is beautiful. It looks like lots of work. I wonder if that would work as a stencil also? I bet it would. I think I will try that.

    Reply
    • Jeanie says

      November 11, 2013 at 5:31 pm

      Thank you Lynne! It looks like more work than it actually is! I’m sure it would work as a stencil, too! Let me know how it goes!

      Reply
  12. Valerie says

    November 11, 2013 at 5:07 pm

    Wowsers that is beautiful! I’ve never seen that glitter heat transfer vinyl before. It’s lovely!

    Reply
    • Jeanie says

      November 11, 2013 at 5:30 pm

      Thank you Valerie! I’m so glad you like it!

      Reply
  13. Glenna Anderson says

    November 11, 2013 at 5:18 pm

    Your pillow is gorgeous! I’m going to have to try this.

    Reply
    • Jeanie says

      November 11, 2013 at 5:29 pm

      Thanks Glenna! Let me know if you do! I’d love to hear how you like working with glitter vinyl.

      Reply
  14. Pam- GetSilvered says

    November 11, 2013 at 5:42 pm

    This is such a stunning pillow. Now you’ve made me want to try the glitter HTV out 🙂 Such an elegant project. I think the cord around the pillow is the perfect finish.

    Reply
    • Jeanie says

      November 11, 2013 at 8:49 pm

      Thank you Pam! You gotta try it!

      Reply
  15. Marilyn says

    November 11, 2013 at 9:06 pm

    This pillow turned out beautifully! You have such a great eye for color and form….you’ve totally inspired me!

    Reply
    • Jeanie says

      November 11, 2013 at 9:09 pm

      Thank you so much Marilyn! And I’m glad I inspired you!

      Reply
  16. Tammy says

    November 11, 2013 at 10:00 pm

    Love the crisp white with the red cording and lettering!!! Beautiful! Would like to invite you to come share at One More Time Events…Tammy

    Reply
  17. MariaElena says

    November 12, 2013 at 7:41 am

    What a beautiful pillow! I have a weekly link party which is live now and I would love if you stop by and link up this wonderful post! Hope to see you there! http://mariaelenasdecor.blogspot.com/ Hugs, Maria

    Reply
    • Jeanie says

      November 12, 2013 at 10:42 am

      Thank you MariaElena!

      Reply
  18. Cynthia L says

    November 12, 2013 at 9:56 am

    Wow! I just love this pillow, just enough bling to make it stand out. Thanks for sharing this at the In and Out of the Kitchen Link Party. So glad you dropped this by!

    Reply
    • Jeanie says

      November 12, 2013 at 10:42 am

      Thanks Cynthia!

      Reply
  19. Trisha D. says

    November 12, 2013 at 4:05 pm

    Finally having a chance to go through all the Silhouette Challenge project inspiration– I’m like a [big] kid on Christmas but earlier!!

    Gah, who doesn’t need a little bling on a festive pillow?! I’m still a noob at Heat Transfer Vinyl but you make it look so darn easy!! One of these days I’ll take a crack at it!

    Keep on being fabulous!!

    Reply
    • Jeanie says

      November 12, 2013 at 8:11 pm

      Thanks Trisha! It really is easy to work with!

      Reply
  20. Tori says

    November 12, 2013 at 4:06 pm

    How clever! I had to read it twice to realize that it’s HTV! Consider my mind blown. 🙂

    Beautiful project!

    Reply
    • Jeanie says

      November 12, 2013 at 8:10 pm

      Thank you Tori! You’re not the only one to think it was rhinestones! Glitter vinyl is fabulous!

      Reply
  21. Brooke says

    November 12, 2013 at 10:39 pm

    I stay away from HTV as much as possible. Way to costly to get addicted to lol. But this is beautiful and don’t you just love combining your loves. I love when I get to combine my silhouette stuff with my sewing stuff.

    Reply
  22. Darcy says

    November 13, 2013 at 8:26 am

    This is so fun! I have a silhouette and I LOVE it! I will have to try this out!

    Reply
  23. Marty@A Stroll Thru Life says

    November 13, 2013 at 9:12 am

    Love, love, love this pillow. Gorgeous. Thanks tons for linking to Inspire Me. Hugs, marty

    Reply
    • Jeanie says

      November 13, 2013 at 4:00 pm

      Thank you Marty!

      Reply
  24. Kathryn Griffin @TheDedicatedHouse says

    November 17, 2013 at 9:28 pm

    So festive and pretty. Thank you for sharing. You will be one of the features tomorrow at the Make it Pretty Monday party at The Dedicated House. Pop on in and grab a feature button for your blog. Hope to see your prettiness again at the bash! Toodles, Kathryn @TheDedicatedHouse

    Reply
  25. karin says

    November 18, 2013 at 8:10 pm

    I just LOVE this…Someday I hope to be brave enough to try it. 🙂
    Thanks for linking up to Twirl and Take A Bow! http://arttisbeauty.blogspot.com/2013/11/twirl-and-take-bow-link-party-65.html
    Hugs
    Karin

    Reply
  26. replacement windows says

    February 3, 2014 at 10:00 pm

    Appreciation to my father who shared with me on the topic of this
    web site, this weblog is truly awesome.

    Reply

Trackbacks

  1. Thank You for Dinner (Card) | everydaypaper says:
    November 11, 2013 at 10:01 am

    […] Christmas Pillow by Create & Babble […]

    Reply
  2. Baby Bag “ICE” Tags | A Tossed Salad Life says:
    November 11, 2013 at 10:01 am

    […] Christmas Pillow by Create & Babble […]

    Reply
  3. DIY Ironing Board Hanger says:
    November 11, 2013 at 10:02 am

    […] Christmas Pillow by Create & Babble […]

    Reply
  4. Advent Star Christmas Countdown - My Favorite Finds says:
    November 11, 2013 at 10:10 am

    […] Lil’ Mrs. Tori DIY Blessing Board – Silhouette Challenge by One Tough Mother Christmas Pillow by Create & Babble Glass Painting with Reverse Stencils by Givemeapaintbrush Chalkboard […]

    Reply
  5. Twirl & Take a Bow~1 linky on 6 Blogs! - All Things Heart and Home says:
    November 19, 2013 at 2:01 am

    […] Take a look at this Glitter Vinyl Christmas Pillow from Create and Babble […]

    Reply
  6. Party Features & Time to Twirl! - DesignedByBH says:
    November 19, 2013 at 12:15 pm

    […] Take a look at this Glitter Vinyl Christmas Pillow from Create and Babble […]

    Reply
  7. Eight Cozy Craft Tutorials | Silly Pearl says:
    May 29, 2015 at 6:05 pm

    […] Scarf by Scattered Thoughts of a Crafty Mom Crazy Patchwork Tree Ornament by Leigh Laurel Studios Glitter Vinyl Christmas Pillow by Create and Babble Hope you enjoyed these cozy ideas. To link up your own ideas and for more […]

    Reply
  8. Eight Cozy Craft Tutorials says:
    May 29, 2015 at 7:05 pm

    […] Scarf by Scattered Thoughts of a Crafty Mom Crazy Patchwork Tree Ornament by Leigh Laurel Studios Glitter Vinyl Christmas Pillow by Create and Babble Hope you enjoyed these cozy ideas. To link up your own ideas and for more […]

    Reply
  9. Nautical Anchor Pillow: Freezer Paper Stenciling Tutorial — the thinking closet says:
    August 6, 2015 at 2:35 am

    […] Lil’ Mrs. Tori DIY Blessing Board – Silhouette Challenge by One Tough Mother Christmas Pillow by Create & Babble Glass Painting with Reverse Stencils by Givemeapaintbrush Chalkboard […]

    Reply
  10. Chalkboard Thankful Tree - Cutesy Crafts says:
    October 29, 2015 at 4:17 pm

    […] Lil’ Mrs. Tori DIY Blessing Board – Silhouette Challenge by One Tough Mother Christmas Pillow by Create & Babble Glass Painting with Reverse Stencils by Givemeapaintbrush Bottoms Up! MYO […]

    Reply
  11. DIY Christmas Card Ornaments with Free Cut File - unOriginal Mom says:
    November 4, 2015 at 2:14 pm

    […] Lil’ Mrs. Tori DIY Blessing Board – Silhouette Challenge by One Tough Mother Christmas Pillow by Create & Babble Glass Painting with Reverse Stencils by Givemeapaintbrush Chalkboard […]

    Reply
  12. Make it Pretty Monday – Week 76 says:
    February 9, 2016 at 10:52 am

    […] Jeanie made this pillow using her sewing machine and her Silhouette.  Scooch on over to Create and Babble to get all of the details.   Make it Pretty Monday Culinary Delight […]

    Reply
  13. Paper Christmas Lights Garland Door Hanging - Making Home Base says:
    February 22, 2016 at 2:30 pm

    […] Lil’ Mrs. Tori DIY Blessing Board – Silhouette Challenge by One Tough Mother Christmas Pillow by Create & Babble Glass Painting with Reverse Stencils by Givemeapaintbrush Chalkboard […]

    Reply
  14. 25 Easy DIY Holiday Pillows to Make for Christmas says:
    July 10, 2017 at 3:01 am

    […] Glitter Vinyl JOY Christmas Pillow […]

    Reply
  15. How to Make Pretty Christmas Pillows with Chalk Couture - Create and Babble says:
    October 22, 2018 at 6:19 am

    […] Christmas pillows over the years. I’ve made pillow covers using metallic heat transfer vinyl, glitter heat transfer vinyl, and polka dot fabric. But I must say that the ones I just made last week are by far the prettiest! […]

    Reply
  16. DIY Horse Silhouette Pillow and How to Cut Felt on a Silhouette says:
    March 27, 2019 at 2:23 pm

    […] Lil’ Mrs. Tori DIY Blessing Board – Silhouette Challenge by One Tough Mother Christmas Pillow by Create & Babble Glass Painting with Reverse Stencils by Givemeapaintbrush Chalkboard […]

    Reply

Leave a Reply Cancel reply

Your email address will not be published. Required fields are marked *

About Jeanie

About Jeanie

Welcome to Create & Babble. This is where I share my loves: crafting, hiking and camping

Read more about me here

Categories

Archives

AntiqueFarmHouse
Zots Craft Adhesive Dots

Amazon Associates Disclosure

Jeanie Hevener Emmert is a participant in the Amazon Services LLC Associates Program, an affiliate advertising program designed to provide a means for sites to earn advertising fees by advertising and linking to amazon.com.


hobby lobby

Copyright © 2025 · Site by Pretty Pink Studio

Copyright © 2025 · Glam Theme on Genesis Framework · WordPress · Log in

This website uses cookies to improve your experience. We'll assume you're ok with this, but you can opt-out if you wish.Accept Reject Read More
Privacy & Cookies Policy

Privacy Overview

This website uses cookies to improve your experience while you navigate through the website. Out of these, the cookies that are categorized as necessary are stored on your browser as they are essential for the working of basic functionalities of the website. We also use third-party cookies that help us analyze and understand how you use this website. These cookies will be stored in your browser only with your consent. You also have the option to opt-out of these cookies. But opting out of some of these cookies may affect your browsing experience.
Necessary
Always Enabled
Necessary cookies are absolutely essential for the website to function properly. This category only includes cookies that ensures basic functionalities and security features of the website. These cookies do not store any personal information.
Non-necessary
Any cookies that may not be particularly necessary for the website to function and is used specifically to collect user personal data via analytics, ads, other embedded contents are termed as non-necessary cookies. It is mandatory to procure user consent prior to running these cookies on your website.
SAVE & ACCEPT