• Home
  • About
  • Contact
  • Partner
  • Privacy Policy
    • Facebook
    • Instagram
    • Pinterest
    • Twitter
    • YouTube

Create and Babble

  • DIY
    • Home Improvement
    • Upcycle
    • Furniture Makeovers
    • Build It
  • Craft
    • Silhouette
    • Sewing
    • Wedding DIYs
    • Seasonal
    • Gifts
  • Lifestyle
    • Bicyling
    • Travel
    • shopping

STAY UP TO DATE

Get the latest crafting and DIY tips, tricks and tutorials delivered straight to your inbox!

How to Build S Shelves for under $10

October 27, 2016

If you like it, please share it!Share on pinterest
Pinterest
Share on facebook
Facebook
Share on twitter
Twitter
Share on stumbleupon
Stumbleupon
Share on google
Google
Share on linkedin
Linkedin
Share on reddit
Reddit

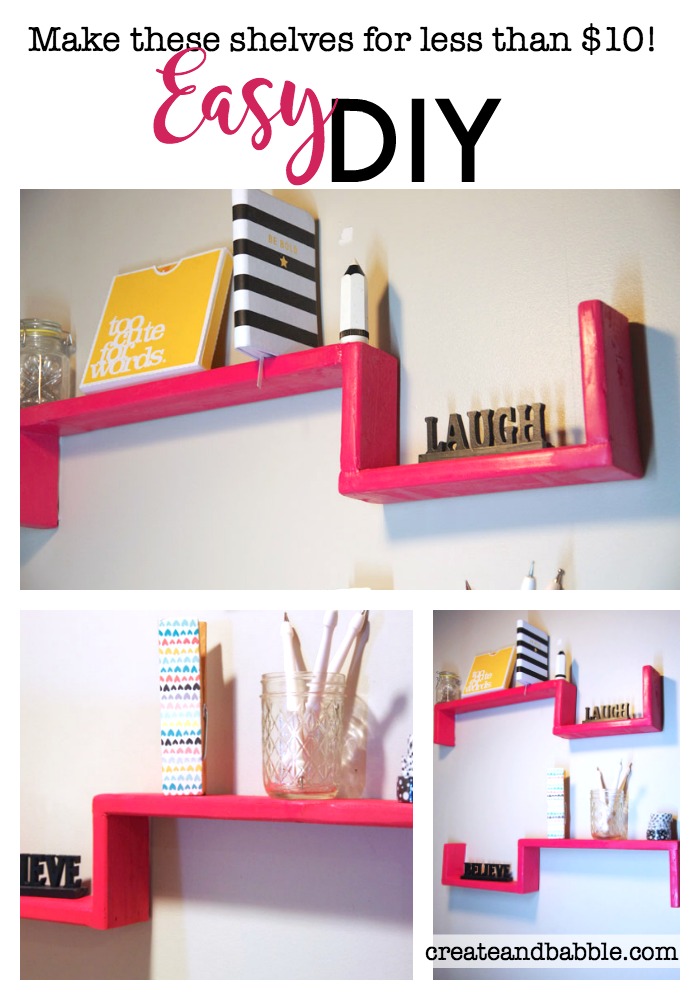
Welcome to a special edition of the Power Tool Challenge. This month’s challenge is to build something for $10 or less. I will show you how to build S shelves for under $10 and then you get to show me what you can make for less than $10!

If your project is chosen as the favorite by the Power Tool Challenge Team, you will win a fabulous power tool package from Ryobi Power Power Tools. I’ll have more details at the bottom of this post.

But first, let me show you how to build “S” shelves for less than $10:

easy-diy-shelves-to-make-under-10

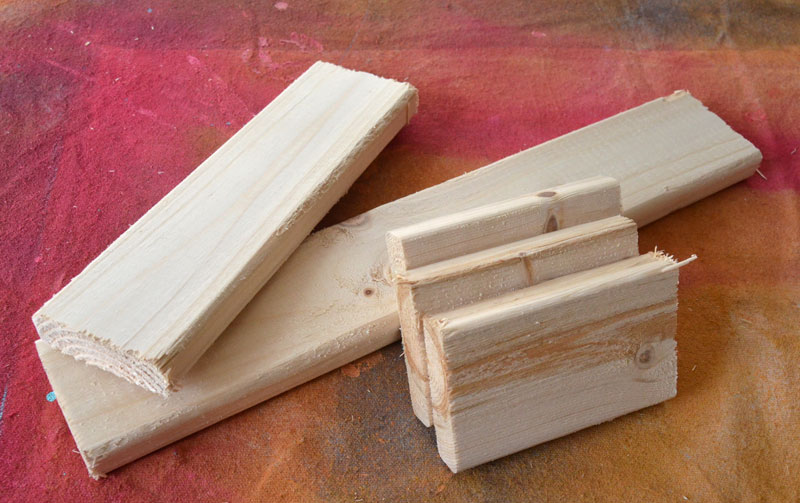
To make these shelves you will need a 1″ x 3″ x 6′. I used a cheap one that I already had in the basement. It’s not one of the “prime” boards so the edges are rounded and the finish is kind of rough. You know the ones I mean. I could have gone out and bought one of the “prime” boards, but decided to just use what I already had on hand. I just sanded a lot and used a lot of wood filler to give them a smoother finish in the end. But we’ll get to that.

You will also need (affiliate links):

  1. miter saw
  2. brad nailer w/1-1/4″ brads
  3. sander
  4. wood glue
  5. wood filler
  6. paint
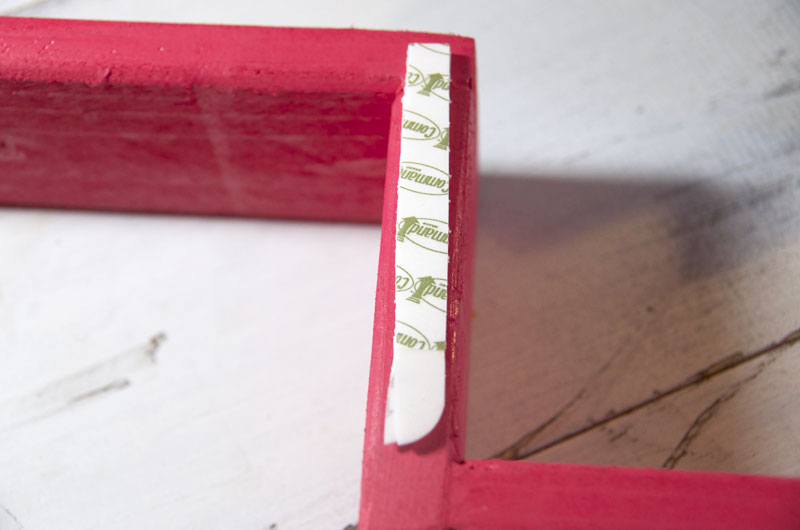
  7. Command strips for hanging

How to build a shelf for under $10

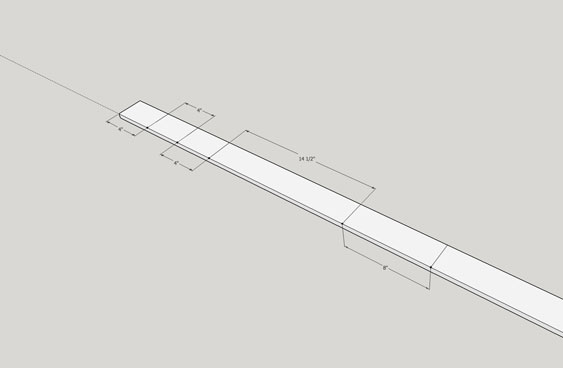
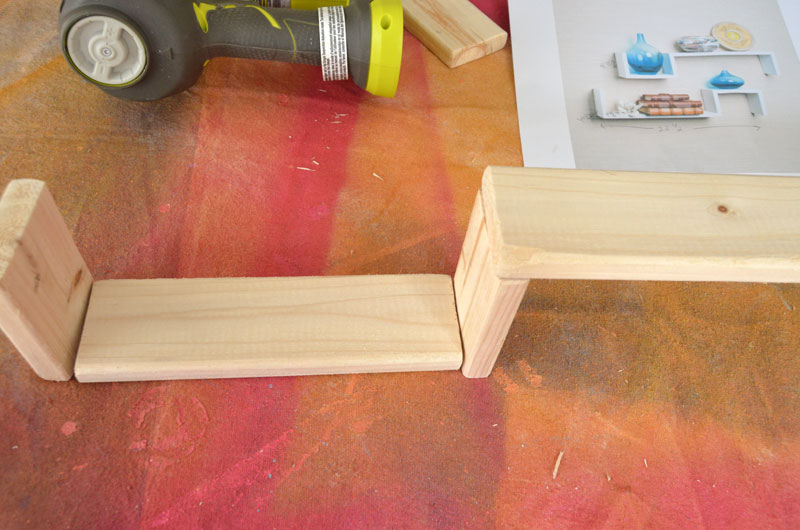
First we want to cut the 1″ x 3″ down. You will need to cut the board into three 4″ lengths, one 8″ length, and one 14-1/2″ length.

How to Build S Shelves for under $10

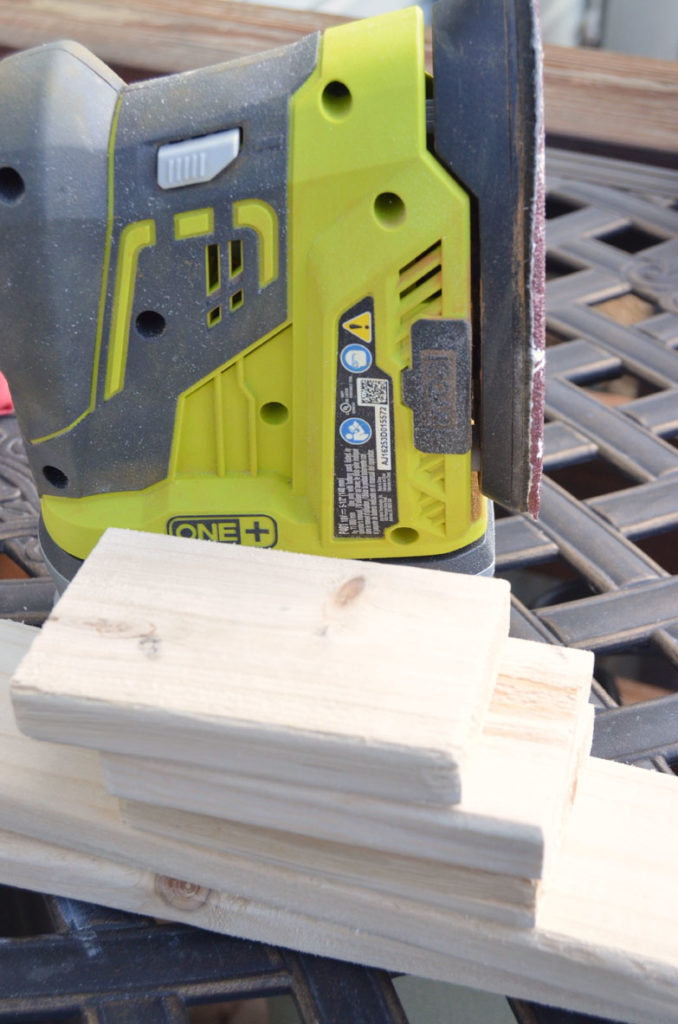
Now sand those pieces smooth. I used my Ryobi sander.

How to Build S Shelves for under $10

Dry-fit the pieces together to form the shelves.

How to Build S Shelves for under $10

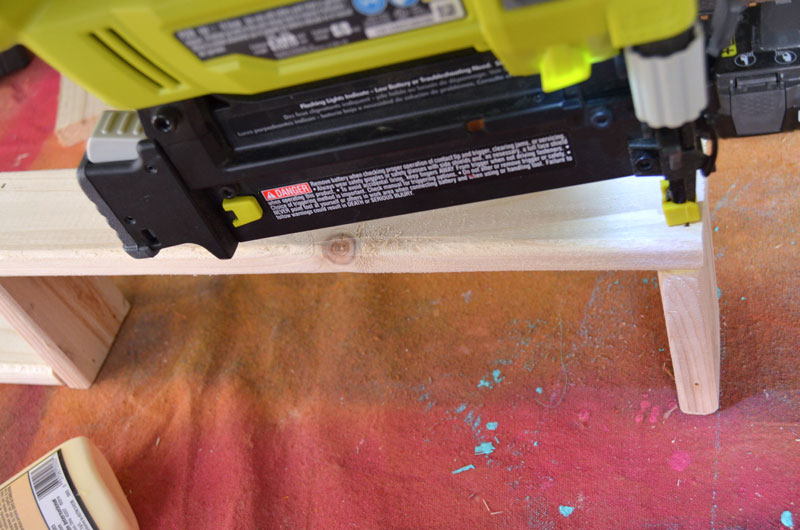
Attach the pieces using wood glue and brad nails.

How to Build S Shelves for under $10

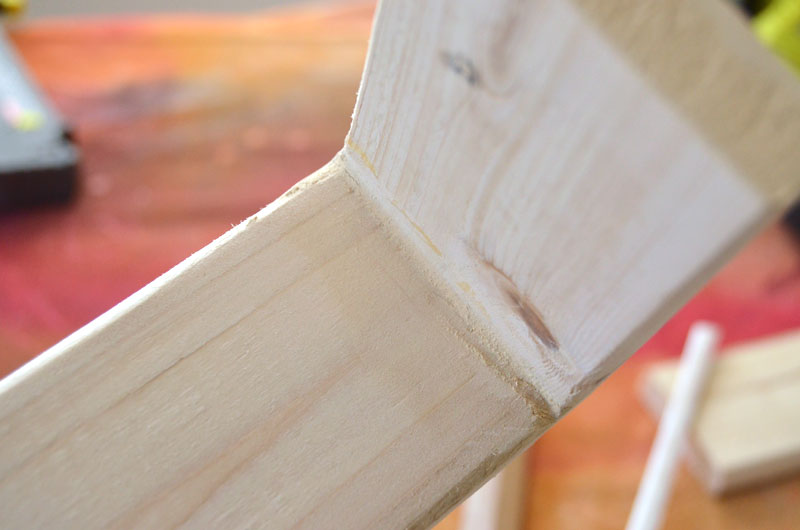
Fill the holes, seams, and gaps with wood filler and allow to dry before sanding.

How to Build S Shelves for under $10

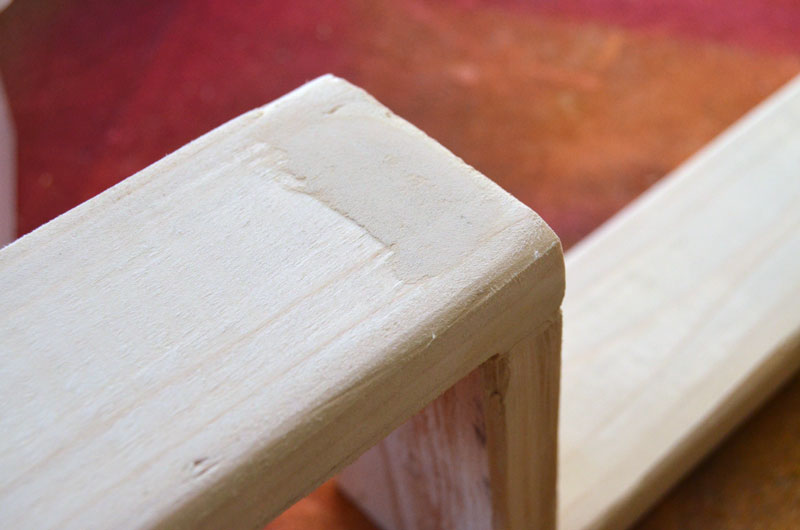
Sand entire shelf smooth before painting.

How to Build S Shelves for under $10

Now it’s time to paint. I used one of my favorite spray paints: Amy Howard Furniture Lacquer. This stuff is the bomb.

How to Build S Shelves for under $10

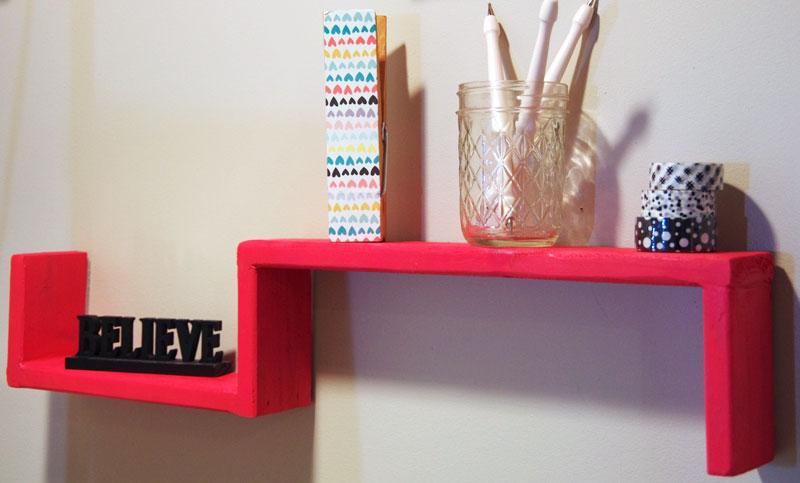
You’ve seen me use it in the laundry room makeover on the cabinet and my all-time favorite painted furniture piece: the sewing desk. I had just a little bit left from those two projects – just enough for these two shelves! I’m in love with that color: it’s called Begonia and I think it’s so bright and pretty!

TIP: I just have light-weight items on my shelf so I hang it up using Command Strips that I cut in half length-wise so they wouldn’t show.

How to Build S Shelves for under $10

Pretty cute, right? I love having that bright, fun pop of color next to me as I sit at computer.

How to Build S Shelves for under $10

pin-this-post

Now, as promised, here is the information about the $10 or Less Reader Challenge:

Power Tool Challenge Team Reader Challenge

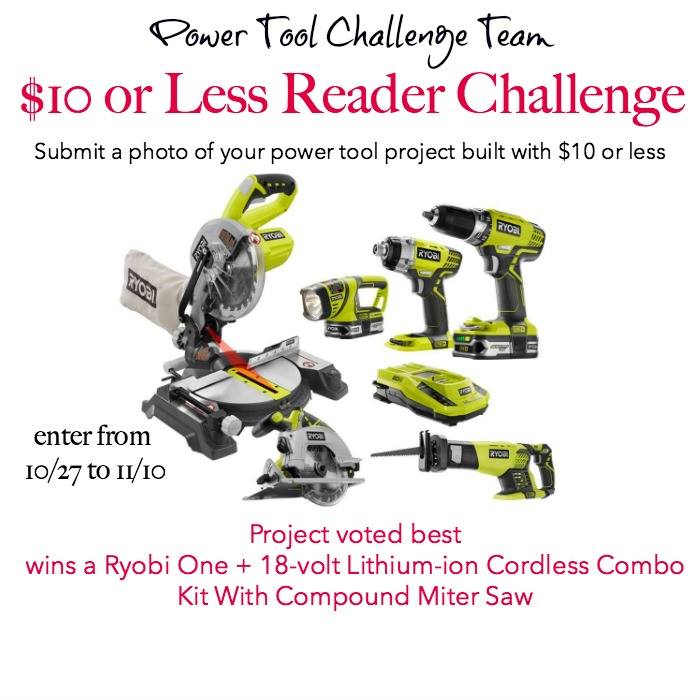
Reader Challenge Rules:

  1. The project can be made from a free item, reclaimed wood, anything as long as less than $10 was spent on it including hardware.
  2. At least one power tool has to be used to build it.
  3. The $10 Power Tool Project Challenge is open for entries from 10/27 through 11/10 with a linky. Upload a picture of your project. (If you need help uploading your project photo, send me an email at (add your own email address) and I will upload it for you 🙂
  4. Submit an old or new project as long as it was under $10 to build.
  5. Anyone can enter, the more the merrier 🙂
  6. Each participant can enter up to 3 projects.
  7. Winners must be 18 or older and live in the US.
  8. The Power Tool Challenge Team will vote on the best project and one winner will be selected. The winner will receive the Ryobi ONE+ 18-Volt Lithium-Ion Cordless Combo Kit with Miter Saw 6 tool package shown above.
  9. Void where prohibited.

power-tool-challenge-team-10-and-under-power-tool-diy-projects

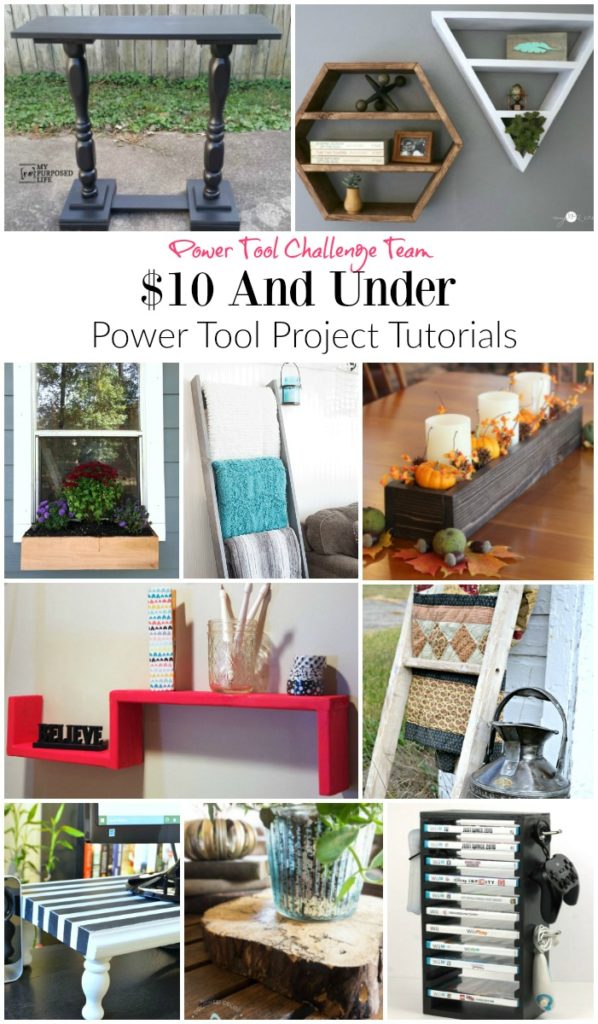
Double Pedestal Scrap Wood Table by My Repurposed Life

Hexagon and Triangle Shelves by My Love 2 Create

Window Box by Dogs Don’t Eat Pizza

Blanket Ladder by Domestically Speaking

DIY Wood Centerpiece Box by Virginia Sweet Pea

Easy DIY Shelves by Create and Babble

Vintage Peg Blanket Ladder by H2OBungalow

Computer Monitor Stand by Interior Frugalista

Wood Slice Plant Stand by Designed Decor

DIY Video Game Organization Station Holder by Kim Six Fix

If you like it, please share it!Share on pinterest
Pinterest
Share on facebook
Facebook
Share on twitter
Twitter
Share on stumbleupon
Stumbleupon
Share on google
Google
Share on linkedin
Linkedin
Share on reddit
Reddit

Filed Under: Build It, DIY, Tutorials, Woodworking

« One Room Challenge {Week 4}
Build a Custom Farmhouse Table »

Comments

  1. Wendi @ H2OBungalow says

    October 27, 2016 at 8:28 am

    These are great! Love the pop of color and the two different shapes of your shelves. I know they’ll look fabulous in your office! Pinned 🙂

    Reply
  2. gail says

    October 27, 2016 at 9:36 am

    Jeanie,

    What a great shelf idea! They look great “opposite” hanging on your wall. Very clever!

    pinning!

    gail

    Reply
  3. Karen @ Dogs Don't Eat Pizza says

    October 27, 2016 at 9:38 am

    So creative!! I love the color and shape – fun storage idea! Pinned!

    Reply
  4. Mindi says

    October 27, 2016 at 10:06 am

    These are super fun, and so creative! I love the pop of color too!

    Reply
  5. Marie from The Interior Frugalista says

    October 27, 2016 at 10:24 am

    I like the interesting layout you used for your DIY shelves and of course the pop of red (being my favorite color). One of these would be perfect for my grandson’s room!

    Reply
  6. Paula says

    October 27, 2016 at 11:45 am

    I love the fun design of these shelves and really love their hot pink color. Hanging them with command strips is a great tip!

    Reply
    • Printable Calendar says

      January 9, 2019 at 8:30 am

      What a great shelf idea! They look great “opposite” hanging on your wall. Very clever!

      Reply
  7. Maryann @ Domestically Speaking says

    October 27, 2016 at 12:08 pm

    What a fun shelf!

    Reply
  8. DeDe Designed Decor says

    October 27, 2016 at 5:07 pm

    Jeanie, How clever! They turned out great and I love the idea of filling your crack lines with filler.

    Reply
  9. the cape on the corner says

    October 31, 2016 at 12:48 pm

    this looks great, and actually reminds me of those shelves for cats to “get vertical” with their space. lol.
    b

    Reply
  10. Robin @ Redo It Yourself Inspirations says

    November 4, 2016 at 7:27 am

    Such a clever design! Great pop of color too.

    Reply
  11. Sahana says

    November 6, 2016 at 10:23 am

    Great tutorial. Thank you for linking up with us at #HomeMattersParty . We would love to see you again next week.

    Reply
  12. Erlene Amat says

    November 6, 2016 at 6:07 pm

    This would be a great way to use up all my wood scraps. Thanks for sharing this fun project on Merry Monday.

    Reply
  13. Nicole says

    November 7, 2016 at 3:06 pm

    Cool DIY shelves! Thank you for sharing your blog post with us at the #HomeMattersParty this week. Hope to see you link up again when the party opens on Friday at midnight EST!

    Reply
  14. Click Home says

    March 29, 2018 at 4:04 am

    Thanks for your great writeup. It was the activity bill them. Seem innovative to considerably added in agreeable from you! By the way, what exactly is be in contact?

    Reply

Trackbacks

  1. DIY Blanket Ladder under $10 - Domestically Speaking says:
    October 27, 2016 at 8:00 am

    […] Easy DIY Shelves by Create and Babble […]

    Reply
  2. DIY Wood Slices! ~- Designed Decor says:
    October 27, 2016 at 8:01 am

    […] Easy DIY Shelves by Create and Babble […]

    Reply
  3. Double Pedestal Sofa Table - My Repurposed Life™ says:
    October 27, 2016 at 10:12 am

    […] Easy DIY Shelves by Create and Babble […]

    Reply
  4. Double Pedestal Table - My Repurposed Life® says:
    January 7, 2019 at 9:36 pm

    […] Easy DIY Shelves by Create and Babble […]

    Reply
  5. How to Make a DIY Wood Box Centerpiece for Less Than $10 - Sweet Pea says:
    October 20, 2020 at 8:54 am

    […] Easy DIY Shelves by Create and Babble […]

    Reply

Leave a Reply Cancel reply

Your email address will not be published. Required fields are marked *

About Jeanie

About Jeanie

Welcome to Create & Babble. This is where I share my loves: crafting, hiking and camping

Read more about me here

Categories

Archives

AntiqueFarmHouse
Zots Craft Adhesive Dots

Amazon Associates Disclosure

Jeanie Hevener Emmert is a participant in the Amazon Services LLC Associates Program, an affiliate advertising program designed to provide a means for sites to earn advertising fees by advertising and linking to amazon.com.


hobby lobby

Copyright © 2025 · Site by Pretty Pink Studio

Copyright © 2025 · Glam Theme on Genesis Framework · WordPress · Log in

This website uses cookies to improve your experience. We'll assume you're ok with this, but you can opt-out if you wish.Accept Reject Read More
Privacy & Cookies Policy

Privacy Overview

This website uses cookies to improve your experience while you navigate through the website. Out of these, the cookies that are categorized as necessary are stored on your browser as they are essential for the working of basic functionalities of the website. We also use third-party cookies that help us analyze and understand how you use this website. These cookies will be stored in your browser only with your consent. You also have the option to opt-out of these cookies. But opting out of some of these cookies may affect your browsing experience.
Necessary
Always Enabled
Necessary cookies are absolutely essential for the website to function properly. This category only includes cookies that ensures basic functionalities and security features of the website. These cookies do not store any personal information.
Non-necessary
Any cookies that may not be particularly necessary for the website to function and is used specifically to collect user personal data via analytics, ads, other embedded contents are termed as non-necessary cookies. It is mandatory to procure user consent prior to running these cookies on your website.
SAVE & ACCEPT