


Yes, that’s one long title right there! And those are the exact words that I used in my google search and found absolutely no answer on how to hang a pegboard WITHOUT drilling into cinder block. I can’t believe I’m the only one who wants to hang a pegboard without drilling into cinder block! So I had to come up with my own way.

If you want to hang a pegboard in your basement without drilling into cinderblock (are they called cinderblock or cement block? Is there a difference?) HERE’S HOW:
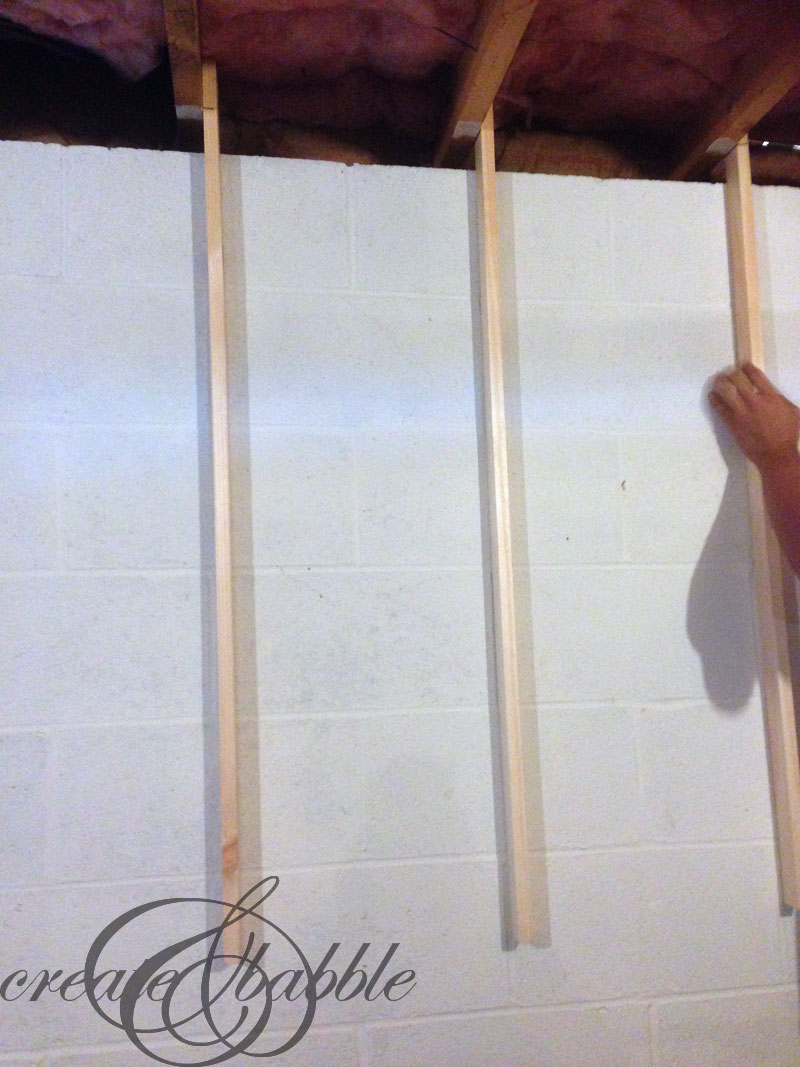
Get yourself some 1″ x 2″ x 10′ boards and cut them in half.
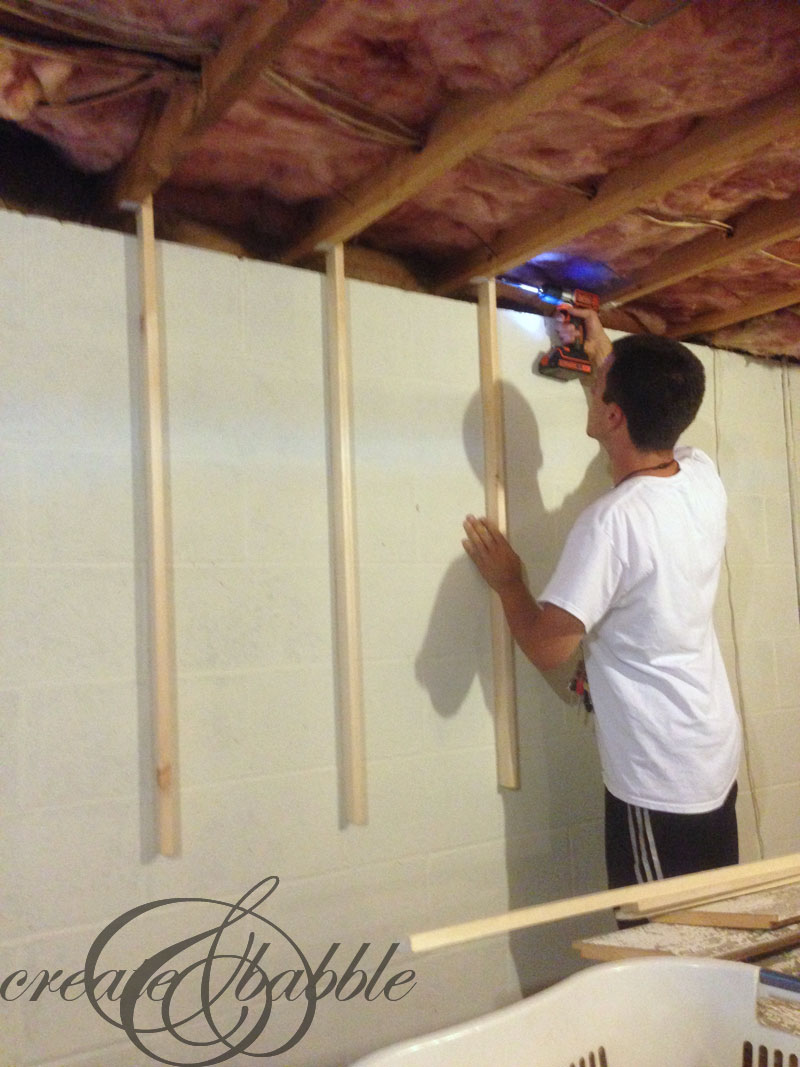
Then grab your tall, dark, and handsome son (don’t have one? you can borrow mine ; ) and have him stand on a chair, or more safely: a step ladder, and screw the 1″ x 2″ x 5′ boards into the floor joists, right up against the cement block wall. Keep in mind that my basement is unfinished so the ceiling of the basement IS the floor joists. Well, floor joists and insulation. We used two 2-1/2 wood screws to attach each 1″ x 2″ boards to 5 floor joists.
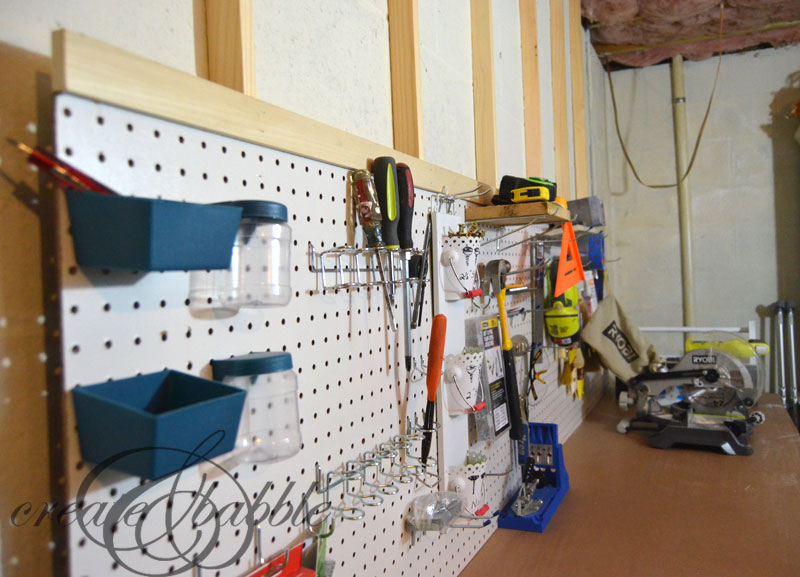 Staple gun or nail your pegboards to the 1″ x 2″ boards. I used 2 sheets of 2′ x 4′ pegboards that I bought at Home Depot. Nail or staple a 1″ x 2″ board across the top to give the pegboard a framed, finished look.
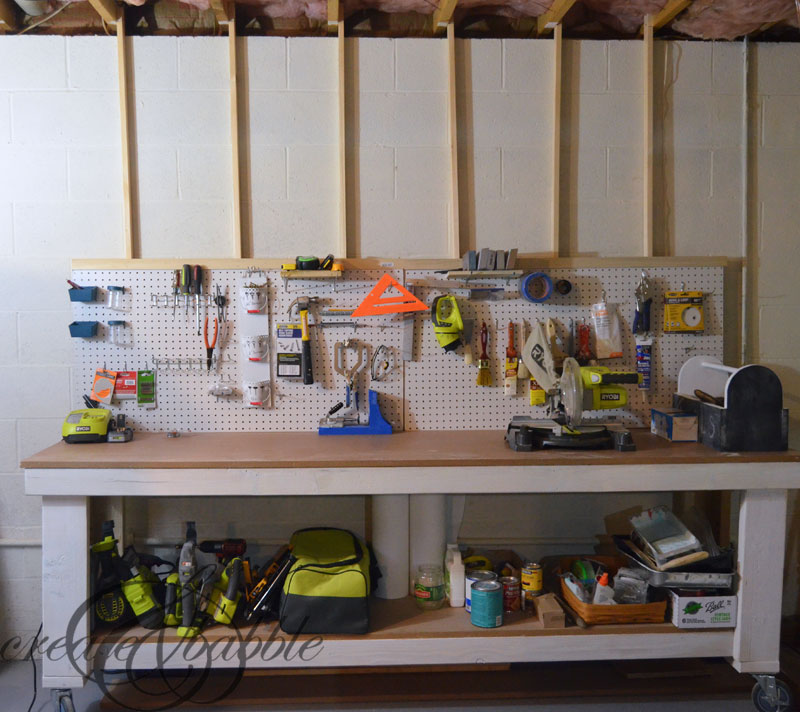
Since I’m only about five feet tall, it worked out perfectly for me to have the bottom of the pegboard right up against the top of my workbench. If you are taller, then you’ll want to hang it higher or add additional pegboards above the lower ones.
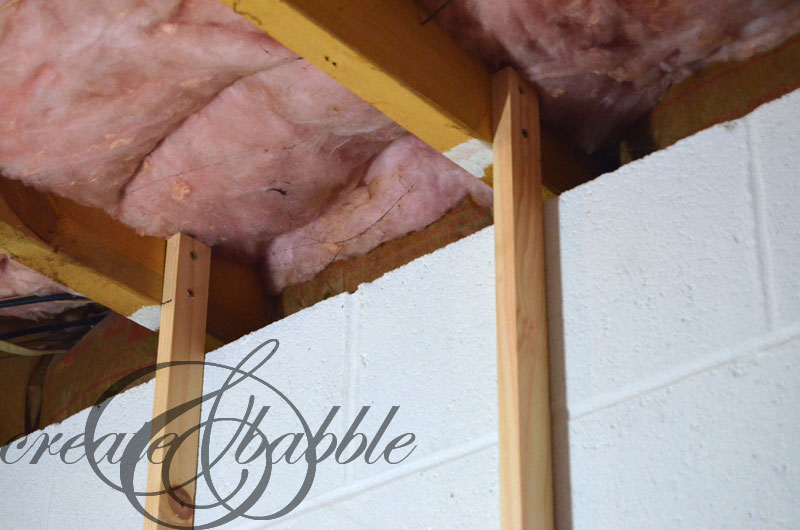 Here’s a close up of the 1″ x 2″ boards screwed into the floor joists above. Since I don’t plan on hanging heavy tools on my pegboard, I am confident that my pegboard will hold all of my small tools and DIY supplies, like paint brushes, screw drivers, etc. All of the heavy stuff is on the shelf of my workbench.
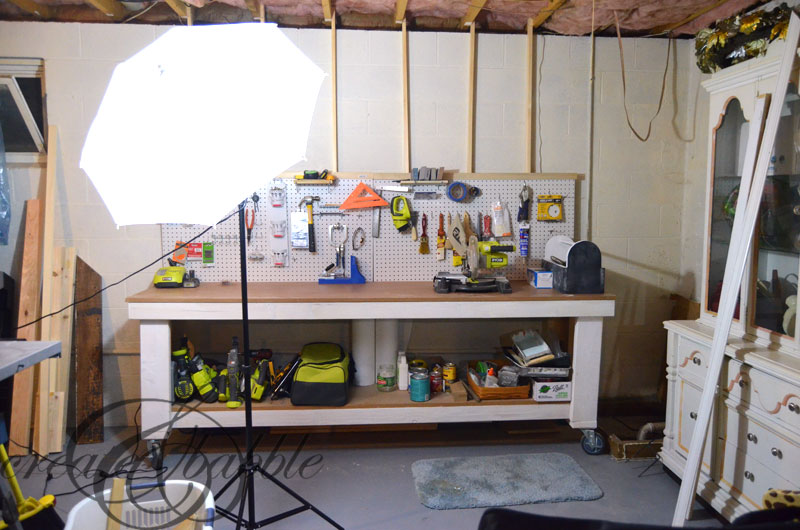
And just for fun, here’s a behind the scenes look (and a peek at my somewhat cluttered basement). I need to get some lights hung and maybe find one of those padded floor mats. That basement floor is hard and cold!
So what do you think of this solution for hanging a pegboard without drilling into the cement block walls? If you like it, feel free to pin it!


Brilliant! I’m off to look at my work bench now.
Yeah! I’m going to try this asap! …or I’ll forget… so I intend to go to Home Depot this week and no later than that!
Excellent idea! Thank you so much! I have a lovely, tri-fold pegboard ‘cabinet’ that was my father-in-law’s. I have wanted to hang it in my basement workshop for some time now but did not know how to go about doing it. I am going to try your technique. Wish I could borrow your son but my husband will have to do 🙂 Thanks for sharing this. I particularly appreciated the pics.
Thanks Judy, let me know if this method works for you!
Hmm. Good idea. Couldn’t you also just roll out your work bench and attach your 1 X 2’s to the back of it? Then if you ever decide to drywall your ceiling you don’t have to detach the boards.
This looks like an older post but this is GENIUS! I have been making my unfinished basement more “user friendly”! That includes a workspace with more pegboard! YOU HAVE MADE my night! Can’t wait to do this! Thank you!
Perfect! I was looking for exactly this since I am planning to make the kids a pegboard marble run and don’t want to drill into the basement cement block for each project. Thanks for posting this.
Thank you for this!! Like you I had put this into google so many times and came up empty! So today I put it into Pinterest and low and behold I found you!
Love this! I just hit the pegboard bonanza on Craigslist today. I’ll have to try this!
My 12-year-old daughter and I put this up yesterday in the basement. Followed your directions to a tee, except used 4 pegboards instead of 2. Came out perfect.
I sincerely appreciate that you posted this article and now I know I can save a few $$$ by DIY with this product. thank you!
This is absolutely BRILLIANT! Thank you for this tip. I don’t like punching holes in my walls and I was thinking of getting the Ikea Skadis pegboard system.
I stumbled across your post when searching “basement craft room ideas”, and this is the post I didn’t know I needed bc I had the same dilemma: hanging a pegboard without drilling into the cinderblock since we are renting…genius! Thank you!
I did this in my craft space on a smaller scale. Love it! Now I’m trying to figure how to hang some cabinets in my laundry area following the same method. Will it work?
Looks nice but it may not work for me because there’s a rat’s nest of electrical wires all around the joists.
Has your son painted the wood to match the wall yet?