


Now that I’ve had my heat press for almost six months I thought I’d write to tell you what I think about it. I’ll also share some tips I picked up along the way and also give you my opinion on the whole heat press versus iron decision. So if you are on the fence and trying to decide whether you should spend the $ and get a heat press or just want to learn how to use a heat press, read on!
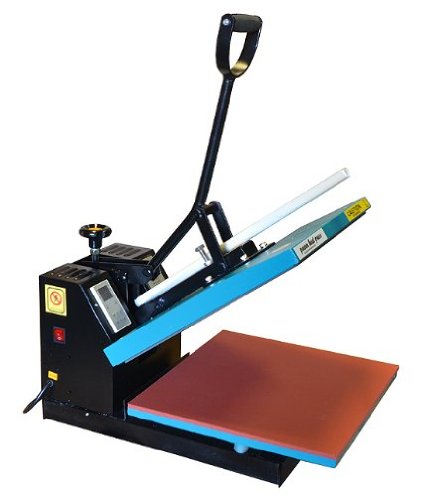
This is my heat press. It’s the Fancierstudio Industrial-Quality Digital 15-by-15-Inch Sublimation T-Shirt Heat Press. (affiliate link)
First of all: it’s heavy, so you will need a fairly strong and sturdy spot for your heat press. You’ll also need to be able to open it and get at the sides easily.
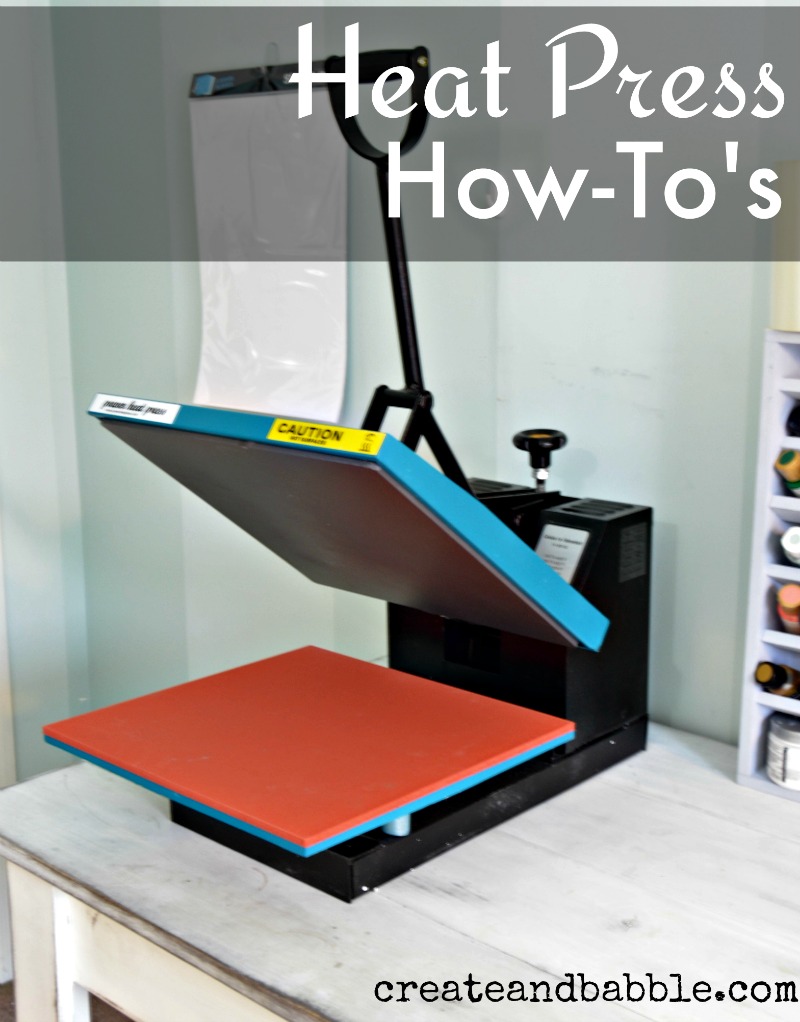
Mine is sitting on the end of the farmhouse table in my craft room for now. I have plans in the works to build a small stand specifically for it with storage for heat transfer vinyl. (Of course I’ll share those plans with you!)
I think the easiest way to show you how to use this heat press is to actually use it! Follow along as I make a birthday shirt for my grandson.
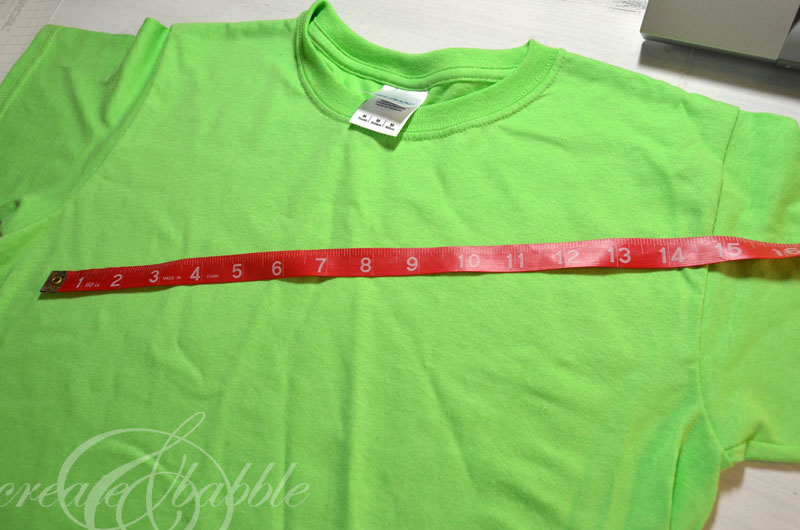
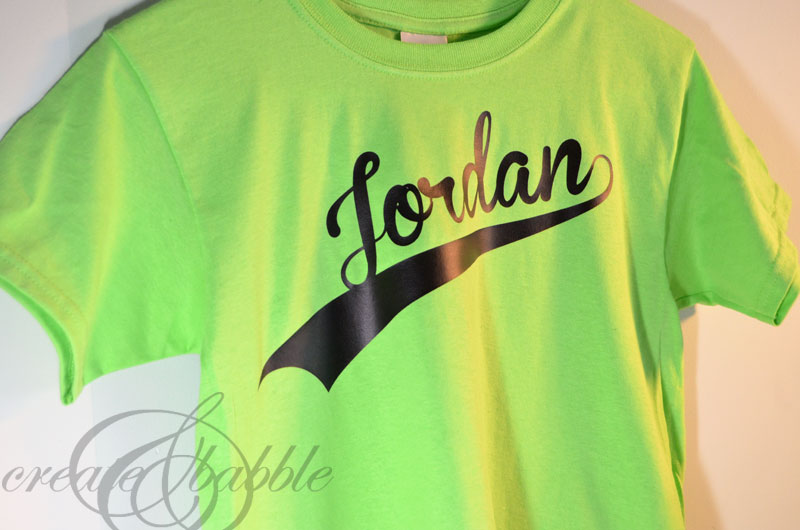
First I measure how big to make the design for the shirt. I decided 12″ long by about 6″ high would be good so I draw a 12″x 6″ rectangle in Silhouette Studio. Inside that rectangle, I type “Jordan” in the Brannbol Fet font. (for the swoosh at the end, I type a zero) I also type a “7” for Jordan’s age for the back of the shirt.
IMPORTANT: Don’t forget to reverse the images before cutting!!!
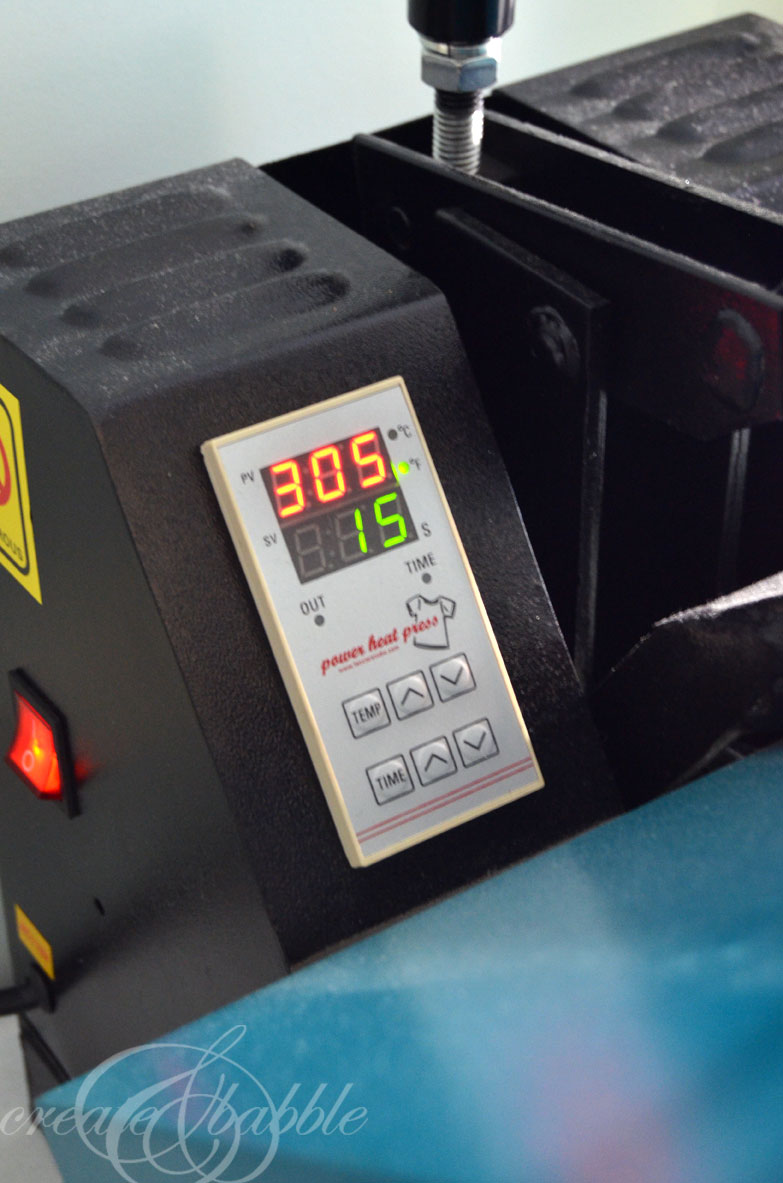
Next, I turn on the heat press and set the temperature and timer recommended by the HTV manufacturer. In this case: 305 degrees for 15 seconds.
TIP: place the shirt in the heat press for a few seconds to 1. get out the wrinkles and 2. to remove any moisture in the fabric
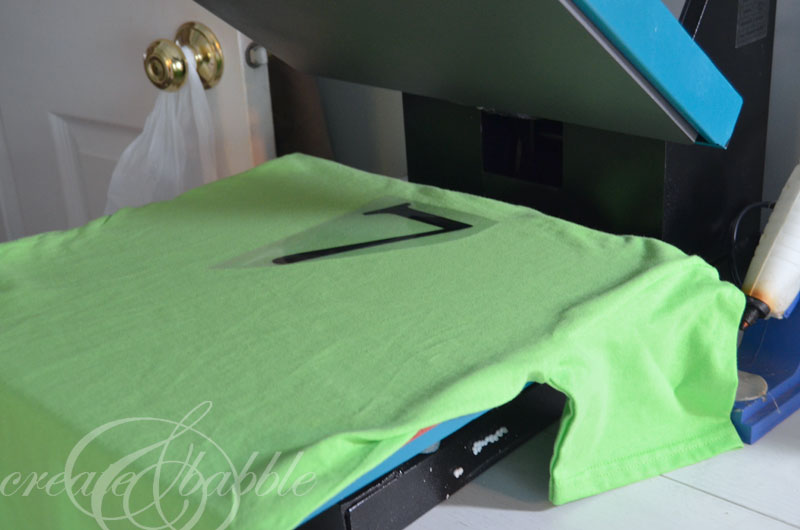
Now I place the design on the shirt and place the shirt on the bottom plate.
TIP: I make sure the neck hole, side seams, and sleeve seams are off the plate (if possible) to ensure the best adhesion.
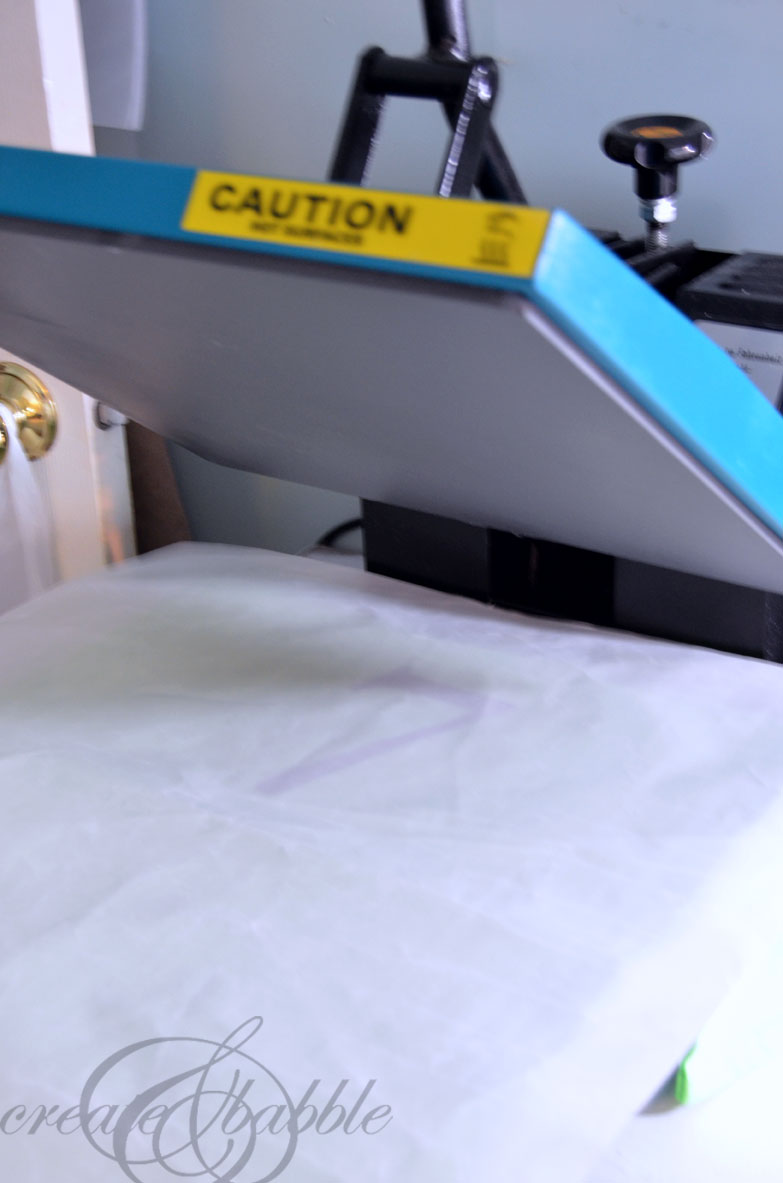
Before closing down the top plate, I place the teflon sheet (provided with the heat press) on top of the shirt.
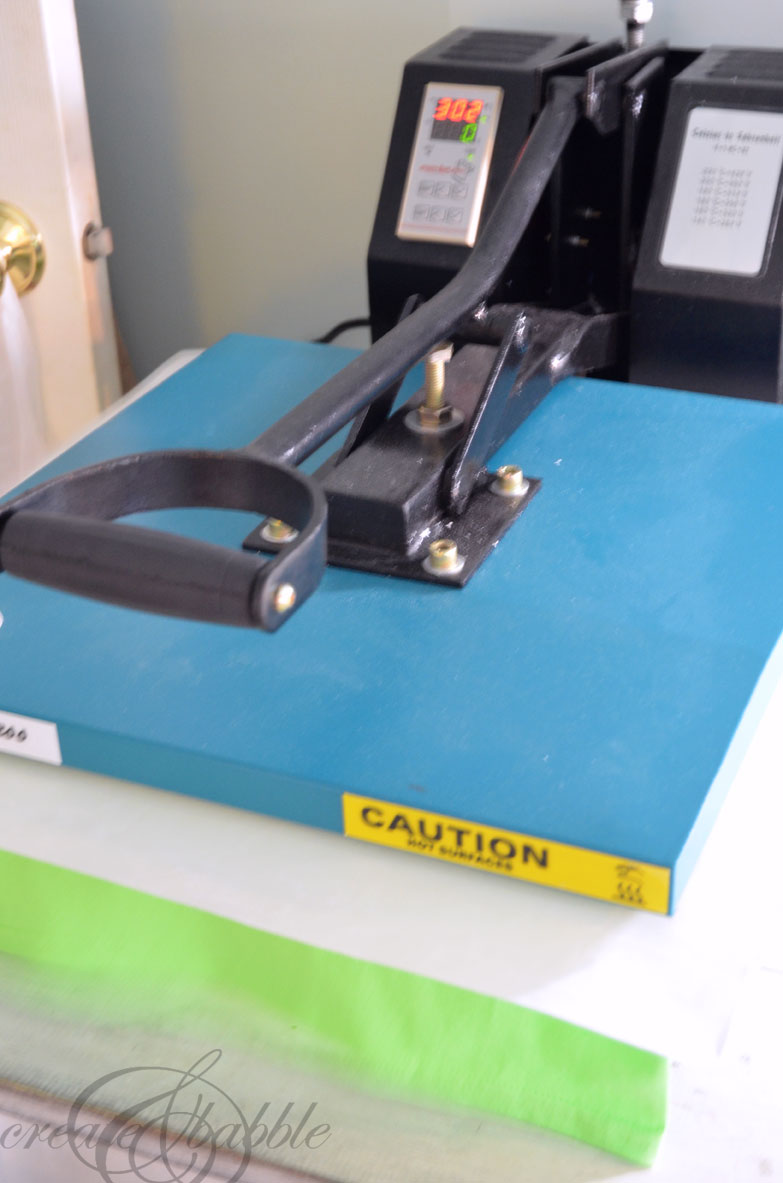
Now I can close the top plate. Pushing down on the handle locks it firmly. Once the timer goes off, I remove the shirt . . .
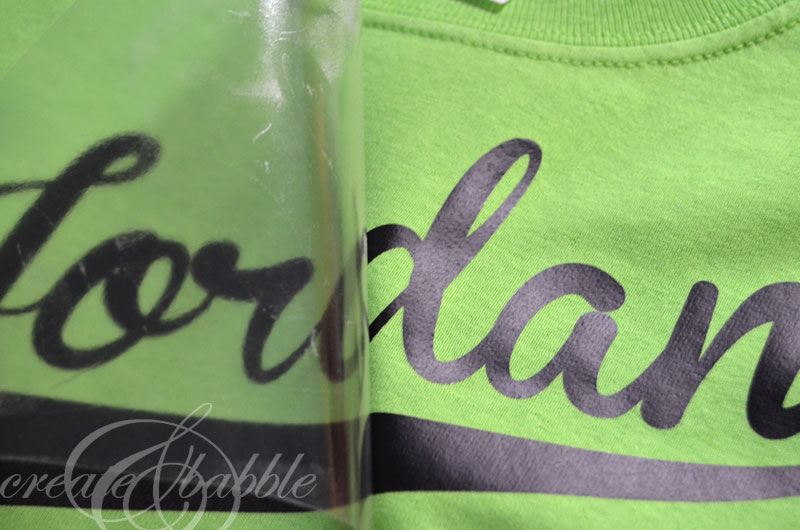
. . . . and peel off the plastic backing. It lifts right off with no effort.
TIP: turn shirt inside out and press for a few seconds to ensure a long-lasting adhesion.
Now. As for the iron vs. heat press decision? For me, it was easy. I love to create one-of-kind pieces for my family and hope to someday sell items. The creations that I made with an iron that were worn more than a few times had the peeling up problem. The time-savings was important to me too. There’s a lot of time and pressure involved with using an iron. But if you only make a few items a year, and you can get good adhesion with your iron, then an iron is probably good enough for you. But if you make several items a year, including larger-than-your-iron designs, have problems with peeling HTV, or plan to sell your items, then a heat press is probably a wise investment for you.
If you are in the market for a heat press or are thinking about it, I suggest that you look at Amazon’s large selection. That is where mine came from. If you’re a Prime member, you will save a ton with the free shipping.
Please feel free to Pin this post for future reference!


I just received my heat press. What type of transfer paper or tape do I need? Thanks!
Hi, I was just wondering what machine do you use to print your graphics? Also, do I need anything special for the transparent parts (for example, the hole in the ‘a’ or the space in the letter ‘n’)?
Hello, thanks for all the advice/help… I have my heat press and printer however the paper I’ve been using is just some cheap paper from Walmart that I can only use on whites unless I can’t completely cut out the background? Can u please tell me if its vinyl paper you use and if so do I need to buy the cutting machine because it looks like u left excess vinyl/plastic and it came off easily…please write me asap I’m so anxious to get better! Thanks!!
You can use a silhouette cameo for cutting your images… Search amazon for offers.
Thanks for the step by step directions. I have been researching and seems like Hotronix is the brand to own but its very very expensive. I clicked on your affiliate link and saw the one on Amazon. Does the heating element heat the entire top platen? Meaning the heat is evenly distributed on all sides so the transfer will stick longer? Just curious with other brands but the price is great!
Hi, I’m planning to buy a heat press. I still don’t really understand what else I need to do my shirts. I know I need the teflon sheet but do I also need the vinyl sheet to print my own designs or what type of paper I need? Also can I make my shirt designs on any computer and print them?
Great article and a must read for all the beginners who are about to start printing with a Heat Press. You can always rely upon Splashjet sublimation ink for your print business. Splashjet inks ensure minimum downtime, clog-free nozzles & excellent print-head run-ability.
Thanks for the step by step directions. Anyway, I am planning to buy one heat press machine for my new business. But, I wonder which one to choose for. Some of my friends suggest me to buy FancierstudioBB1515 heat press machine. Anyway, how about your ideas?
Very nice article. How do you compare your user’s experience to the cricut easy press? Is the result off the same quality?
I would love to hear from you!
I also have one recommendation. It is considered a good practice to be sure that the fabric to print doesn’t have any. In general, I would advise to wash them before printing the vinyl.
Best,
Ali
I have read your blog, it was written very well, but if someone is looking for printing ink, please visit https://splashjet-ink.com/