• Home
  • About
  • Contact
  • Partner
  • Privacy Policy
    • Facebook
    • Instagram
    • Pinterest
    • Twitter
    • YouTube

Create and Babble

  • DIY
    • Home Improvement
    • Upcycle
    • Furniture Makeovers
    • Build It
  • Craft
    • Silhouette
    • Sewing
    • Wedding DIYs
    • Seasonal
    • Gifts
  • Lifestyle
    • Bicyling
    • Travel
    • shopping

STAY UP TO DATE

Get the latest crafting and DIY tips, tricks and tutorials delivered straight to your inbox!

How to Make Floating Shelves

February 4, 2015

If you like it, please share it!Share on pinterest
Pinterest
Share on facebook
Facebook
Share on twitter
Twitter
Share on stumbleupon
Stumbleupon
Share on google
Google
Share on linkedin
Linkedin
Share on reddit
Reddit

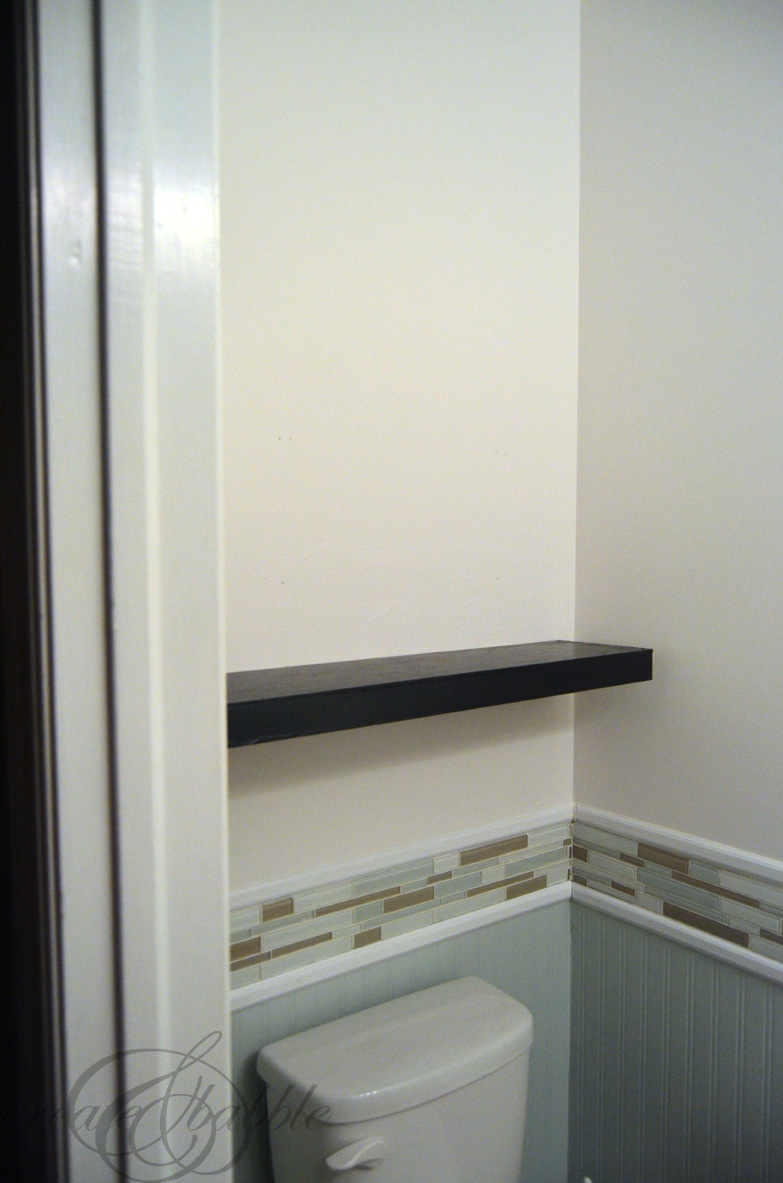
Remember my powder room makeover? I never really got around to totally finishing it. Just this past weekend I finally got the second coat of paint on the walls. (Please tell me I’m not the only one with “almost finished projects” around the house.) Now that the walls are painted it’s time install some shelving. I always knew that I wanted to make and install floating shelves on the blank wall behind the toilet.

how to make floating shelves

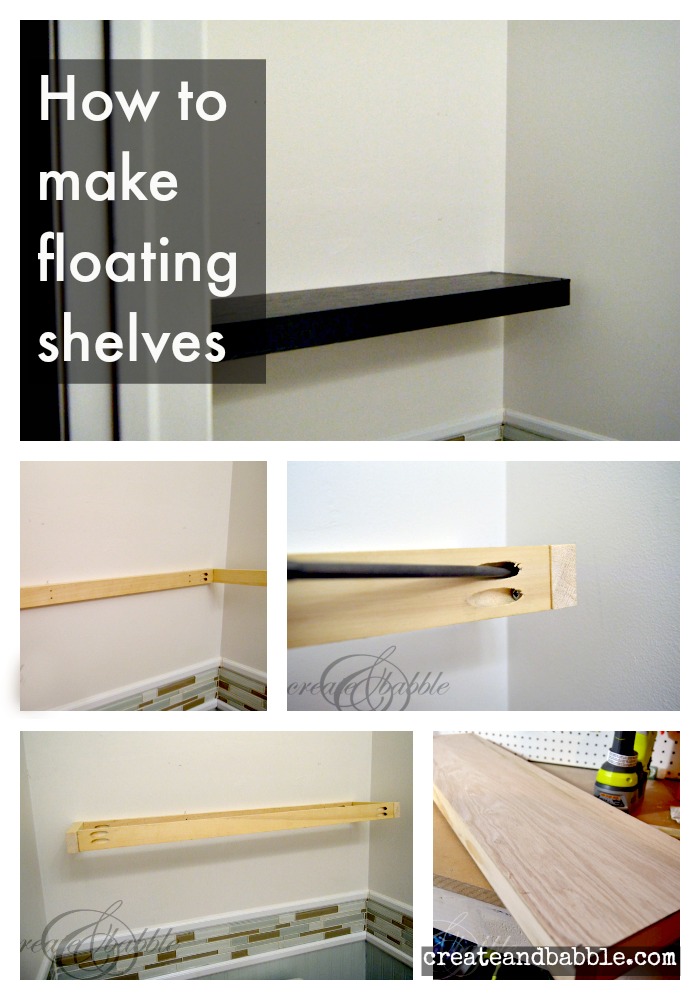
So after I got home from work yesterday, that’s exactly what I did. I made a floating shelf. I have one more to make and since these shelves come together pretty quickly, I should have one more made and hung by the end of the week. That’s how quick and easy these floating shelves are to make. And since I have a ton of leftover wood from other projects, these shelves didn’t cost me anything to make. If you have to buy the wood, I would estimate the cost to be less than $20.

Here’s what I used to make my 32″ wide floating shelves (affiliate links):

  • 1/4″ plywood, cut into two 7-1/2″ x 32″ strips (top and bottom of shelf)
  • 1″ x 2″ select pine boards, cut: 1 @ 29″, 1 @ 30-1/2″, 1 @ 32″, 2 @ 7-1/2″  and 4 @ 7″
  • Ryobi Narrow Crown Stapler
  • Kreg Jig
  • Ryobi Drill
  • 1-1/2″ pocket screws
  • 2″ wood screws
  • wood glue
  • stud finder
  • laser level
  • level
  • tape measure
  • pencil

And here is a step-by-step instructions for assembling and mounting the shelf:

floating-shelves

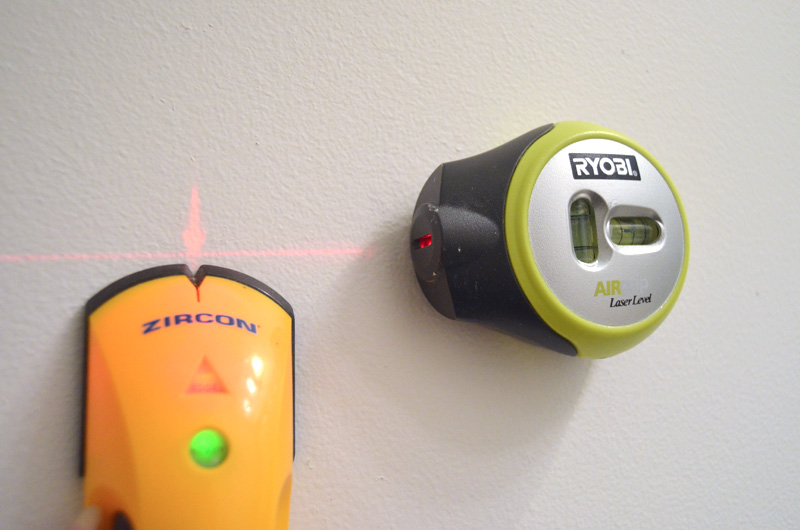
Determine where you want your shelf to be installed. Find and mark the studs with a pencil along the line from the laser level.

kreg-jig-3

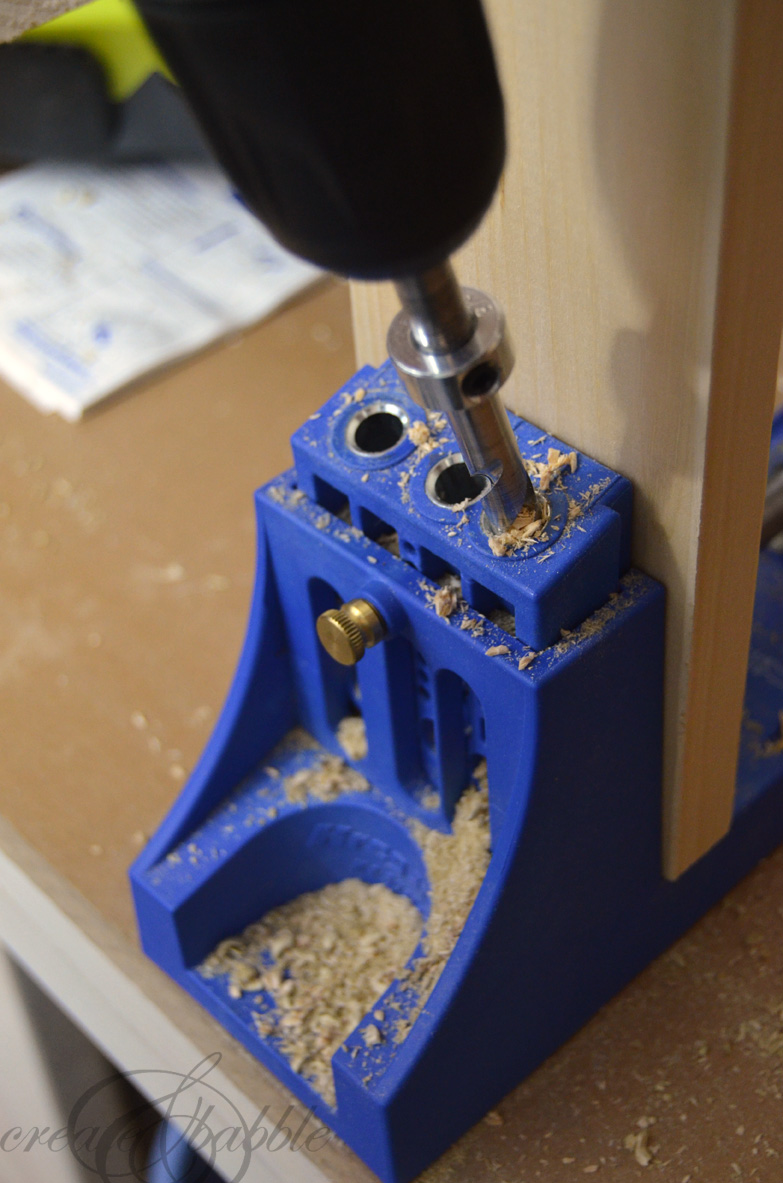
Drill pocket holes on the ends of  the 29″ 1 x 2 board. (The photo above is from a different project, but you get the idea ; )

floating-shelves

Using 1-1/2 pocket screws and wood glue, assemble the 3-sided skeleton of the floating shelf.

floating-shelves

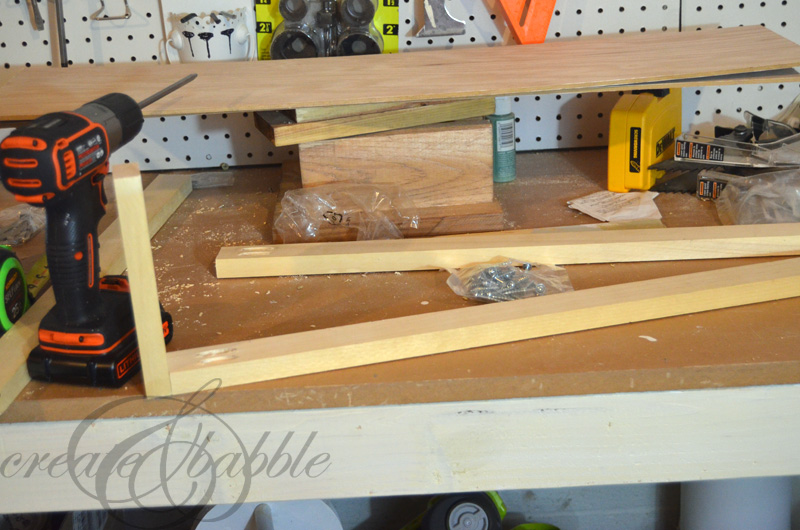
(You will attach the middle braces after the frame is screwed into the wall.)

diy-floating-shelves

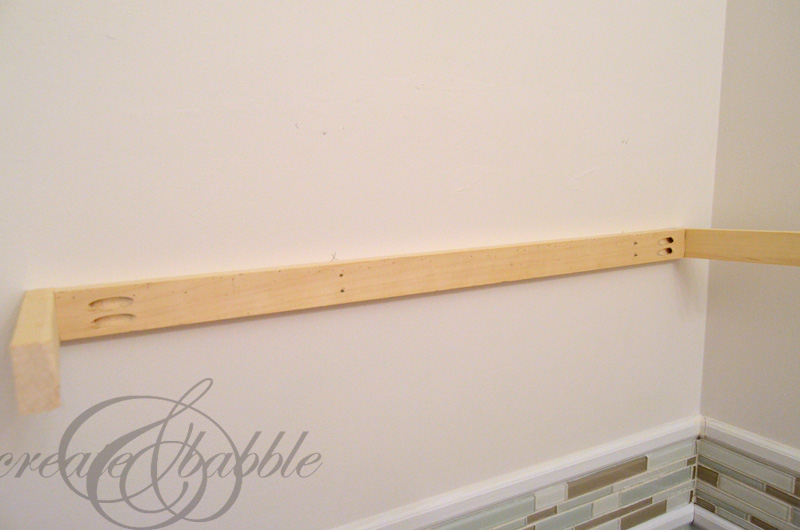
Attach the 3-sided frame to the wall using the wood screws at the marked stud locations.

skeleton of floating shelf

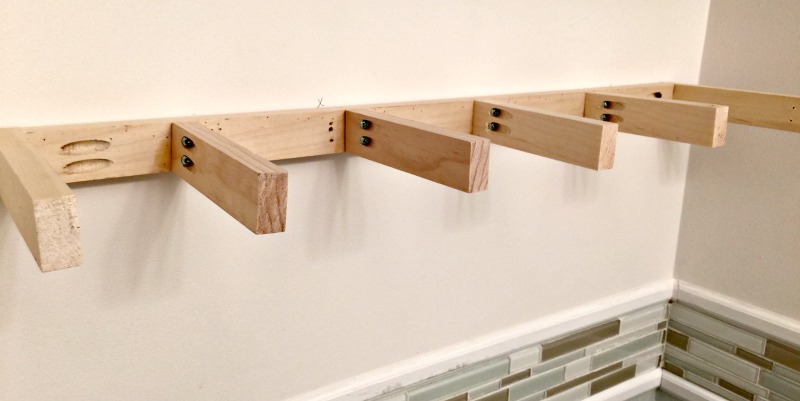
Now you can attach the 7″ middle braces with pocket hole screws.

diy-floating-shelves

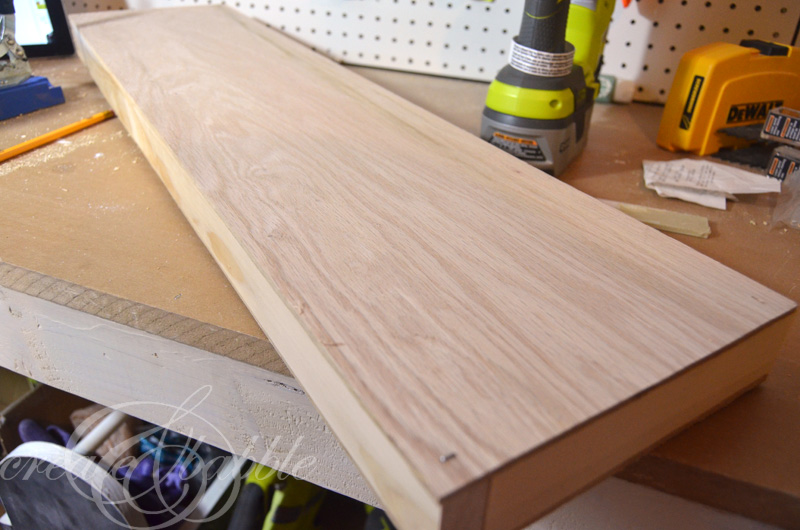
Assemble the shelf by sandwiching the 32″ 1×2 between the two strips of plywood as shown in the photo above. I attached my shelf using wood glue and a narrow crown stapler, but you could also use brad nails.

sliding floating shelf shell onto skeleton

It’s important that all of the edges are even so that it fits snugly over the frame on the wall. I held my breath for this part, but it fit perfectly!

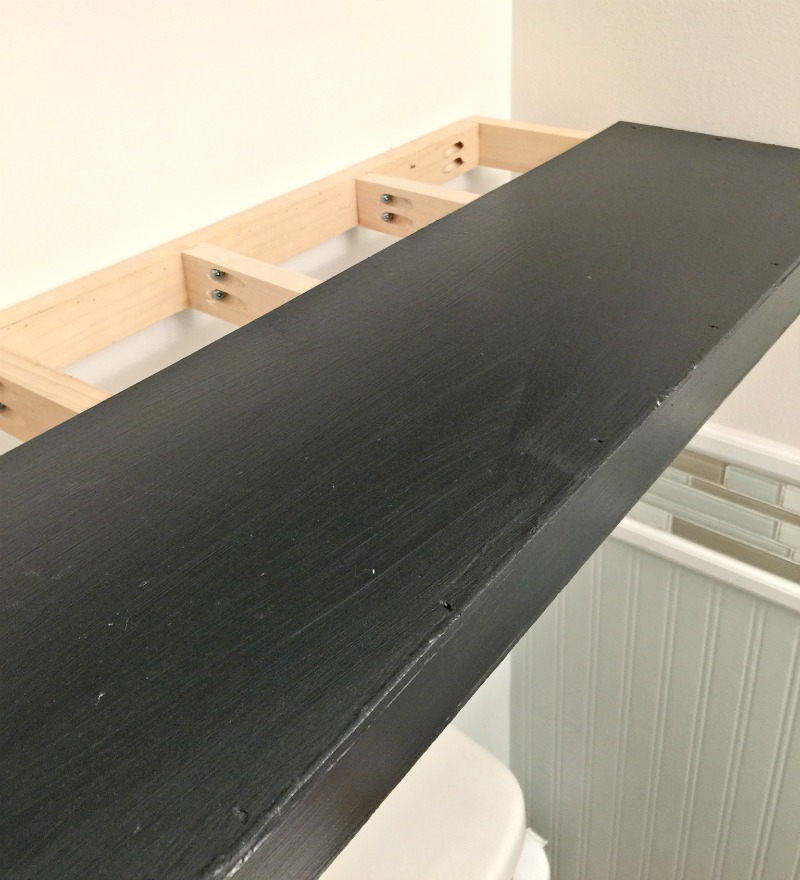
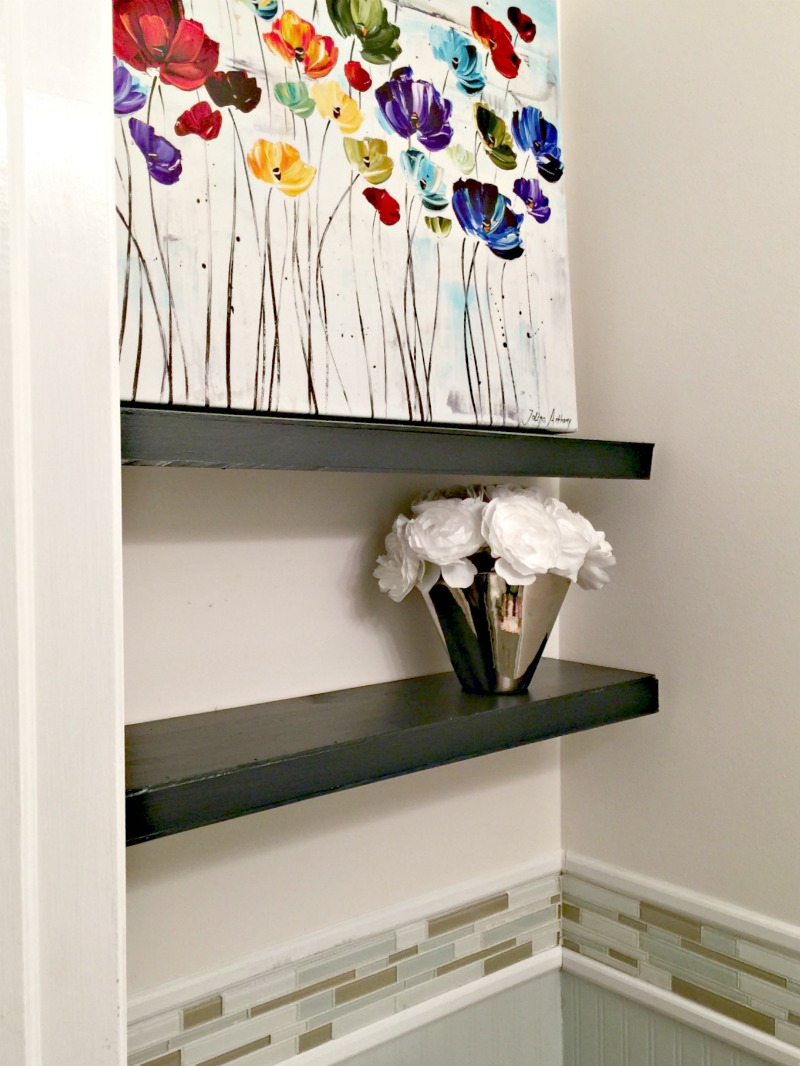
All that’s left to do is sand, prime and paint.

diy-floating-shelves-createandbabble.com

One done, one to go! And then go shopping for some pretty things to put on my shelves.

As soon as the other shelf is done, I’ll be back to work on the armoire that I’m building.  I’ve been showing update photos of the armoire on Instagram.

floating shelves

Disclaimer: These shelves are not built to hold heavy items. I will use them to store baskets of toilet paper, hand towels, and light-weight accessories.

Disclosure: This post contains affiliate links.

If you like it, please share it!Share on pinterest
Pinterest
Share on facebook
Facebook
Share on twitter
Twitter
Share on stumbleupon
Stumbleupon
Share on google
Google
Share on linkedin
Linkedin
Share on reddit
Reddit

Filed Under: Build It, DIY, Tutorials

« Valentine’s Day Onesie
Applique Pillow – A Silhouette Tutorial »

Comments

  1. Jason Swartz says

    February 11, 2020 at 10:34 pm

    Looks nice! Why did I see a Rigid drill. when you say ryobi ? LOL :~)

    Reply
  2. myperfectresume review says

    November 13, 2021 at 2:41 am

    Furthermore, because these are found at Ikea, it also comes with two hooks to hang them on your wall. They’re incredibly easy to mount on the wall and look much more elegant than a wobbly set of shelves from any other store–plus it conveniently holds items above a desk or table if needed.

    Reply
  3. Stefan says

    June 4, 2022 at 1:11 am

    well post

    Reply
  4. camtasia discount says

    June 4, 2022 at 1:21 am

    I really like the given information is very interesting as like its article name floating shelves you make such a nice blog I read you some previous article, you are such an excellent wring skill, and did the great work with your articles. thanks for this all useful content.

    Reply

Trackbacks

  1. Applique Pillow - A Silhouette Tutorial says:
    February 7, 2015 at 4:41 pm

    […] I was walking through the aisles of HomeGoods yesterday looking for decorative pieces for the floating shelves that I recently built and installed in my powder room, I came across an applique pillow in the baby […]

    Reply
  2. How To Make A Shelf says:
    May 14, 2020 at 2:05 am

    […] Download Plan More @ createandbabble.com […]

    Reply

Leave a Reply Cancel reply

Your email address will not be published. Required fields are marked *

About Jeanie

About Jeanie

Welcome to Create & Babble. This is where I share my loves: crafting, hiking and camping

Read more about me here

Categories

Archives

AntiqueFarmHouse
Zots Craft Adhesive Dots

Amazon Associates Disclosure

Jeanie Hevener Emmert is a participant in the Amazon Services LLC Associates Program, an affiliate advertising program designed to provide a means for sites to earn advertising fees by advertising and linking to amazon.com.


hobby lobby

Copyright © 2025 · Site by Pretty Pink Studio

Copyright © 2025 · Glam Theme on Genesis Framework · WordPress · Log in

This website uses cookies to improve your experience. We'll assume you're ok with this, but you can opt-out if you wish.Accept Reject Read More
Privacy & Cookies Policy

Privacy Overview

This website uses cookies to improve your experience while you navigate through the website. Out of these, the cookies that are categorized as necessary are stored on your browser as they are essential for the working of basic functionalities of the website. We also use third-party cookies that help us analyze and understand how you use this website. These cookies will be stored in your browser only with your consent. You also have the option to opt-out of these cookies. But opting out of some of these cookies may affect your browsing experience.
Necessary
Always Enabled
Necessary cookies are absolutely essential for the website to function properly. This category only includes cookies that ensures basic functionalities and security features of the website. These cookies do not store any personal information.
Non-necessary
Any cookies that may not be particularly necessary for the website to function and is used specifically to collect user personal data via analytics, ads, other embedded contents are termed as non-necessary cookies. It is mandatory to procure user consent prior to running these cookies on your website.
SAVE & ACCEPT