• Home
  • About
  • Contact
  • Partner
  • Privacy Policy
    • Facebook
    • Instagram
    • Pinterest
    • Twitter
    • YouTube

Create and Babble

  • DIY
    • Home Improvement
    • Upcycle
    • Furniture Makeovers
    • Build It
  • Craft
    • Silhouette
    • Sewing
    • Wedding DIYs
    • Seasonal
    • Gifts
  • Lifestyle
    • Bicyling
    • Travel
    • shopping

STAY UP TO DATE

Get the latest crafting and DIY tips, tricks and tutorials delivered straight to your inbox!

How to Make a Growth Chart Ruler

August 7, 2014

If you like it, please share it!Share on pinterest
Pinterest
Share on facebook
Facebook
Share on twitter
Twitter
Share on stumbleupon
Stumbleupon
Share on google
Google
Share on linkedin
Linkedin
Share on reddit
Reddit

Making one of these growth chart rulers has been on my to-do list for a long time. When I received an email notification that my daughter sent me three Pinterest pins that were images of growth chart rulers, I got the hint ; )

how-to-make-growth-chart-ruler

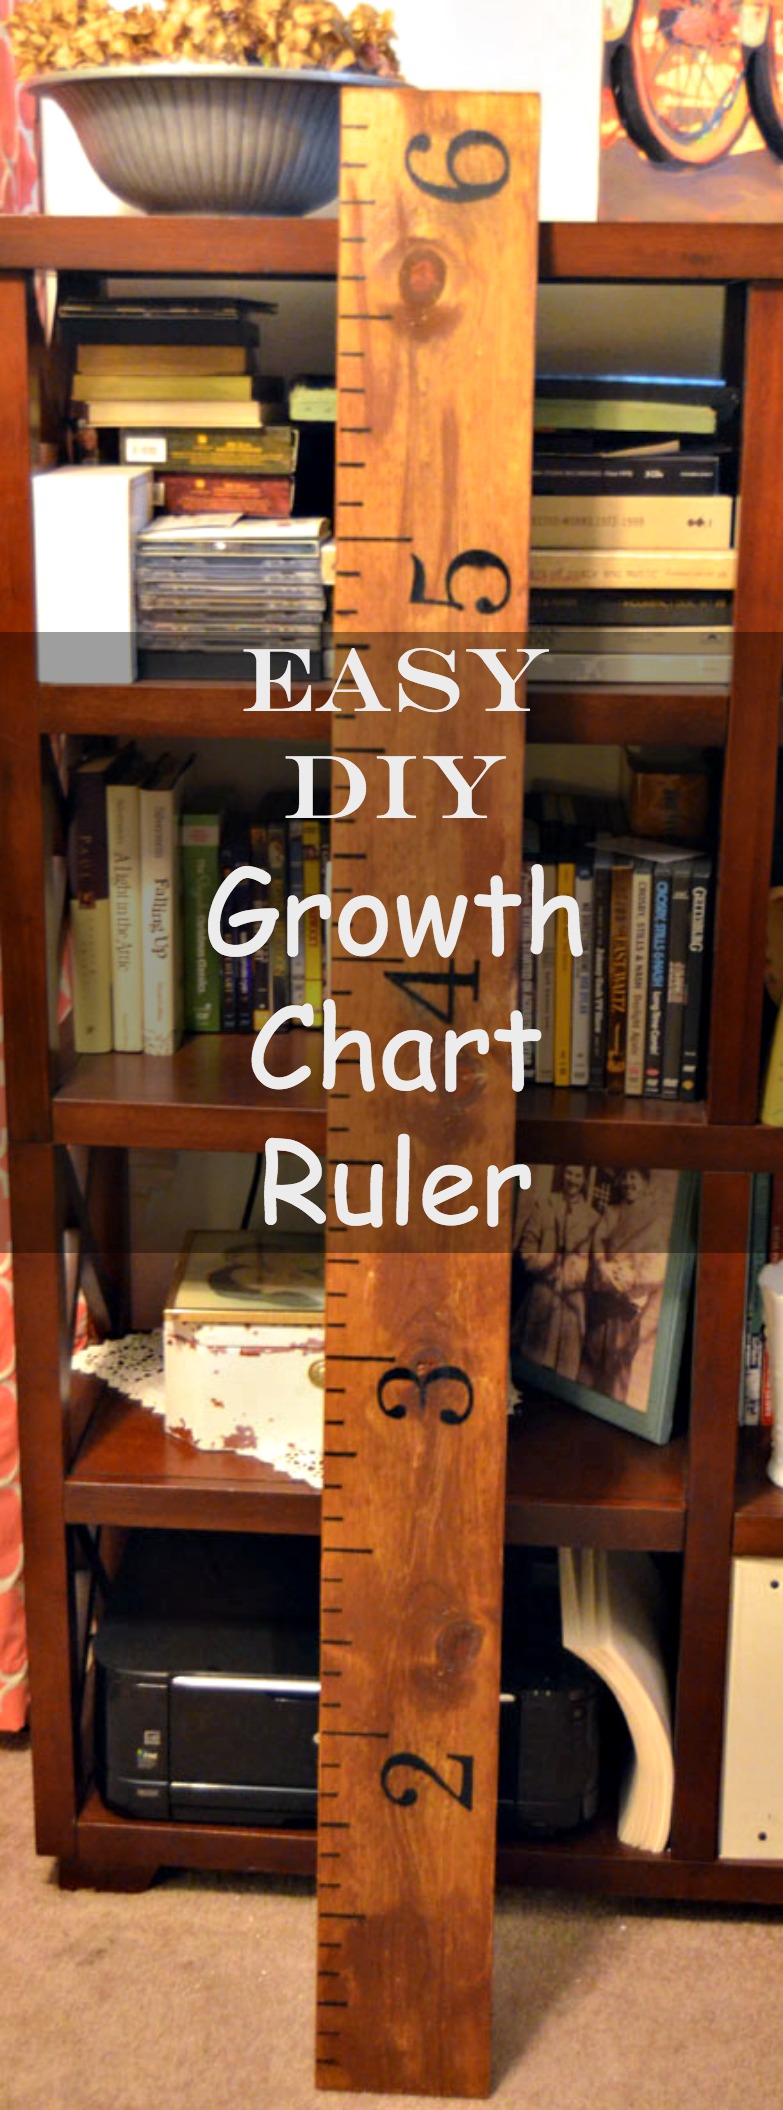
At first I thought I’d make one for each of my grandchildren, but Dan thought it would be better to have a family keepsake with all the kid’s growth recorded on one ruler. Smart guy.

So without further ado, here is how to make a growth chart ruler – or at least how I made one.

You will need:

  • a long board
  • black sharpie
  • painter’s tape
  • measuring tape
  • a straight edge
  • sand paper
  • stain

For the wood: I happened to have a piece of 1 x 6 x 5. Ideally a 6′ length would be better. I felt safe with the 5′ length since no one in my family is over 6 feet. Watch, now my grandson will end up over six feet just because of Nanny’s 6′ board ; )  The board will be attached to the wall one foot up from the floor.how-to-make-growth-chart-ruler-by-createandbabble

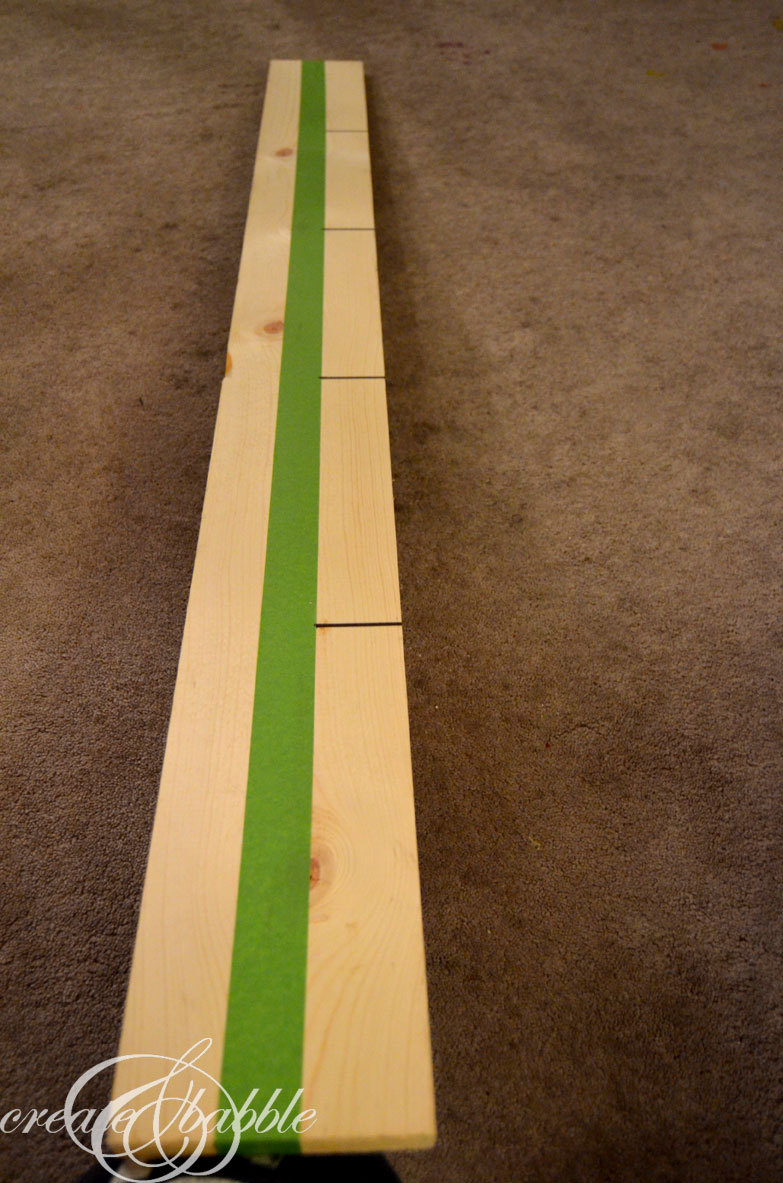
The first thing I did was place a strip of painter’s tape down the middle of the board. Then I marked off the 12″ mark lightly with a pencil

how-to-make-growth-chart-ruler

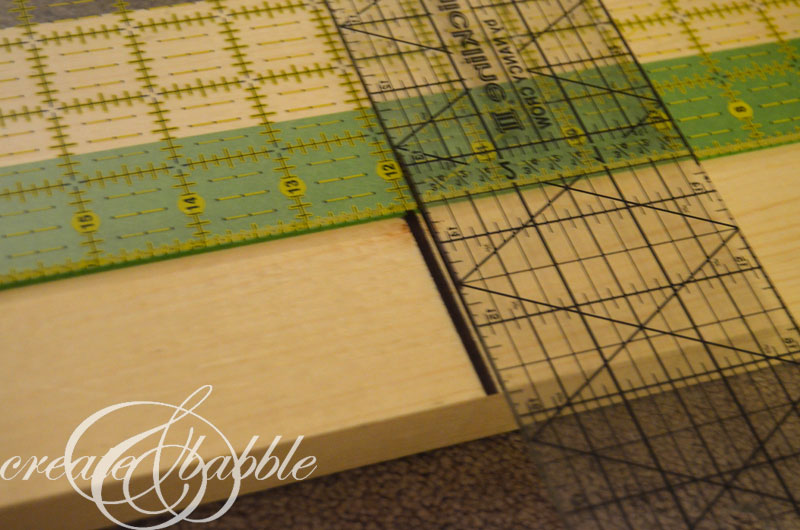
Then I drew a line against a straight edge from the painter’s tape to the edge of the board with a black Sharpie. (Quilting square are handy for so much more than quilting, you know!)

diy-growth-chart-ruler-by-createandbabble

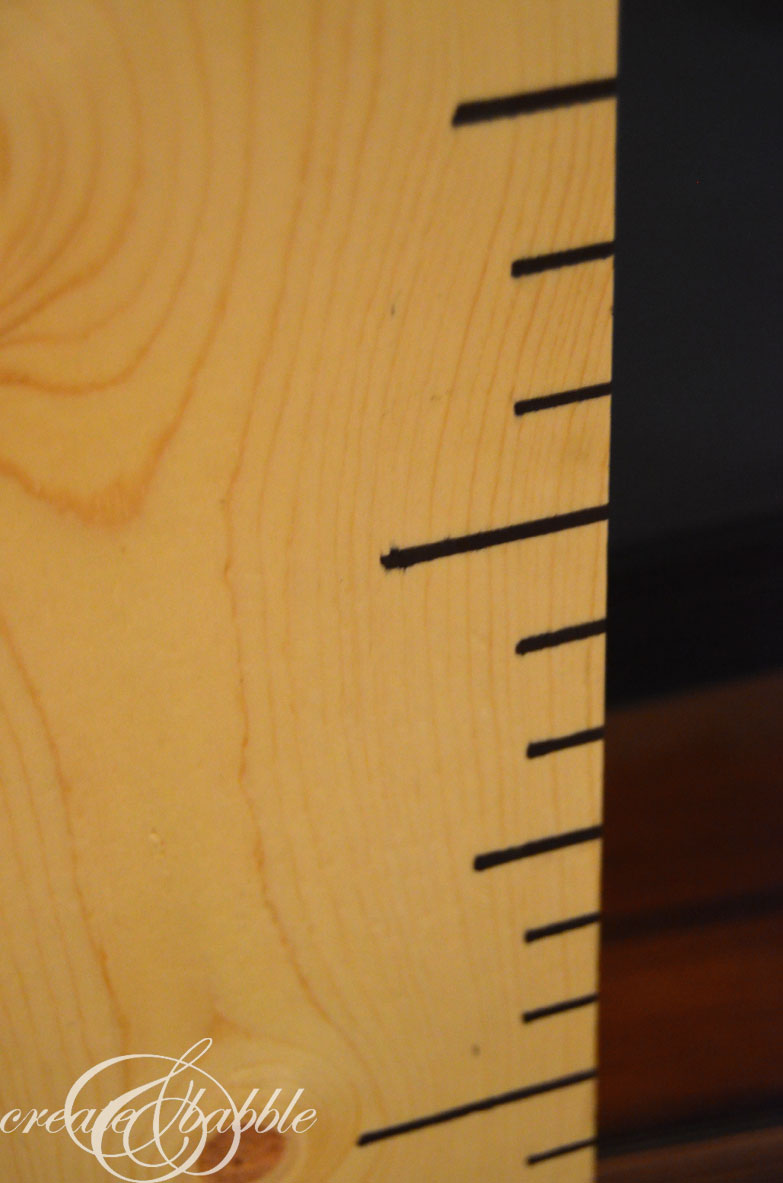
Next, I placed a second strip of painters tape down, covering about half of the length of the 12″ marks. Then I made Sharpie lines at 6″ intervals. I repeated that same step for the inch marks. I don’t know why I didn’t take pictures of that!

diy-growth-chart-ruler

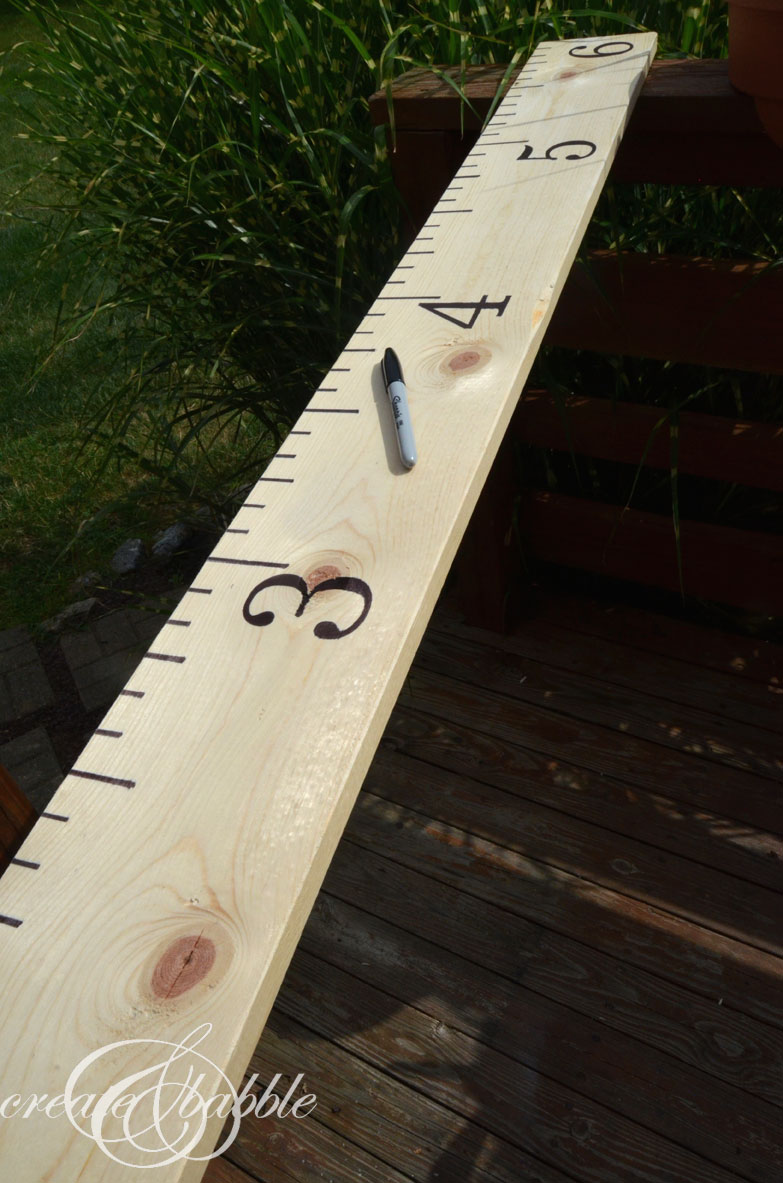
Once all the lines were drawn, I took the board outside to finish it. Laying it across the railings on the deck made it easier to stain and stencil. (I need saw horses: in case Santa is reading this 😉

growth-chart-ruler-4


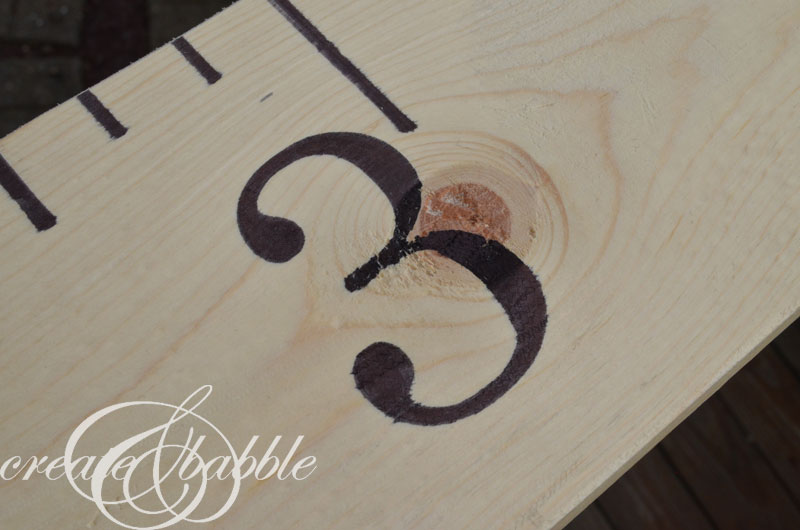
I just placed the paper stencil down on the board and traced inside the edge with a black Sharpie then filled it in using a thicker Sharpie.

growth-chart-ruler-createandbabble

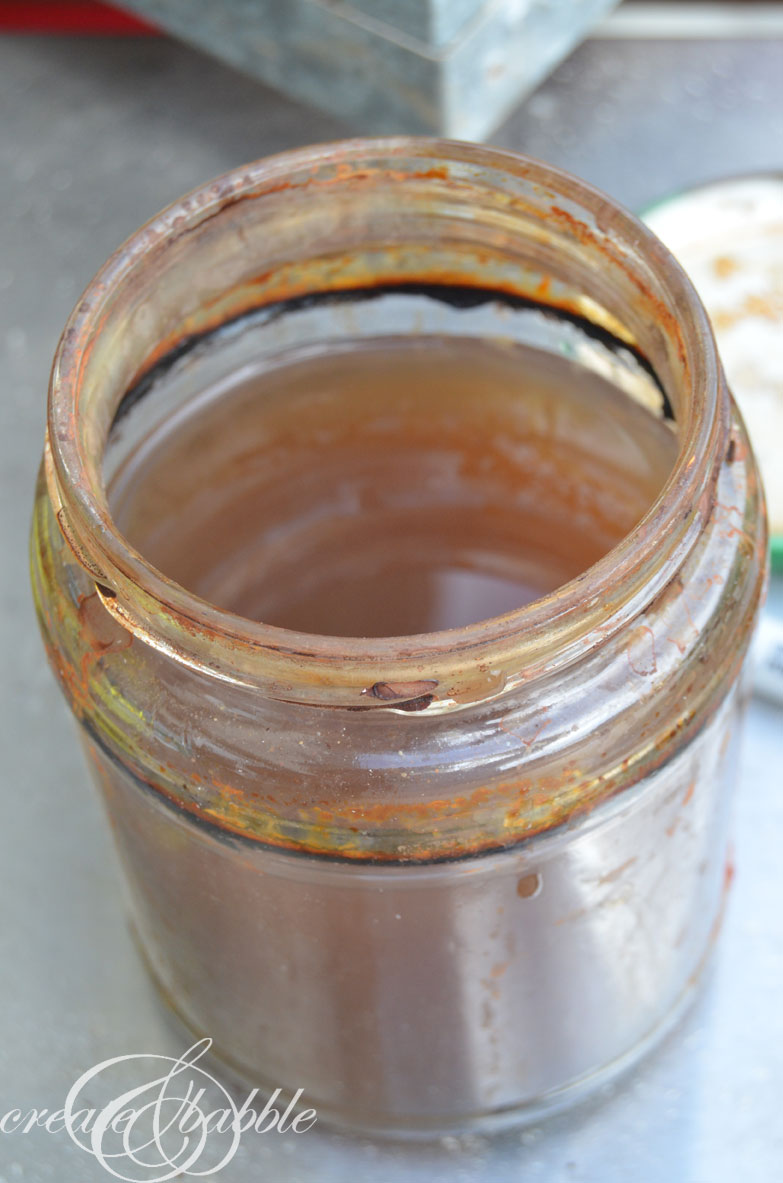
Now for the stinky part. Yes, I mean stinky as in it smells bad. Really bad. It’s homemade stain that’s supposed to make wood look aged. I put some steel wool in a jar with vinegar and let it sit on my counter for a couple of days. And listened to it hiss and moan. I’m serious. It was making noises. I took off the lid because I was afraid it was going to explode or something. Anyway, after a day or so it makes this stinky solution.

diy-growth-ruler

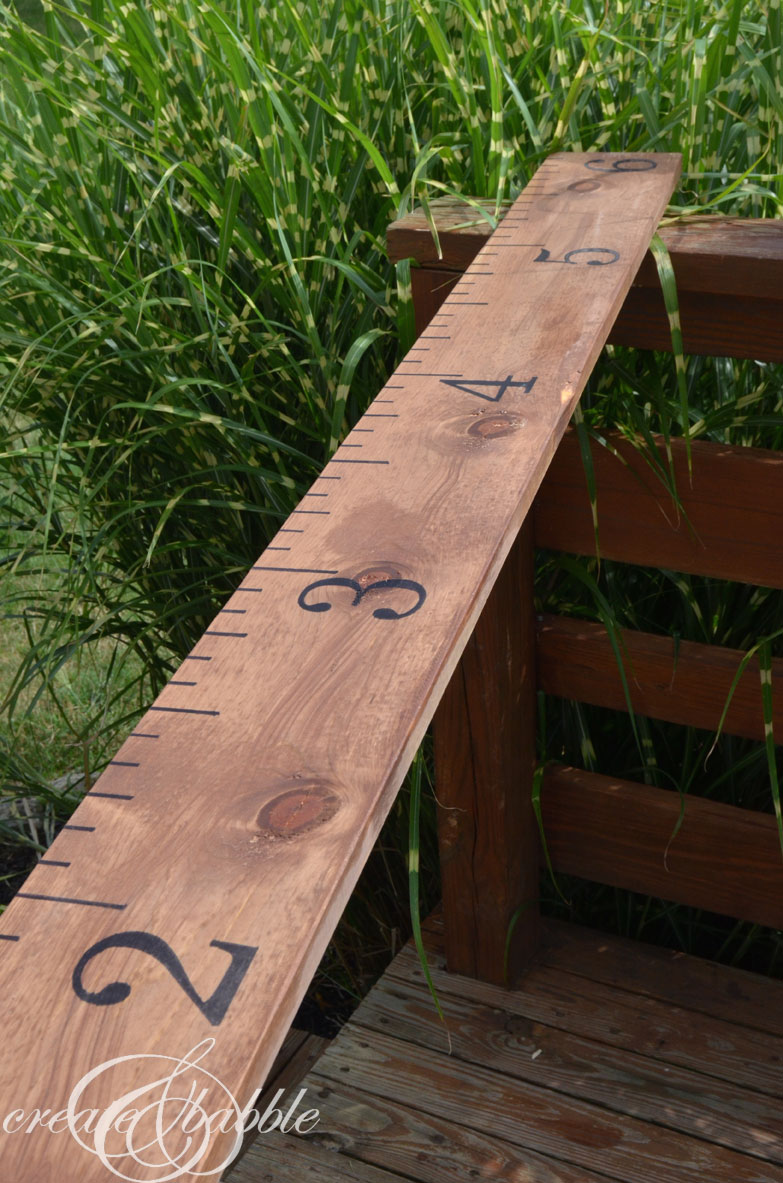
So wearing two pairs of rubber gloves, I rubbed said stinky solution on the board and this is how it looks after one coat.

diy-growth-ruler-createandbabble.com

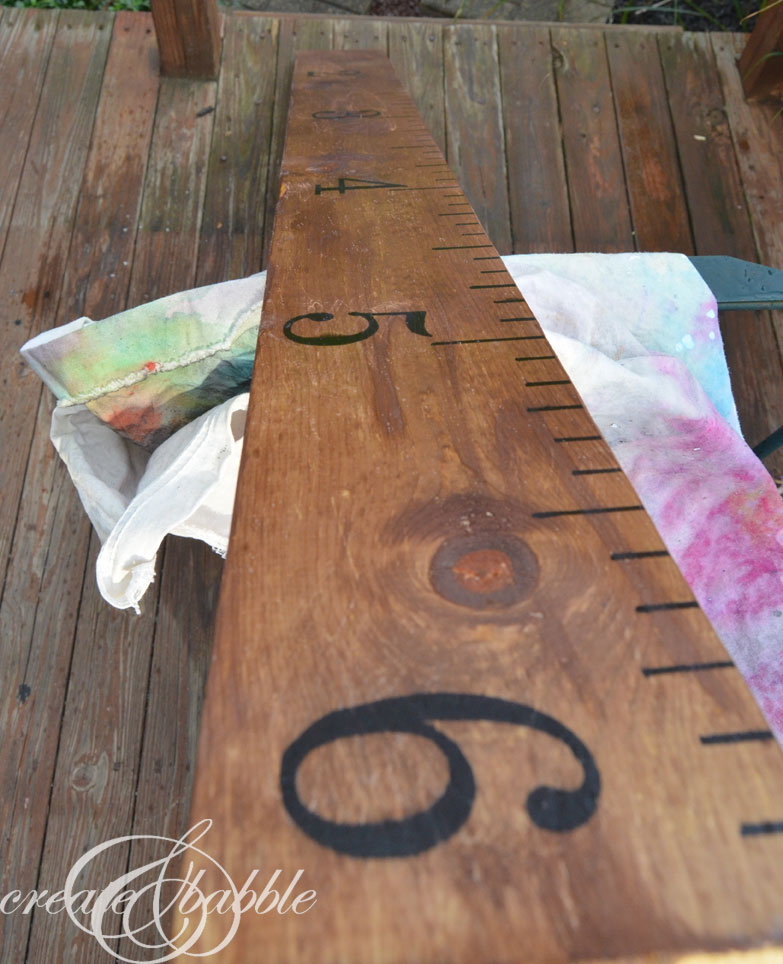
Two coats. And the stink does go away after it’s dry. Thank goodness.

Have you ever tried the stinky stain? I was hoping for more of a gray, weathered color. Maybe I let the steel wool in too long, But in any case, I like how the ruler turned out. And if my grandson grows to be over 6′ tall…well my daughter will have to add an addition to the ruler ; )

If you like it, please share it!Share on pinterest
Pinterest
Share on facebook
Facebook
Share on twitter
Twitter
Share on stumbleupon
Stumbleupon
Share on google
Google
Share on linkedin
Linkedin
Share on reddit
Reddit

Filed Under: Tutorials

« Pretty Organization with Sharpies
Powder Room Update {30 Day Challenge} »

Comments

  1. Susan says

    August 7, 2014 at 7:33 am

    My kids are too old for me to make one for them, but I think this would be an amazing baby shower gift.

    Reply
  2. Maureen says

    August 7, 2014 at 8:27 am

    My kids are all grown Jeanie, but I love it has a décor piece! Pin to Tim’s to-do- list!

    Reply
    • Mickelly says

      June 19, 2016 at 8:14 am

      I just wanted to comment…You can look through your kids records and find heights and dates/ages and mark them on the board then eventually grandchildren can be measured and she how they compare. I made my ruler when my third child was born and just added the other two children’s heights. Even their birth length…We marked mom dad and grandparents final height and the kids love it! just a thought:) anytime we think one of them looks like they have grown we measure and we always measure on their birthday. We are casual and fun about it marking a line,date and their name!

      Reply
      • Jeanie says

        June 21, 2016 at 11:49 am

        Good ideas!

        Reply
  3. beth says

    August 7, 2014 at 11:52 pm

    I’ve been wanting to make one of these! I will have to try the sticky stain – I like the color. Another addition to my to do list!

    Reply
  4. Emma @ P is for Preschooler says

    August 8, 2014 at 8:00 pm

    I love measuring the kids as they grow. And this one would be much easier to carry to a new house than the door we currently measure on, lol!

    Reply
  5. Jill says

    August 9, 2014 at 2:09 pm

    We measure our kids growth on the back of our laundry room door but your idea is so sweet and what a wonderful keepsake it will make. I will be pinning this to look at making for my family since I should be able to transfer my kids heights and dates right onto it 🙂

    Reply
  6. Debra says

    February 21, 2015 at 5:31 pm

    What size stencils are you using for the numbers?

    Reply
  7. double sided tape says

    July 20, 2017 at 3:54 pm

    It’s remarkable to pay a quick visit this web site and reading the views of all
    colleagues on the topic of this paragraph, while I am also eager of getting experience.

    Reply
  8. Surrey Limo says

    August 26, 2017 at 12:30 pm

    Hmm is anyone else experiencing problems with the images on this blog loading?
    I’m trying to determine if its a problem on my end or if it’s the blog.
    Any suggestions would be greatly appreciated.

    Reply
  9. Kristine says

    November 7, 2017 at 7:58 am

    Thanks for the easy DIY… FYI the “stinky” stain colour is very dependent on the wood you use. If your board was pine, you need to add some tannins to the mix by washing with a black tea solution first then applying the vinegar mixture. This should give you the brownish grey aged barnwood effect you might have been going for. Also, if the mix is too brown from sitting too long, just add some more white vinegar to the solution to dilute.

    Reply

Trackbacks

  1. Gallery Walls | Three 31 says:
    September 22, 2014 at 8:22 am

    […] incorporates a lot of what I want his room to have: name or initial (done!), bookshelves, and a ruler growth chart. I’m currently researching different types of DIY bookshelves and the growth chart is in the […]

    Reply
  2. The Ultimate Guide to DIY Christmas Gifts | MostCraft says:
    October 8, 2015 at 1:45 pm

    […] via Create and Babble […]

    Reply
  3. Diy Wood Growth Chart – Finn P Ramsey says:
    June 29, 2016 at 9:34 am

    […] back to her. I love how yours turned out! I’ve been wanting to diy this too! How did you hang it? How to make a growth chart ruler create and babble. Making one of these growth chart rulers has been on my todo list for a long time. When i received […]

    Reply
  4. 6 Easy Homemade Holiday Gifts | Off Your Plate says:
    December 4, 2016 at 12:55 pm

    […] Project via Hometalker Jeanie @Create and Babble […]

    Reply

Leave a Reply Cancel reply

Your email address will not be published. Required fields are marked *

About Jeanie

About Jeanie

Welcome to Create & Babble. This is where I share my loves: crafting, hiking and camping

Read more about me here

Categories

Archives

AntiqueFarmHouse
Zots Craft Adhesive Dots

Amazon Associates Disclosure

Jeanie Hevener Emmert is a participant in the Amazon Services LLC Associates Program, an affiliate advertising program designed to provide a means for sites to earn advertising fees by advertising and linking to amazon.com.


hobby lobby

Copyright © 2025 · Site by Pretty Pink Studio

Copyright © 2025 · Glam Theme on Genesis Framework · WordPress · Log in

This website uses cookies to improve your experience. We'll assume you're ok with this, but you can opt-out if you wish.Accept Reject Read More
Privacy & Cookies Policy

Privacy Overview

This website uses cookies to improve your experience while you navigate through the website. Out of these, the cookies that are categorized as necessary are stored on your browser as they are essential for the working of basic functionalities of the website. We also use third-party cookies that help us analyze and understand how you use this website. These cookies will be stored in your browser only with your consent. You also have the option to opt-out of these cookies. But opting out of some of these cookies may affect your browsing experience.
Necessary
Always Enabled
Necessary cookies are absolutely essential for the website to function properly. This category only includes cookies that ensures basic functionalities and security features of the website. These cookies do not store any personal information.
Non-necessary
Any cookies that may not be particularly necessary for the website to function and is used specifically to collect user personal data via analytics, ads, other embedded contents are termed as non-necessary cookies. It is mandatory to procure user consent prior to running these cookies on your website.
SAVE & ACCEPT