• Home
  • About
  • Contact
  • Partner
  • Privacy Policy
    • Facebook
    • Instagram
    • Pinterest
    • Twitter
    • YouTube

Create and Babble

  • DIY
    • Home Improvement
    • Upcycle
    • Furniture Makeovers
    • Build It
  • Craft
    • Silhouette
    • Sewing
    • Wedding DIYs
    • Seasonal
    • Gifts
  • Lifestyle
    • Bicyling
    • Travel
    • shopping

STAY UP TO DATE

Get the latest crafting and DIY tips, tricks and tutorials delivered straight to your inbox!

Crafting with Glitter Just Got Easier

October 14, 2013

If you like it, please share it!Share on pinterest
Pinterest
Share on facebook
Facebook
Share on twitter
Twitter
Share on stumbleupon
Stumbleupon
Share on google
Google
Share on linkedin
Linkedin
Share on reddit
Reddit

Who doesn’t love glitter? I love it! I love the sparkle, glitz and shine of glitter! What I don’t like is the mess. I can’t tell you how many times I hear “you have glitter on your face”. In fact, I’m looking at glitter on my pants and desk. Well I don’t think there’s any way to completely avoid getting glitter where you don’t want it, but Silhouette has these awesome double-sided adhesive sheets that help you get the glitter where you DO want it! Why didn’t I know about this???

crafting with glitter_createandbabble.com
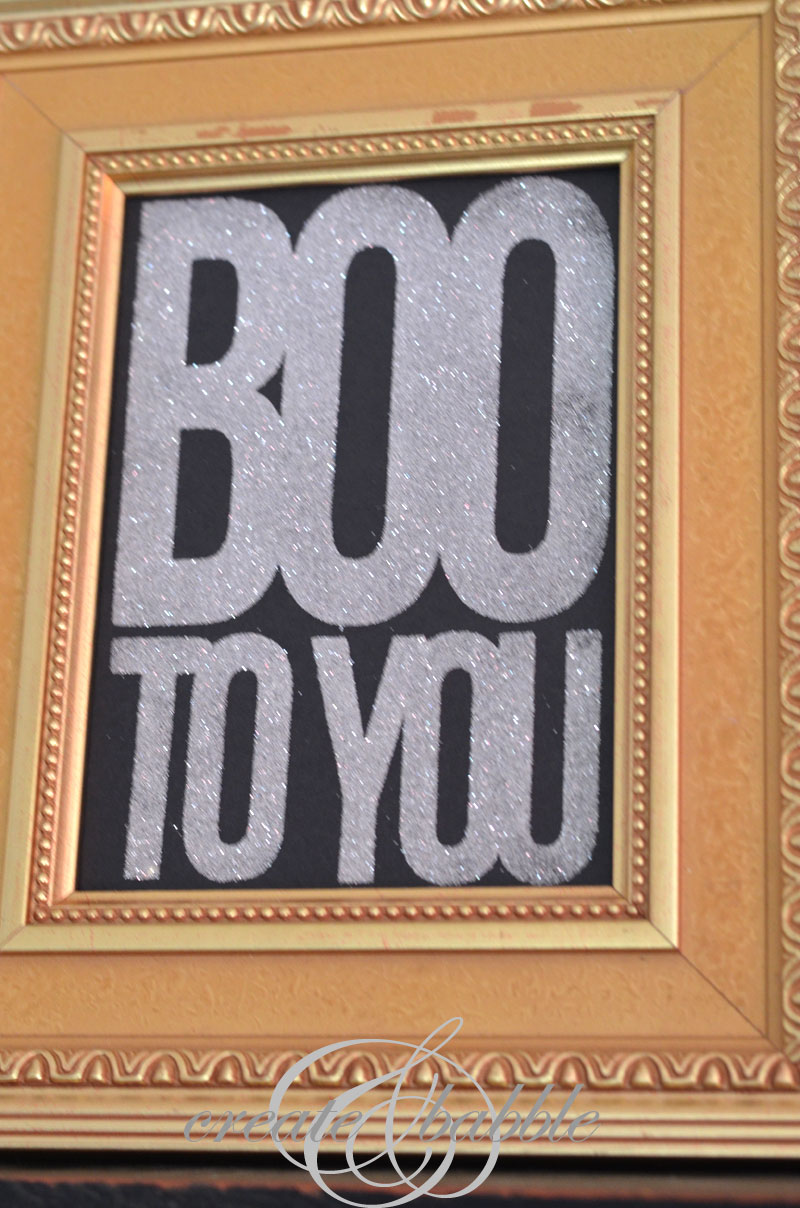
Do you see in the photo how crisp and clean the lines of the letter are? I love that! And it’s so easy! Any shape you want to cut with your Silhouette can now be glittery! I’m so excited about this, can you tell?!?!

You simply place an adhesive sheet (yellow side down) on the cutting mat and cut your shape using the recommended settings.

crafting with glitter_createandbabble.com

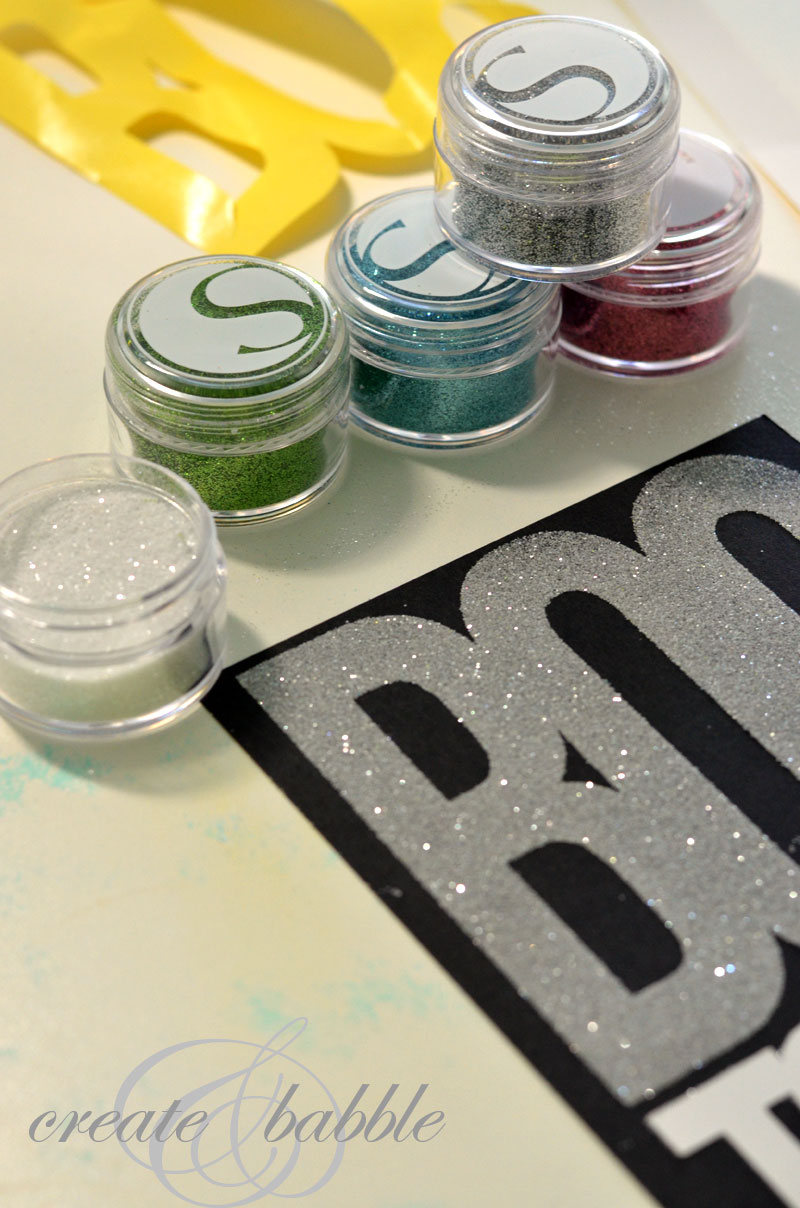
Once your shape is cut, carefully remove the yellow backing then place your shape on where you want your glittered shape. In my case, I adhered it to a 5 x 7 piece of black card stock. Then you remove the white backing and your are left with the adhesive. (By the way, a shape almost identical to the one I made is available in the Silhouette Online Store, but I made my own using Bebas Neue front and welded the letter shapes together. I own their shape but wanted it to be a little thicker).

crafting with glitter_createandbabble.com
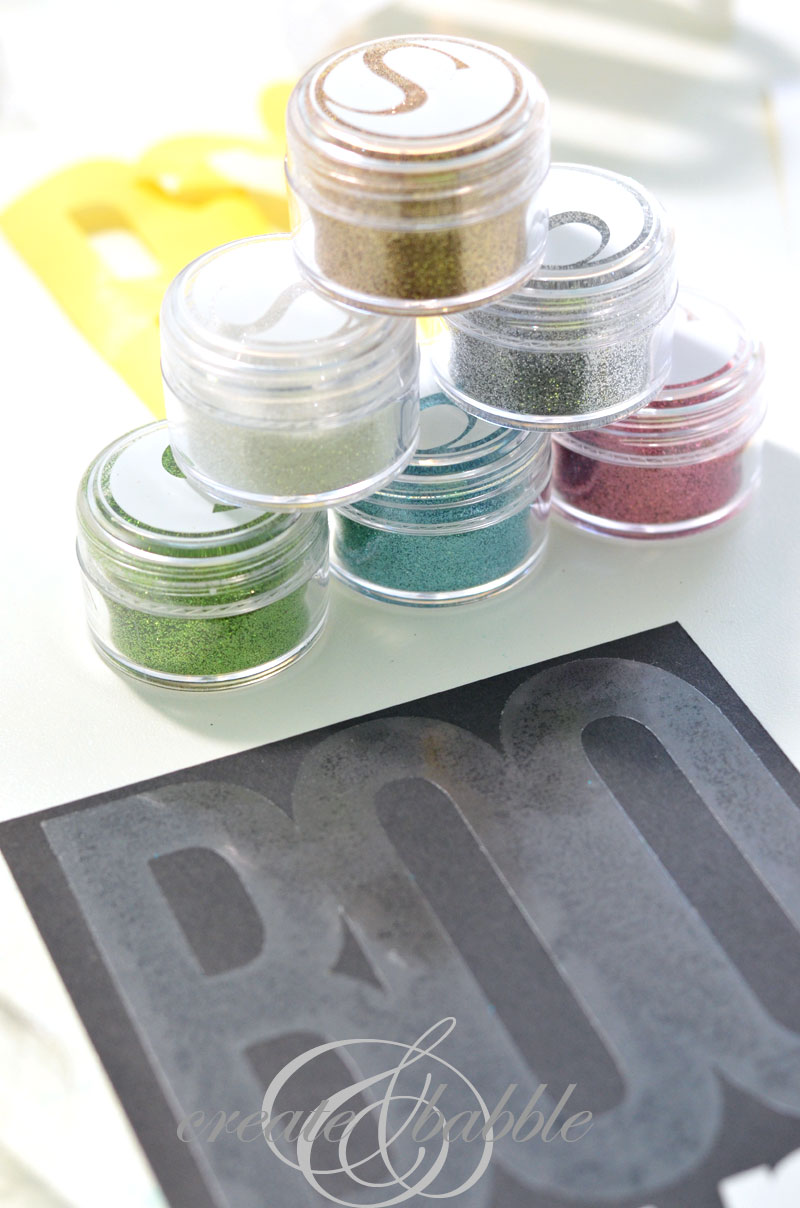
Shake on your glitter, then tap or brush off the excess and that’s it!
crafting with glitter-2_createandbabble.com
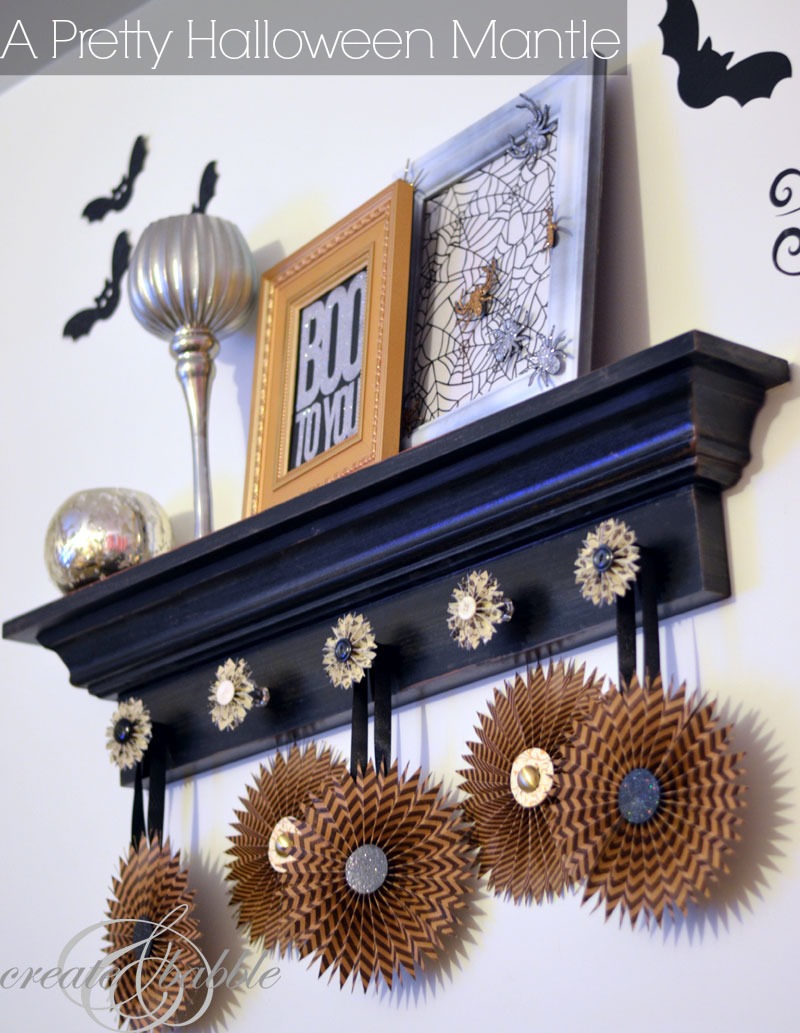
I cut the black card stock to 5 x 7 so it would fit on this frame.
old-frame_createandbabble
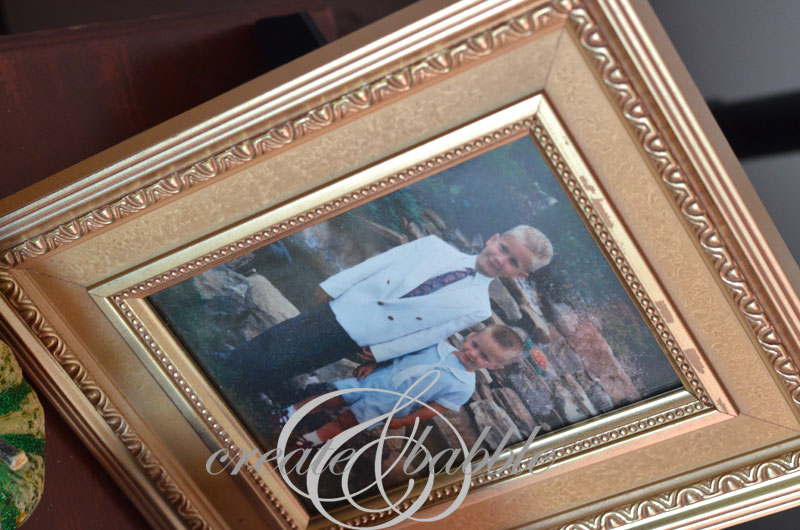
Oh my goodness, does that old photo bring back memories! Those little guys are now 30 and 26 (and not so little ; ) and probably thrilled that I posted this photo here, I’m sure ; )

I put the framed Boo To You on my Halloween Mantle along with the glittered spiders that I made using the double-sided sheets, too.

pretty halloween mantle decor
This post is part of the Silhouette Challenge, a monthly collection of  Silhouette projects made members of the Silhouette Challenge Facebook  Group.

TheSilhouetteChallenge-TTC&Friends

Want to Check Out More Silhouette Projects?

My Silhouette Challenge buddies are all sharing projects today on their blogs, so peruse the links below for a blog-hopping good time.

Birthday Invitations Homer Simpson Style by Black & White Obsession

DIY Planner Dividers by The House on Hillbrook

3D Haunted Forest by Chicken Scratch NY

Pumpkins and Peacocks Fall Mantel by joy & gladness of heart

DIY Cheers Garland by Rain on a Tin Roof

Wedding Gift Wrapping by It Happens in a Blink

Glitter Monogrammed Pumpkin by unOriginal Mom

Halloween Family Rules by Tried & True

Faux Stitched Speech Bubbles by Get Silvered Craft

A Mario Bros. Backsplash by Please Excuse My Craftermath…

Halloween Spooky Eye Luminaries by A Tossed Salad Life

Addressing Invitations with a Silhouette Cameo by My Favorite Finds

Halloween Party Treat Bags by The Thinking Closet

“Create” Wooden Pallet by Lil’ Mrs. Tori

Spooky Halloween Bats Garland by TitiCrafty

Decorated Pumpkins by Tanya’s Creative Space

Cute Wedding Card by Zanaree

Learn to Tie Your Shoes by From Wine to Whine

Fussy Cutting Making You Fussy? by My Paper Craze

Cut Fabric With Your Silhouette by Cutesy Crafts

Cookie Lee Jewelry’ Gift Bags with a Purpose: Sharing Thankfulness by An Elegant Touch

Halloween Banner by Sowdering About

Do you have a Silhouette machine?

Looking for Silhouette inspiration, support, trouble-shooting?  Interested in joining us for our group posting event next month?  Then, we’d love to have you join our Silhouette Challenge Facebook group.  To join, simply fill out the new member request form, and Lauren from The Thinking Closet will get you squared away.

If you like it, please share it!Share on pinterest
Pinterest
Share on facebook
Facebook
Share on twitter
Twitter
Share on stumbleupon
Stumbleupon
Share on google
Google
Share on linkedin
Linkedin
Share on reddit
Reddit

Filed Under: Silhouette, Tutorials

« Pedal to Pittsburgh – Almost there
Pedal to Pittsburgh – Point Made! »

Comments

  1. Stephanie @ The House on Hillbrook says

    October 14, 2013 at 10:11 am

    AMAZING! I haven’t ever thought of playing with this medium but it looks like it is a must. Maybe for my gift tags! Would love to do some gold glitter! Great job! And I love your mantle…pinning!!!

    Reply
    • Jeanie says

      October 14, 2013 at 11:23 am

      Thanks so much for pinning Stephanie! Oh, using this for the gift tags is a great idea!

      Reply
  2. Emily says

    October 14, 2013 at 10:45 am

    LOVE THE VIGNETTE! It is so pretty, but I love the silhouette project too. I’m so wary of glitter because of the mess!

    Reply
    • Jeanie says

      October 14, 2013 at 11:22 am

      Thanks Emily! I was happy with how it turned out – not too scary ; ) and I hear ya about the glitter mess, but the doubled sided adhesive really helps keep it under control.

      Reply
  3. Glenna Anderson says

    October 14, 2013 at 11:09 am

    Wow, such a great idea! I’ve never tried the double sided adhesive cardstock but I will now!
    Thanks for the great tutorial!

    Reply
    • Jeanie says

      October 14, 2013 at 11:20 am

      You gotta try the double sided adhesive….I love it and can’t wait to make more holiday projects using it. Thanks for stopping by!

      Reply
  4. Trisha D. says

    October 14, 2013 at 11:11 am

    Stopping by from the Silhouette Challenge. Gahh, such a cute project!! Simple Halloween projects are right up my alley.

    Your mantle is to die for (har har).

    Oh and did I mention I love glitter too?! Fortunately I somehow manage contain the mess every time, knocks on wood…

    Reply
    • Jeanie says

      October 14, 2013 at 11:18 am

      Thanks Trisha! Yep, the simple projects are my favorite ones! And everything is better with glitter!

      Reply
  5. Happysuz says

    October 14, 2013 at 11:21 am

    I love this. I have been cleaning up glitter in my kitchen for 2 weeks after a kids pumpkin craft. I love your mantel. I would love something like that in my kitchen to switch out the decor for each holiday or season!

    Reply
    • Jeanie says

      October 14, 2013 at 11:36 am

      It is hard to contain the glitter mess, isn’t it? But I love glitter! Thanks for the sweet comment! I need something in my kitchen, too. I’ll have to work on that!

      Reply
  6. Jacquelyn Wallace says

    October 14, 2013 at 11:34 am

    I LOVE IT!! I love anything glitter- matter of fact it’s my very FAVORITE color!!! I have the double sided pack but wasn’t sure what todo with it… But I think a framed glitter monogram may be just what my office needs!!

    Thanks for the tips. Love your decoration!

    Reply
    • Jeanie says

      October 14, 2013 at 11:38 am

      Ha, ha Jacquelyn, love that: glitter is your favorite color! And a framed glitter monogram is a great idea!

      Reply
  7. Carrie @ My Favorite Finds says

    October 14, 2013 at 12:05 pm

    That is super awesome! I love it!

    Reply
    • Jeanie says

      October 14, 2013 at 7:58 pm

      Thanks Carrie! Everything is better with a little glitter ; )

      Reply
  8. Tori says

    October 14, 2013 at 2:07 pm

    So pretty! I will have to try out the adhesive and glitter!!

    Reply
    • Jeanie says

      October 14, 2013 at 7:57 pm

      Thanks Tori…you will love it! My brain is spinning with ideas!

      Reply
  9. Tanya says

    October 14, 2013 at 5:41 pm

    Girl, this is so awesome….I love the display that you made. I used the double-sided adhesive too! Isn’t it awesome?!?!!

    Reply
    • Jeanie says

      October 14, 2013 at 7:57 pm

      Thank you so much Tanya! That double-side adhesive is awesome!

      Reply
  10. Pam- GetSilvered Craft says

    October 14, 2013 at 7:43 pm

    You entire Mantle display looks awesome. The glitter project adds a lovely extra touch of sparkle to it.

    Reply
    • Jeanie says

      October 14, 2013 at 7:56 pm

      Thanks Pam! It’s hard for me to not get carried away with glitter ; )

      Reply
  11. Randi Sowders says

    October 15, 2013 at 12:55 am

    I love this!!!!! I am not a fan of glitter because it’s just messy but I love how this came out and it makes me want to try it!

    Reply
    • Jeanie says

      October 15, 2013 at 10:36 am

      Thanks Randi!

      Reply
  12. Lynden Blossom says

    October 15, 2013 at 1:35 am

    Cute, simple, ‘Bright’ idea! Will have to try the adhesive paper one of these day!
    Lynden ;-}

    http://aneleganttouch-lynden.blogspot.com
    https://www.facebook.com/Lynden.AnElegantTouch

    Reply
    • Jeanie says

      October 15, 2013 at 10:38 am

      Thanks Lynden! Definitely give it a try, I think you’ll like working with it.

      Reply
  13. Valerie says

    October 15, 2013 at 11:45 am

    I love the double sided adhesive for glittering. It keeps things so crisp and neat. Love your glittery spiders too 🙂

    Reply
    • Jeanie says

      October 16, 2013 at 9:51 am

      Hi Valerie! You’re right, I love the crisp and clean edges that you get from using the double sided adhesive!

      Reply
  14. Jessica says

    October 15, 2013 at 3:22 pm

    How cute! I have these supplies, I might need to make one too!

    Reply
    • Jeanie says

      October 16, 2013 at 9:50 am

      Thanks Jessica! Yes you must make one, too!

      Reply
  15. Alecia @ Chicken Scratch NY says

    October 15, 2013 at 6:20 pm

    I love your sign! I’m dying to get my hands on some of the double sided adhesive, I want my own glittery signs lol

    Reply
    • Jeanie says

      October 16, 2013 at 9:49 am

      Thanks Alecia! Yes, get some – you’ll love it!

      Reply
  16. Lauren @ The Thinking Closet says

    October 16, 2013 at 1:58 am

    I chuckled at your opener because we ate dinner outside tonight on our back deck atop a table just glistening with bits of glitter from my Silhouette project last weekend; ha ha. It does get EVERYWHERE, but it’s oh so much fun to play with. Especially with that double-sided adhesive! Oh, and I loved your little stack of glitter. Those details aren’t lost on me, friend!

    Fantabulous project as always, Jeanie! I hope the bike ride was epically awesome!

    Reply
    • Jeanie says

      October 16, 2013 at 9:49 am

      Thanks Lauren! Yep, I’ll put up with the bits of glitter ’cause I just love the look! The bike ride was awesome for sure; it was the hardest thing I’ve ever done, but I loved every minute of it!

      Reply
  17. Jenna says

    October 18, 2013 at 8:13 pm

    I love anything glitter and I love Halloween decorating! This is fab!

    Reply
    • Jeanie says

      October 21, 2013 at 5:25 pm

      Glitter makes everything better! Thanks Jenna!

      Reply
  18. Shalana says

    October 19, 2013 at 9:33 am

    Super cute!! I need to play with my Silhouette. Appears you can do so much with it.

    Reply
    • Jeanie says

      October 21, 2013 at 5:24 pm

      Oh my goodness Shalana, the possibilities are endless

      Reply
  19. arod says

    October 30, 2013 at 1:27 pm

    stunning love love love how this turned out

    Reply

Trackbacks

  1. DIY Cheers Garland says:
    October 14, 2013 at 10:00 am

    […] Crafting with Glitter Just Got Easier by Create & Babble […]

    Reply
  2. Halloween Party Treat Bags & Free Cut File — the thinking closet says:
    October 14, 2013 at 10:01 am

    […] Crafting with Glitter Just Got Easier by Create & Babble […]

    Reply
  3. A Mario Bros. Back Splash | Please Excuse My Craftermath... says:
    October 14, 2013 at 10:02 am

    […] Crafting with Glitter Just Got Easier by Create & Babble Birthday Invitations Homer Simpson Style by Black & White Obsession DIY Planner Dividers by The House on Hillbrook 3D Haunted Forest by Chicken Scratch NY Pumpkins and Peacocks Fall Mantel by joy & gladness of heart DIY Cheers Garland by Rain on a Tin Roof Wedding Gift Wrapping by It Happens in a Blink Glitter Monogrammed Pumpkin by unOriginal Mom Halloween Family Rules by Tried & True Faux Stitched Speech Bubbles by Get Silvered Craft A Mario Bros. Backsplash by Please Excuse My Craftermath… Halloween Spooky Eye Luminaries by A Tossed Salad Life Addressing Invitations with a Silhouette Cameo by My Favorite Finds Halloween Party Treat Bags by The Thinking Closet “Create” Wooden Pallet by Lil’ Mrs. Tori Spooky Halloween Bats Garland by TitiCrafty Decorated Pumpkins by Tanya’s Creative Space Cute Wedding Card by Zanaree Learn to Tie Your Shoes by From Wine to Whine Fussy Cutting Making You Fussy? by My Paper Craze Cut Fabric With Your Silhouette by Cutesy Crafts Cookie Lee Jewelry’ Gift Bags with a Purpose: Sharing Thankfulness by An Elegant Touch Halloween Banner by Sowdering About […]

    Reply
  4. Halloween Spooky Eyes Luminaries {14 Days of 31 Days} | A Tossed Salad Life says:
    October 15, 2013 at 12:25 am

    […] Crafting with Glitter Just Got Easier by Create & Babble […]

    Reply
  5. Wedding Gift Wrapping - It Happens in a Blink says:
    October 15, 2013 at 8:44 pm

    […] Crafting with Glitter Just Got Easier by Create & Babble […]

    Reply
  6. From Wine to Whine says:
    November 1, 2013 at 4:28 pm

    […] Crafting with Glitter Just Got Easier by Create & Babble […]

    Reply
  7. Spooky Halloween Bats Garland {+ Cut Files} | The Crafting Nook by Titicrafty says:
    July 20, 2015 at 7:34 pm

    […] Crafting with Glitter Just Got Easier by Create & Babble Birthday Invitations Homer Simpson Style by Black & White Obsession DIY Planner Dividers by The House on Hillbrook 3D Haunted Forest by Chicken Scratch NY Pumpkins and Peacocks Fall Mantel by joy & gladness of heart DIY Cheers Garland by Rain on a Tin Roof Wedding Gift Wrapping by It Happens in a Blink Glitter Monogrammed Pumpkin by unOriginal Mom Halloween Family Rules by Tried & True Faux Stitched Speech Bubbles by Get Silvered Craft A Mario Bros. Backsplash by Please Excuse My Craftermath… Halloween Spooky Eye Luminaries by A Tossed Salad Life Addressing Invitations with a Silhouette Cameo by My Favorite Finds Halloween Party Treat Bags by The Thinking Closet “Create” Wooden Pallet by Lil’ Mrs. Tori Decorated Pumpkins by Tanya’s Creative Space Cute Wedding Card by Zanaree Learn to Tie Your Shoes by From Wine to Whine Fussy Cutting Making You Fussy? by My Paper Craze Cut Fabric With Your Silhouette by Cutesy Crafts Cookie Lee Jewelry’ Gift Bags with a Purpose: Sharing Thankfulness by An Elegant Touch Halloween Banner by Sowdering About […]

    Reply
  8. Glitter Monogrammed Pumpkin - unOriginal Mom says:
    August 23, 2015 at 3:44 pm

    […] Crafting with Glitter Just Got Easier by Create & Babble […]

    Reply
  9. Halloween Spooky Eyes Luminaries (Repost) says:
    October 5, 2015 at 11:00 am

    […] Crafting with Glitter Just Got Easier by Create & Babble […]

    Reply
  10. Cut Fabric With Your Silhouette (the cheap way) - Cutesy Crafts says:
    February 25, 2017 at 2:22 am

    […] request form here.  Go check out some more great Silhouette projects from these awesome bloggers! Crafting with Glitter Just Got Easier by Create & Babble Birthday Invitations Homer Simpson Style by Black & White Obsession […]

    Reply
  11. Cut Fabric With Your Silhouette (the cheap way) - Cutesy Crafts says:
    May 29, 2019 at 11:33 pm

    […] here.  Go check out some more great Silhouette projects from these awesome bloggers!   Crafting with Glitter Just Got Easier by Create & Babble Birthday Invitations Homer Simpson Style by Black & White […]

    Reply
  12. Addressing Invitations with a Silhouette Cameo - A Princess and Her Pirates says:
    April 9, 2020 at 12:37 pm

    […] Crafting with Glitter Just Got Easier by Create & Babble […]

    Reply
  13. 2motherboard says:
    January 12, 2022 at 4:57 pm

    2photographs

    Reply

Leave a Reply Cancel reply

Your email address will not be published. Required fields are marked *

About Jeanie

About Jeanie

Welcome to Create & Babble. This is where I share my loves: crafting, hiking and camping

Read more about me here

Categories

Archives

AntiqueFarmHouse
Zots Craft Adhesive Dots

Amazon Associates Disclosure

Jeanie Hevener Emmert is a participant in the Amazon Services LLC Associates Program, an affiliate advertising program designed to provide a means for sites to earn advertising fees by advertising and linking to amazon.com.


hobby lobby

Copyright © 2025 · Site by Pretty Pink Studio

Copyright © 2025 · Glam Theme on Genesis Framework · WordPress · Log in

This website uses cookies to improve your experience. We'll assume you're ok with this, but you can opt-out if you wish.Accept Reject Read More
Privacy & Cookies Policy

Privacy Overview

This website uses cookies to improve your experience while you navigate through the website. Out of these, the cookies that are categorized as necessary are stored on your browser as they are essential for the working of basic functionalities of the website. We also use third-party cookies that help us analyze and understand how you use this website. These cookies will be stored in your browser only with your consent. You also have the option to opt-out of these cookies. But opting out of some of these cookies may affect your browsing experience.
Necessary
Always Enabled
Necessary cookies are absolutely essential for the website to function properly. This category only includes cookies that ensures basic functionalities and security features of the website. These cookies do not store any personal information.
Non-necessary
Any cookies that may not be particularly necessary for the website to function and is used specifically to collect user personal data via analytics, ads, other embedded contents are termed as non-necessary cookies. It is mandatory to procure user consent prior to running these cookies on your website.
SAVE & ACCEPT