


Usually you hear of using a rolling cart in a kitchen. While that is a good purpose, I had a different purpose in mind.
I needed something to hold my heat press. Heat presses are heavy so this cart has to be sturdy. It also has to have storage. It has to look good. And to save money, I want to build it myself.
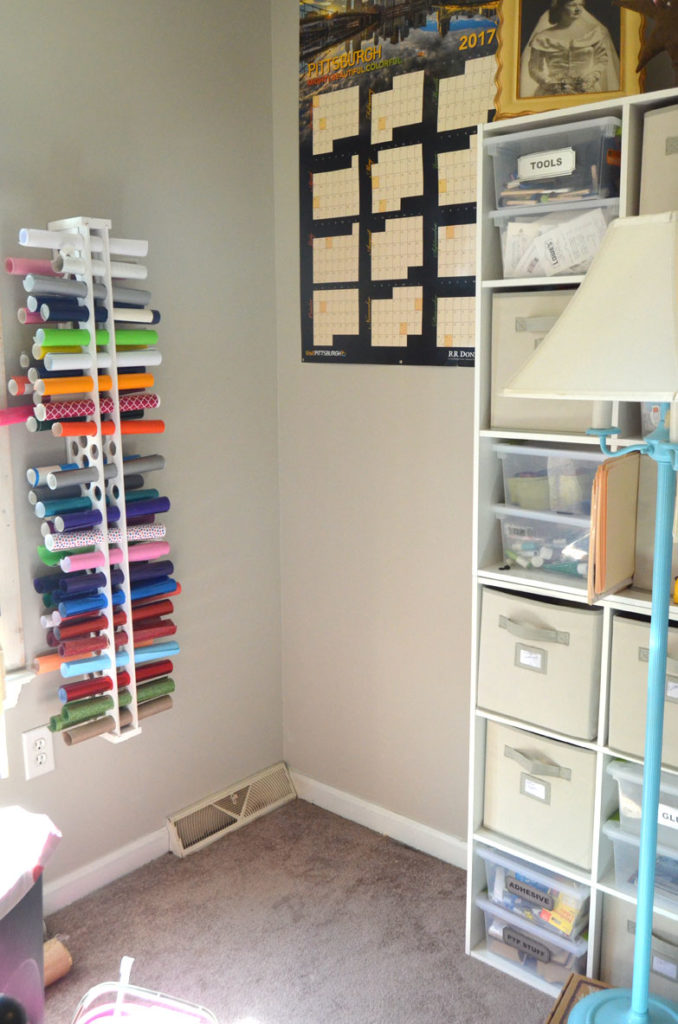
Isn’t this spot just screaming for a heat press on a cart???
Now I could have designed plans for this heat press rolling cart. But why reinvent the wheel when there’s lots of wheels out there? I mean rolling cart plans out there. Don’t get me wrong, I love to design building plans but this rolling cart is pretty basic. Anything that I designed would end up looking pretty much like a lot of the other rolling cart designs out there. Plus designing plans takes time and I wanted this cart pronto!

Here are the steps I took to build a rolling cart using Ana’s plans:
Step One – Gather Supplies & Cut Wood to plan specs
These are the tools I used:
- 12″ sliding miter saw
- 10″ table saw
- drill/driver
- Kreg Jig
My cart differs from the plan in the following ways:
- The back of mine has a plywood back – no door.
- The front of mine is open – no door or drawer front.
I plan on living with it for a while and then will probably add shelves where I find them necessary.
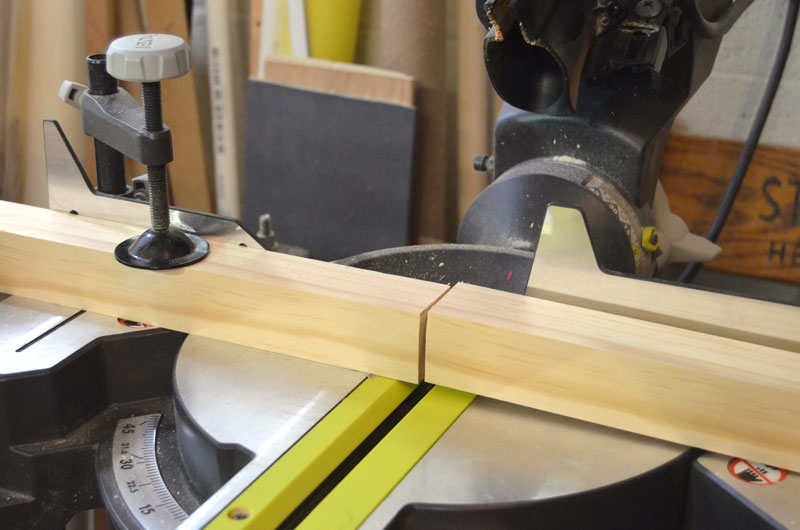
This cart is built using 2 x 2s, 1 x 2s, and 1 x 4s boards and also 3/4″ plywood for the sides and back. Since my cart was going to have a drawer front, I didn’t use a 1 x 6 board. I had most of the wood in my wood stack in my workshop, but the rest I picked up at Home Depot.
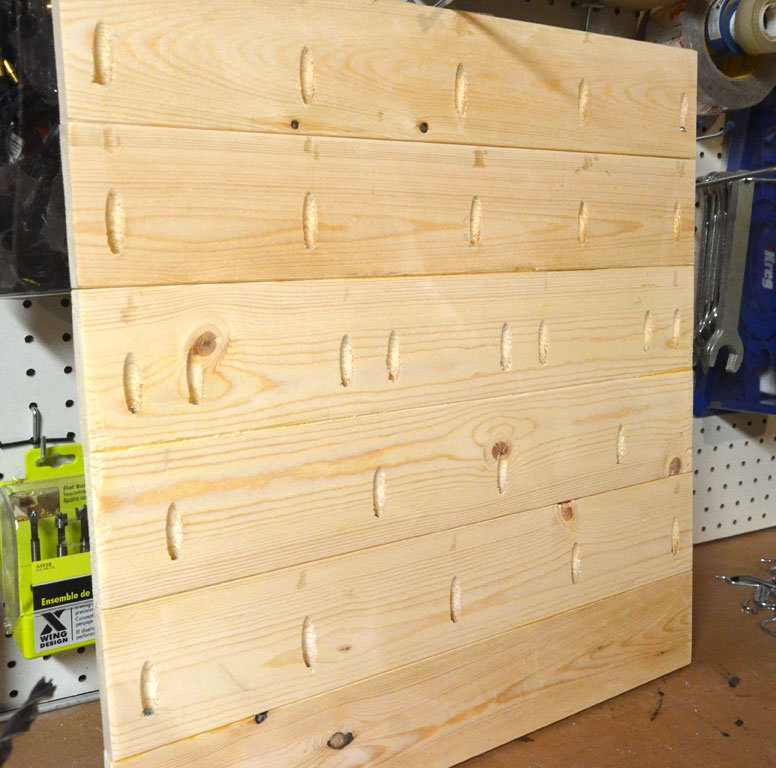
Step 2 – Drill pocket screws
This cart is put together with lots of pocket screws and wood glue so a Kreg Jig is a must-have. After all of my wood was cut, I followed the plans and drilled all of the pocket screws using my Kreg Jig K4.

Step 3 – Assemble cart per instructions
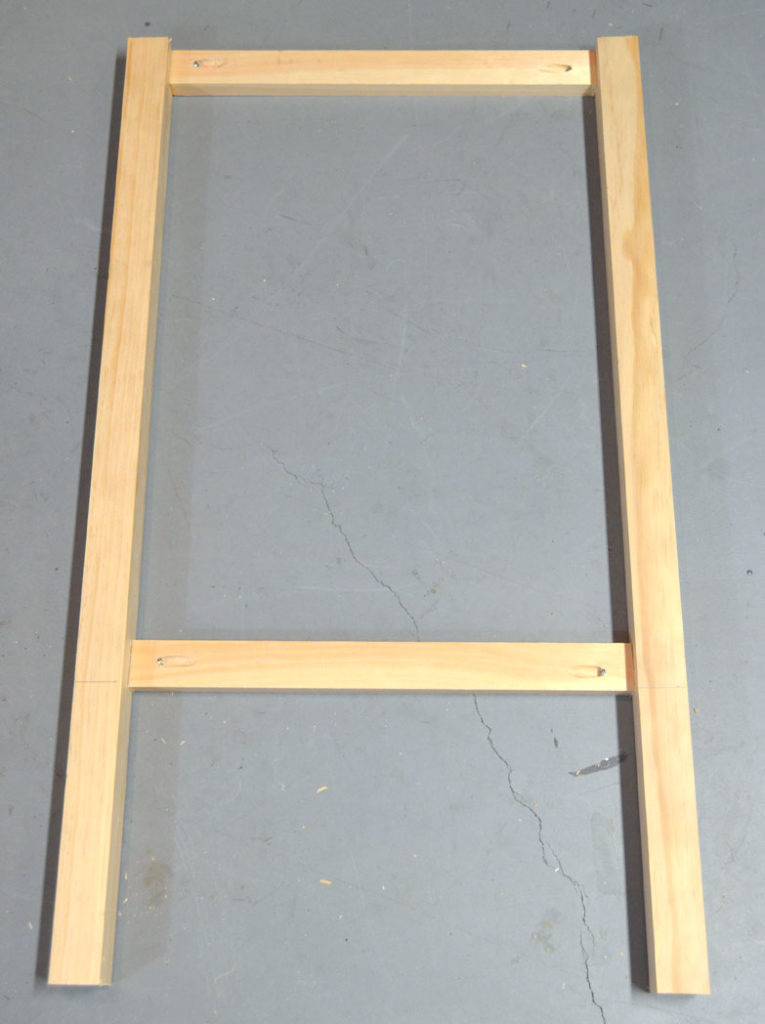
I followed Ana’s instructions and built the sides first.
After the two sides are built, it’s time to put the cart together with more pocket screws and 2 x 2s.
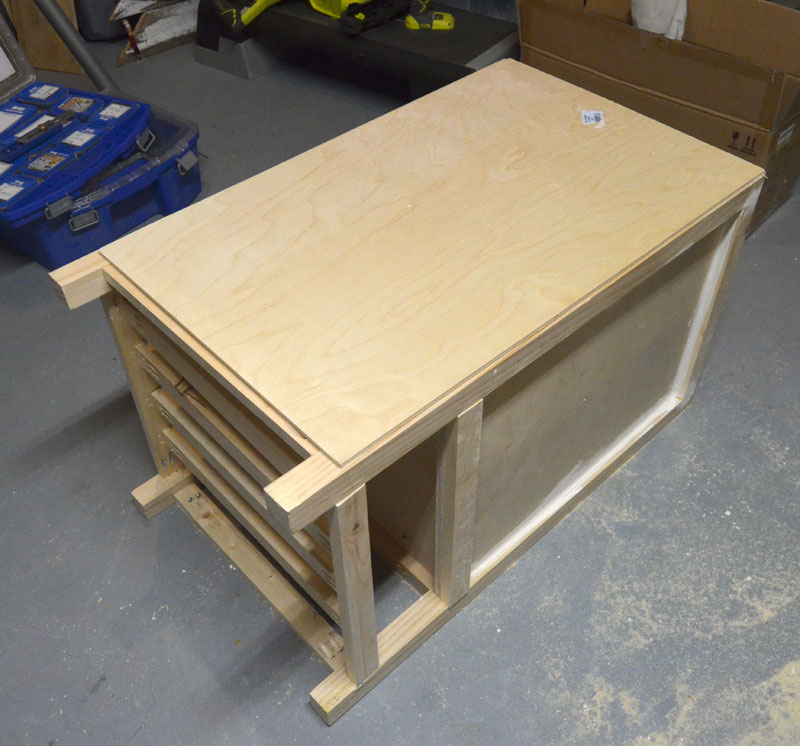
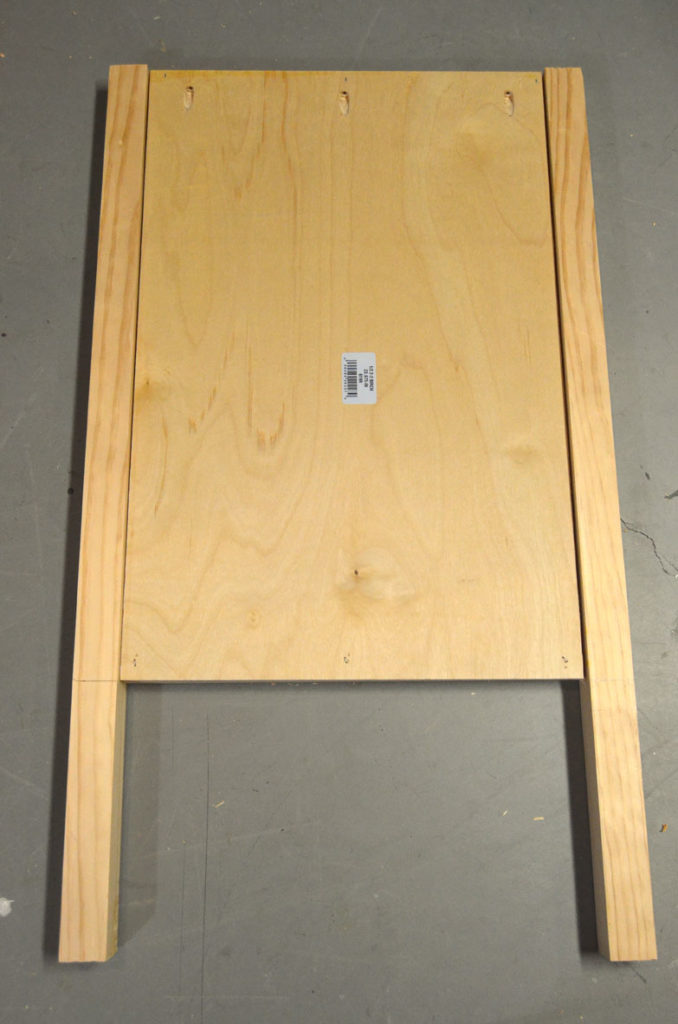
As I mentioned earlier, I chose to cover the back with with a piece of plywood cut to size. I also choose to have this piece of plywood cut long enough to reach the bottom shelf. I did this to prevent items on that bottom shelf from slipping through the back onto the floor. (This cart is going to be placed up against a wall instead of being in the middle of kitchen.)
Again, as per Ana’s instruction, I put the top together with more pocket screws and glue.
Step 3 – Paint or Stain (or both)
I brushed on two coats of white primer on the base of my cart and decided to stain the top.
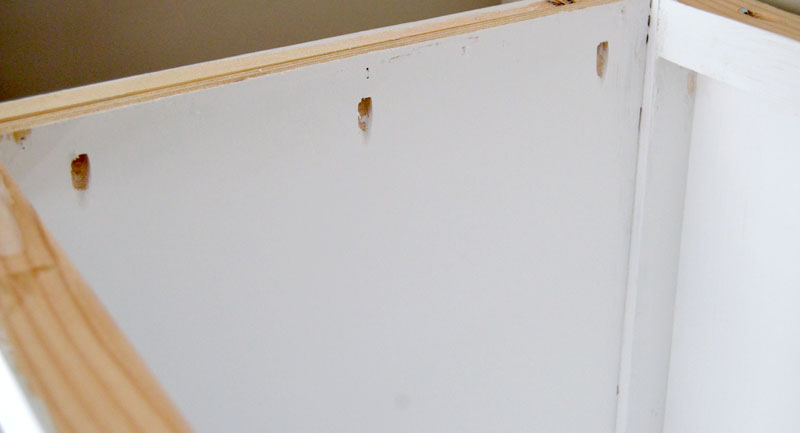
Note the pocket holes that are drilled into the sides of the cart to that will be used to attach the top.
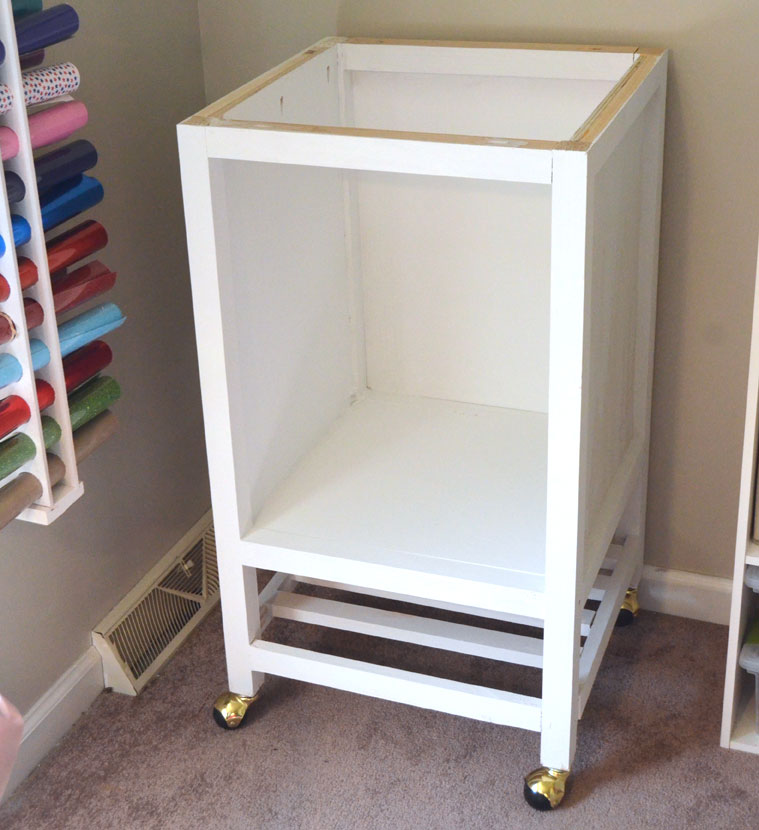
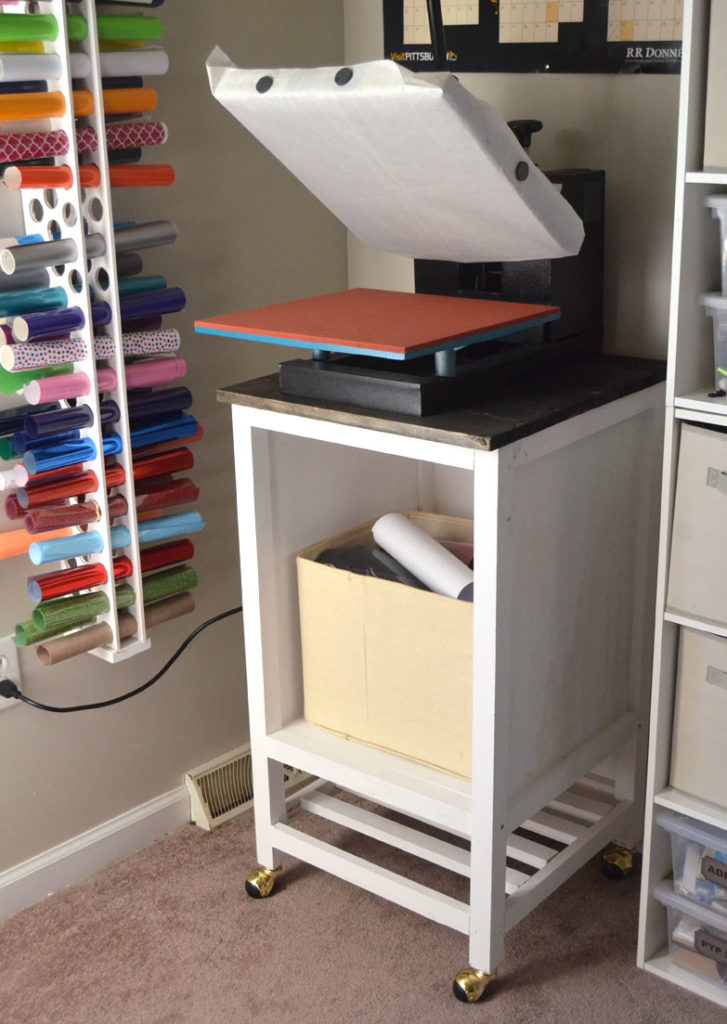
Here it is in place in that corner of my office. Right next to the vinyl storage! Convenient!
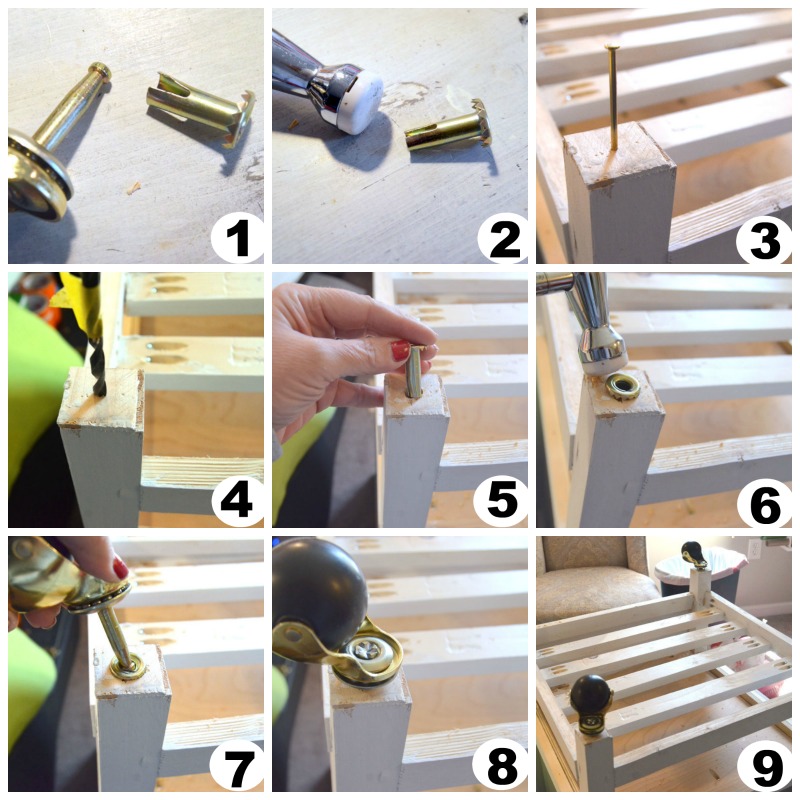
If you have never installed casters, I’ve included a little picture tutorial showing you how easy it is. I know that sometimes these type of things can look intimidating – especially if you’ve never done it before. (Like using wall anchors!)
- Remove socket from caster stem by prying open with a flat head screw driver
- Using pliers or a soft craft mallet ; ), gently squeee the socket until it is back to its original shape (or close to it)
- Tap a nail into bottom of leg (to give the drill bit a place to grip)
- Drill hole to depth recommended on caster packaging
- Place socket into drilled hole
- Tape socket with a mallet until the teeth lock into the wood
- Insert caster stem into socket and press firmly by hand until the caster stem locks into place
- Repeat on remaining legs
- Enjoy looking at your handiwork!
This is just perfect! I love the dark stained top with the white base. It’s just primer paint for now – I’m waiting on a shipment of glossy white paint to finish it. And like I said, I’ll live with it like this for now. I did make a door, but decided to try it without the door for now. I’m not sure I’ll add it or not. But I think I’ll probably add shelves for sure. That will be an easy add. I’ll probably use my Kreg Jig Shelf Pin Kit to so that I can adjust the height of the shelves as necessary. Similar to the shelves in my granddaughter’s armoire that I built for her.


Love this. Thinking about building one. Did you building that htv holder? How did u cut the holes? I’ve been trying to come up with a storage solution for so long.
wish this had better instructions. Like what size plywood and the sides are not 2 x 2s. No measurements of any kind. Anyway I’ll figure it out and do my own version. I was just needing to see how tall and wide so I could adjust it
What wood are you using? and what sizes they need to be cut.
Can I ask what type of heat press you have?
Just need it 3 times as tall and it’ll work!
😉
Create and Babble is a builder that helps you build your very own Rolling Cart. This platform lets you easily create and manage your own products, sales, and shipping. With Create and Babble, you’re in control of everything!
Dental Veneers in North Shore
The decision to modify existing plans from Ana White’s website is a smart approach, especially when time is of the essence and the desired design is relatively simple. By the way, write my discussion board I can here https://studyfy.com/write-my-discussion-board-post. Using ready-made plans and adapting them to your requirements is an effective way to start DIY projects, saving time and effort.
I had an excellent experience with this essay writing service. The writer delivered a clear, well-organized, and original essay right on time, exactly as I requested. The support team was responsive and helpful, answering all my questions promptly Essayshark . The quality of the writing exceeded my expectations, and the price was very reasonable for the level of professionalism and attention to detail. This service made my academic life much easier by meeting tight deadlines without compromising quality. I highly recommend it to any student looking for trustworthy and efficient essay help!
Thank you for an interesting and helpful post. It was nice to read and learn something new. Your articles always help me to expand my knowledge. If you like betting on sports, I advise you to pay attention to https://melbetsite.ci/. This site offers high odds, a lot of events for betting and a convenient interface. I use their services and I am always satisfied.
Hello everyone from GambleZoid! We’re here to share our expert knowledge and help you find the best online casinos. Read on to find out more about the latest news, bonuses and tips for responsible gambling. Your questions and comments are always welcome find out the details!
I’ve been searching for the best nascar betting site, and I think I’ve finally found one with great odds and promotions.
I enjoy using https://betwhales.org/ for its wide range of sports to bet on. It’s easy to use and provides exciting betting opportunities.