• Home
  • About
  • Contact
  • Partner
  • Privacy Policy
    • Facebook
    • Instagram
    • Pinterest
    • Twitter
    • YouTube

Create and Babble

  • DIY
    • Home Improvement
    • Upcycle
    • Furniture Makeovers
    • Build It
  • Craft
    • Silhouette
    • Sewing
    • Wedding DIYs
    • Seasonal
    • Gifts
  • Lifestyle
    • Bicyling
    • Travel
    • shopping

STAY UP TO DATE

Get the latest crafting and DIY tips, tricks and tutorials delivered straight to your inbox!

How to Make a Rustic Wooden Tray

September 17, 2015

If you like it, please share it!Share on pinterest
Pinterest
Share on facebook
Facebook
Share on twitter
Twitter
Share on stumbleupon
Stumbleupon
Share on google
Google
Share on linkedin
Linkedin
Share on reddit
Reddit

Welcome to another edition of The Power Tool Challenge! Every month, a group of us power-tool loving bloggers get together and post a project based on the month’s theme. This month the theme is “Fall”. I chose to make a pretty, rustic wood tray.
how to make a rustic tray from wood scraps
What does this tray have to do with Fall, you say? Weeel, I could have stenciled a Fall item, say a pumpkin or the word “Harvest” on it.

rustic-tray-10

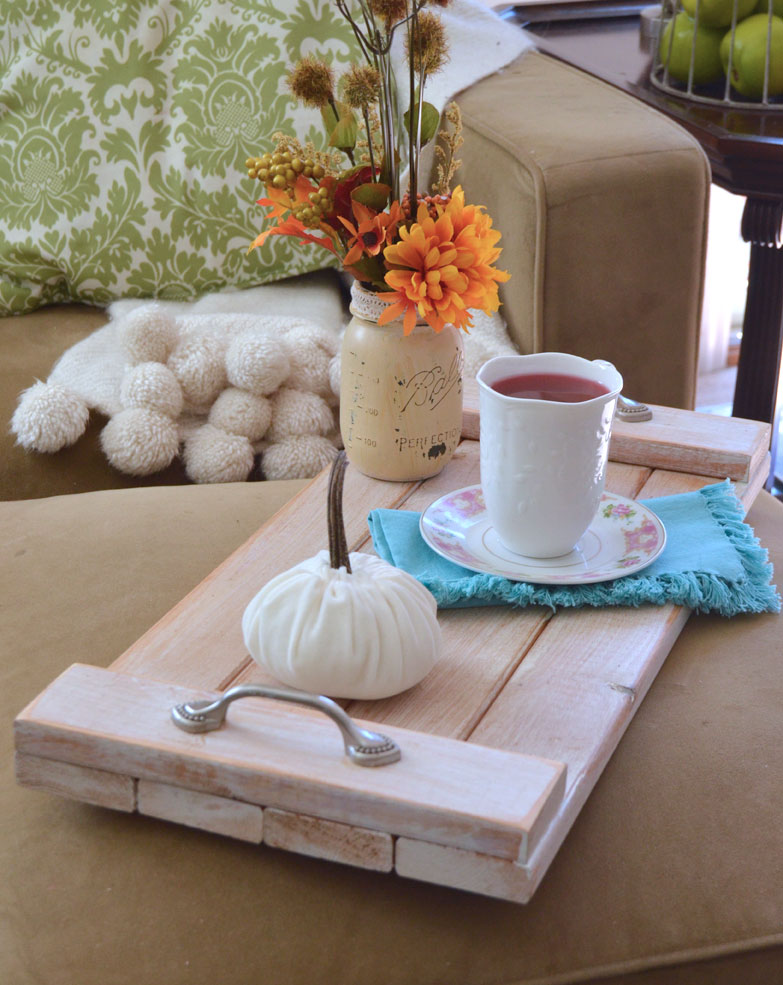
And that was the plan. But you know how plans go! After I dry-brushed on the white paint, I kind of liked it just how it was ; )

rustic-tray-13

And so I think that if you place fall-related items on such a tray, it becomes a Fall tray ; )

rustic-tray-1

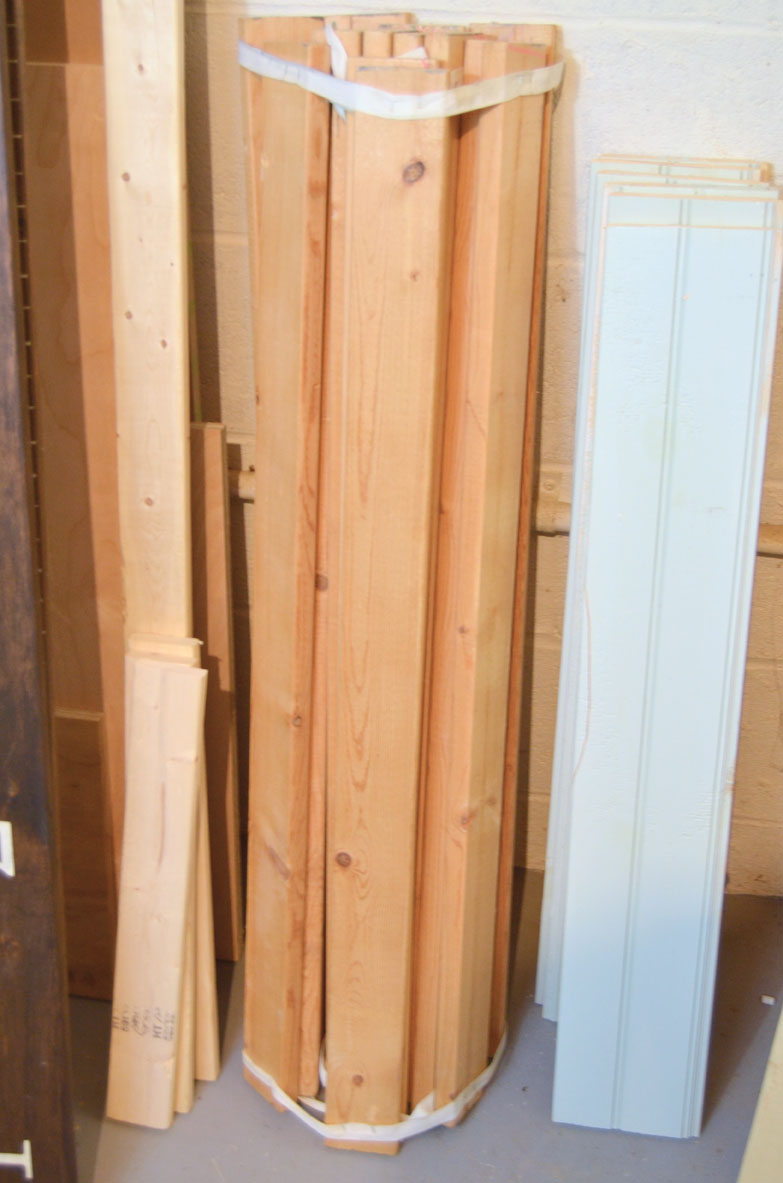
The 1″ x 3″ boards for my Fall tray started life as slats for an old Ikea bed. My son got a bigger bed and rescued those slats for me.

(This post contains affiliate links. If you make a purchase using one of these links, I may make a small commission at no additional cost to you. Thanks for your support of Create & Babble.)

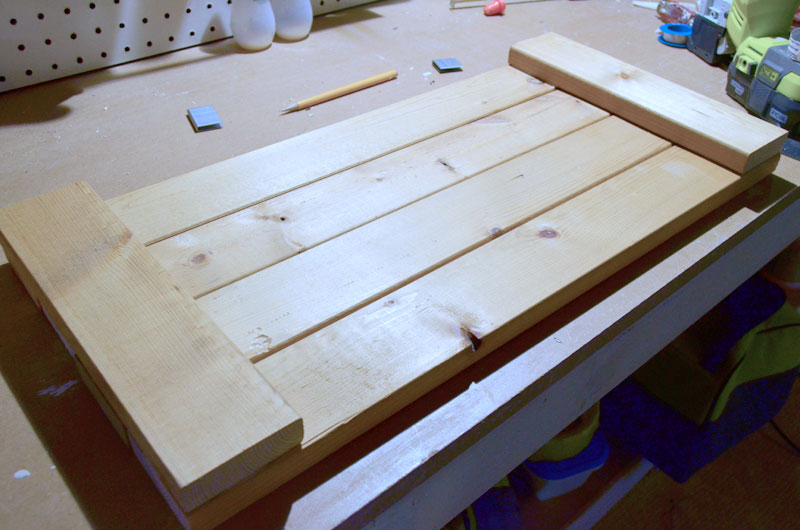
I simply cut four equal lengths of the 1 x 3’s to around 20 inches. I used my RYOBI 12″ Compound Sliding Miter Saw to cut the wood. (By the way, I have one of these miter saws to give away – enter here!)

rustic-tray-3

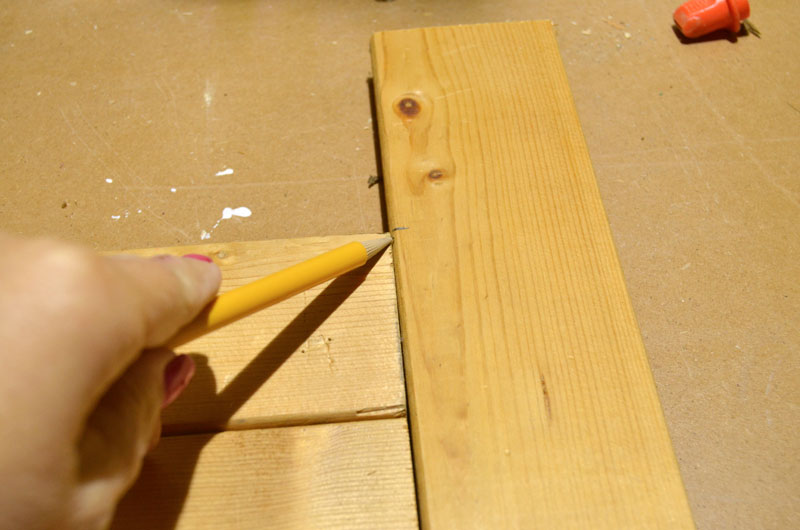
Next, I marked and cut two pieces to match the width of the four 1 x 3’s . . .

rustic-tray-4

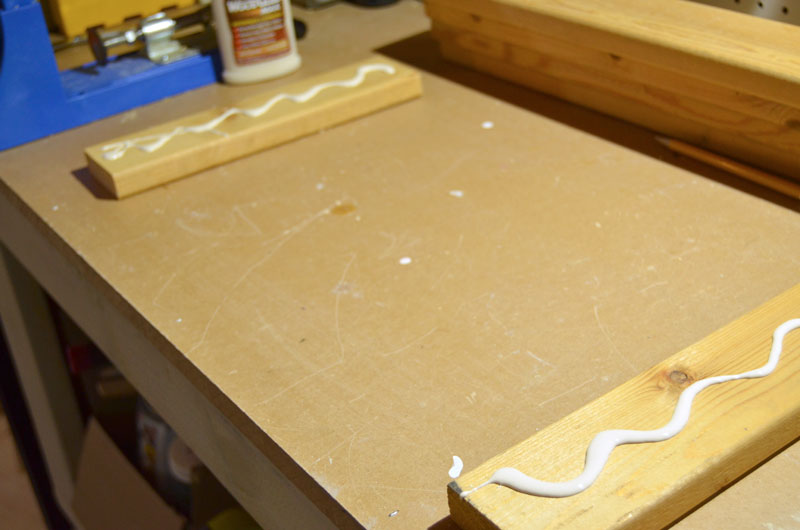
. . .  and attached them to the back of the 1 x 3’s with wood glue and 1″ crown staples with my RYOBI Narrow Crown Stapler.

rustic-tray-5

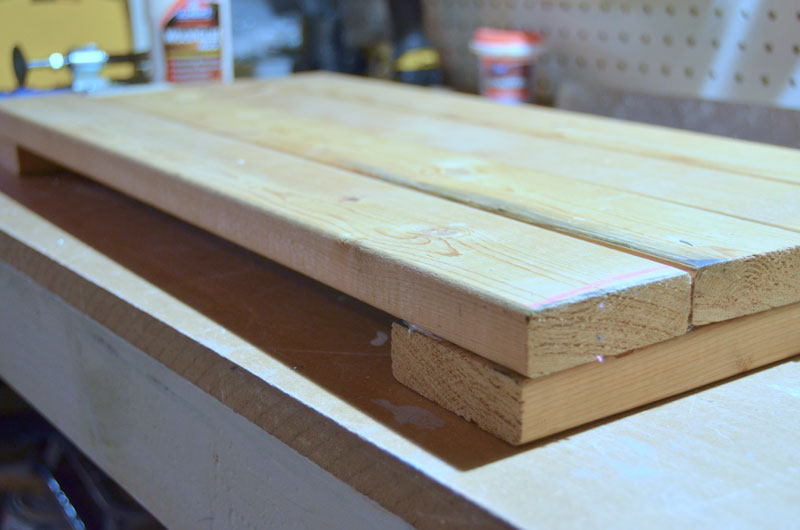
After waiting for the glue to dry . . .

rustic-tray-7

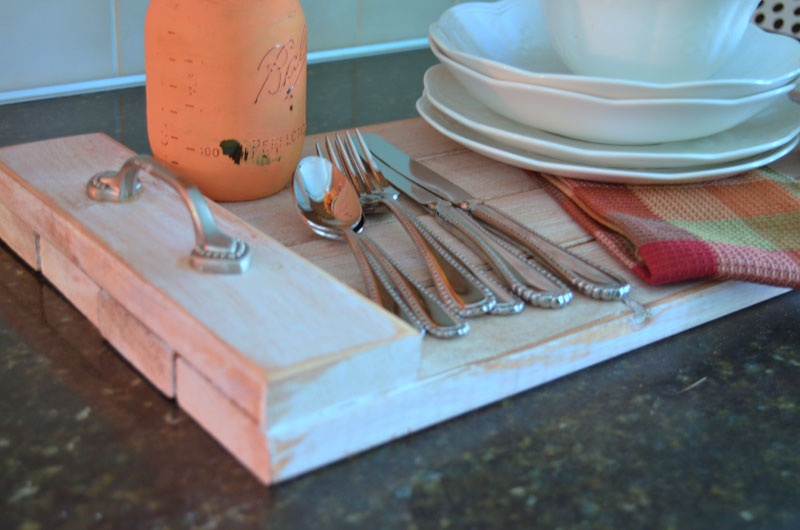
. . .  I flipped the tray over and found the handles that I had bought for my granddaughter’s armoire but didn’t use.

rustic-tray-8b

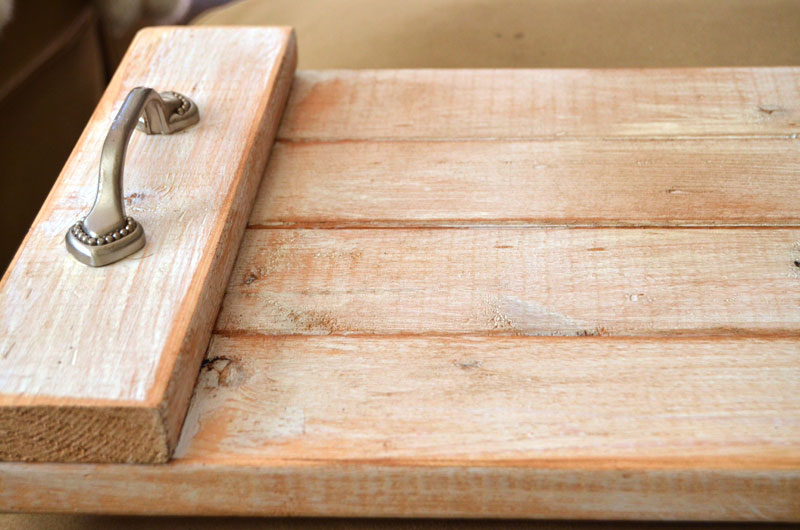
I love how they look as handles on this tray. Perfect!

rustic-tray-10

I hope you liked my rustic “Fall” tray! Now head over to see what my friends have made for Fall!

12033155_10206440127395920_5306346904341635901_n

An InLinkz Link-up

Joining in these fun parties:

Shabbilicious Friday

If you like it, please share it!Share on pinterest
Pinterest
Share on facebook
Facebook
Share on twitter
Twitter
Share on stumbleupon
Stumbleupon
Share on google
Google
Share on linkedin
Linkedin
Share on reddit
Reddit

Filed Under: Build It, Home Decor, Tutorials

« How to Monogram Hand Towels
Craft Show Lessons Learned »

Comments

  1. Larissa ~ Prodigal Pieces says

    September 17, 2015 at 7:51 am

    Love this project! I’m all about function and this is a sweet project that can be used in so many ways. Thank you for the DIY, Jeanie!

    Reply
  2. Christy@Confessions of a Serial Do-it-Yourselfer says

    September 17, 2015 at 7:58 am

    That is such a clever use of those old slats! I bet you will get a ton of use out of it as it is the perfect base for a vignette for any season! XO

    Reply
  3. Wendi @ H2OBungalow says

    September 17, 2015 at 8:05 am

    This is awesome! I love this tray for fall, and hot chocolate with a cozy blanket and sitting by a fireplace:) I have to have one…thanks for adding on to my “need to build list!”

    Reply
  4. Cher @ Designs by Studio C says

    September 17, 2015 at 8:37 am

    I love this tray! I am so inspired to make one of my own… A great weekend project!

    Reply
  5. gail says

    September 17, 2015 at 9:42 am

    I love trays of all kinds, but rustic ones are definitely my favs.

    beautiful Job Jeanie!

    pinning!

    gail

    Reply
  6. ananda says

    September 17, 2015 at 10:45 am

    hi jeanie, this tray is beautiful! i love the finish details and the handles, and the styling! <3

    Reply
  7. Marie@The Interior Frugalista says

    September 17, 2015 at 12:26 pm

    Jeanie your rustic wooden tray is awesome! I like that it can be changed up for the seasons and you decorated it for Fall beautifully. The white wash finish is spot on too!

    Reply
  8. DeDe @ Designed Decor says

    September 17, 2015 at 3:53 pm

    It is perfect the way it is I have been wanting to make one of these and now you have inspired me to geter done! Thanks Jeanie!

    Reply
  9. Nellie says

    September 17, 2015 at 10:48 pm

    Really like your tray, very cute and farmhouse looking.
    You did a great job on it.
    Blessings, Nellie

    Reply
  10. Paula@SweetPea says

    September 18, 2015 at 10:28 am

    Your tray has so many uses and will be perfect for decorating in any season. I need to stop by our Habitat Restore to pick up two door handles so that I can make one.

    Reply
  11. Amy says

    September 18, 2015 at 11:49 am

    Super cute tray, great idea repurposing the wood from the bed. I really love your finish!

    Reply
  12. Kerryanne @ Shabby Art Boutique says

    September 24, 2015 at 12:18 am

    Every house needs a tray or two Jeanie and this one is a beauty!
    Thank you for sharing it at Shabbilicious Friday this week. I’m delighted to be featuring it at tomorrow’s party.

    Reply
  13. LEILANI says

    September 25, 2015 at 10:01 am

    I was planning on doing this with two old cupboard doors but wasn’t sure how to place the handles. Now I know that need to glue another strip of wood on each side. Thanks for the tip!

    Reply
  14. Loida says

    September 25, 2015 at 11:34 pm

    Wait, how did u put the handles on the wood?

    Reply
    • MARTINA THURLOW says

      May 14, 2016 at 12:01 am

      I am wondering the same thing. Please explain the handles. Thanks!

      Reply
      • Jeanie says

        May 18, 2016 at 10:41 am

        I attached them with screws that were drilled in through the bottom of the tray.

        Reply
  15. Debi @ Surroundings by Debi says

    September 28, 2015 at 8:30 pm

    I love this project you have created! Someday I will learn to use a hammer and saw! I would love to have you share with us at the Thursday Favorite Things Blog Hop. We go live every Wednesday at 8:00 pm CST.

    Reply
  16. Cathy says

    March 27, 2019 at 2:58 pm

    I love the tray and have always wanted to make them for myself and gifts. Just wondering how heavy they are with the 1 x 3 wood !!!!

    Reply
  17. adam says

    February 4, 2025 at 3:15 pm

    Companies can quickly prototype and iterate designs without expensive molds or tooling. Impact: Faster product development cycles, reduced time-to-market, and increased innovation. https://wallstreetpepe.com/

    Reply

Trackbacks

  1. Shabbilicious Friday Link Party - Shabby Art Boutique says:
    September 24, 2015 at 3:46 pm

    […] from Create and Babble shows us how to make her rustic tray from wood scraps. This one is perfect for any time of the […]

    Reply
  2. how to make a rustic tray from wood scraps... - Woodwork Cafe says:
    November 4, 2017 at 12:17 pm

    […] Source […]

    Reply
  3. 1acknowledge says:
    January 12, 2022 at 9:09 pm

    1noontide

    Reply

Leave a Reply Cancel reply

Your email address will not be published. Required fields are marked *

About Jeanie

About Jeanie

Welcome to Create & Babble. This is where I share my loves: crafting, hiking and camping

Read more about me here

Categories

Archives

AntiqueFarmHouse
Zots Craft Adhesive Dots

Amazon Associates Disclosure

Jeanie Hevener Emmert is a participant in the Amazon Services LLC Associates Program, an affiliate advertising program designed to provide a means for sites to earn advertising fees by advertising and linking to amazon.com.


hobby lobby

Copyright © 2025 · Site by Pretty Pink Studio

Copyright © 2025 · Glam Theme on Genesis Framework · WordPress · Log in

This website uses cookies to improve your experience. We'll assume you're ok with this, but you can opt-out if you wish.Accept Reject Read More
Privacy & Cookies Policy

Privacy Overview

This website uses cookies to improve your experience while you navigate through the website. Out of these, the cookies that are categorized as necessary are stored on your browser as they are essential for the working of basic functionalities of the website. We also use third-party cookies that help us analyze and understand how you use this website. These cookies will be stored in your browser only with your consent. You also have the option to opt-out of these cookies. But opting out of some of these cookies may affect your browsing experience.
Necessary
Always Enabled
Necessary cookies are absolutely essential for the website to function properly. This category only includes cookies that ensures basic functionalities and security features of the website. These cookies do not store any personal information.
Non-necessary
Any cookies that may not be particularly necessary for the website to function and is used specifically to collect user personal data via analytics, ads, other embedded contents are termed as non-necessary cookies. It is mandatory to procure user consent prior to running these cookies on your website.
SAVE & ACCEPT