• Home
  • About
  • Contact
  • Partner
  • Privacy Policy
    • Facebook
    • Instagram
    • Pinterest
    • Twitter
    • YouTube

Create and Babble

  • DIY
    • Home Improvement
    • Upcycle
    • Furniture Makeovers
    • Build It
  • Craft
    • Silhouette
    • Sewing
    • Wedding DIYs
    • Seasonal
    • Gifts
  • Lifestyle
    • Bicyling
    • Travel
    • shopping

STAY UP TO DATE

Get the latest crafting and DIY tips, tricks and tutorials delivered straight to your inbox!

Make Your Own Roman Shades

June 12, 2013

If you like it, please share it!Share on pinterest
Pinterest
Share on facebook
Facebook
Share on twitter
Twitter
Share on stumbleupon
Stumbleupon
Share on google
Google
Share on linkedin
Linkedin
Share on reddit
Reddit

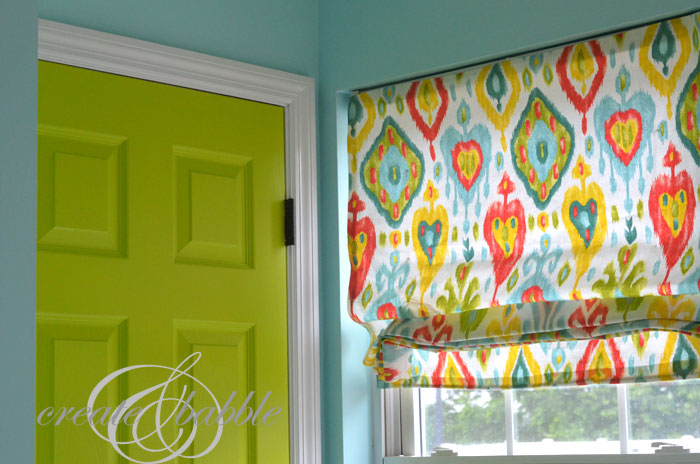
When I decided that I wanted Roman Shades in my kitchen I headed over to Pinterest to get ideas on how to make them. There are plenty of really good Roman Shade tutorials to be found over there. Since I already had faux wood blinds, I was drawn to the roman shades that were made with the “skeleton” of mini blinds. What I wasn’t crazy about was being able to see the shadow or outline of the slats that were glued to the back of the fabric when the shade is down. I made mine without using the slats. The end result is that the folds are not as crisp and the ends flop down somewhat, but I’m okay with that.
roman shades_createandbabble.com


This is how I quickly and easily made my roman shades using the blinds that I already had:

  • Removed slats by cutting off the ladder-like strings from blinds, making sure not to cut the cords.
  • Cut fabric to the height of my window and the width of the top of my blind (add 1″ to the width and 3″ to the height).
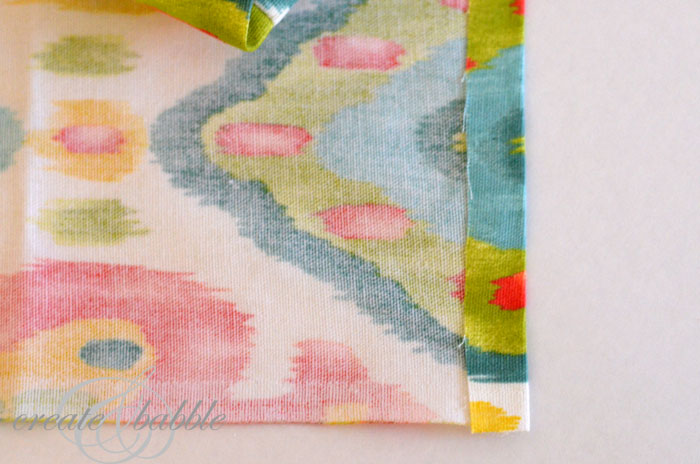
  • Hem side edges 1/2″ using iron-on hemming tape.
  • Hem top and bottom edges 1-1/2″ using iron-on hemming tape.

hemming roman shades_createandbabble

After I decided how deep (or long?) I wanted the folds to be when my blind is raised (around 3 Ā inches sounded good to me), that meant the “pick ups” needed to be about six inches apart.

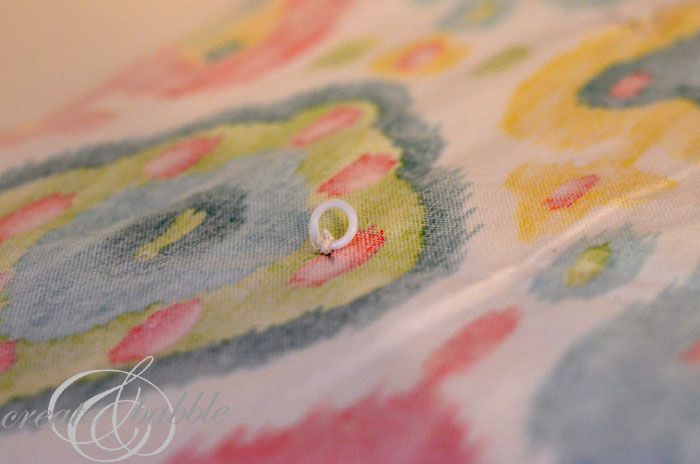
Starting at the bottom, I measured every 6-1/2″ and made a small, light “X” with a pencil along the line where the cords would fall straight down from the top rail of the blind.

DIY Roman Shade_createandbabble
These “X”s represent where the little plastic rings will be sewn.
roman shades_createandbabble

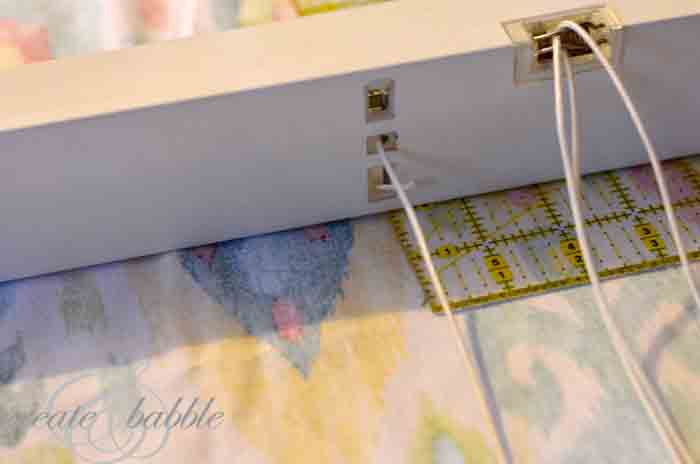
  • After all of the rings are sewn on, I laid the header of the blind on the top edge of the shade and thread the cords down through the plastic rings. I then tied the end of each cord to the bottom rings.
  • Adhered the header of the blind to the top edge of the shape using adhesive-backed hook and loop.
  • Installed the blind back into the brackets.
  • To keep the bottom edge nice and straight, I inserted a dowel rod into the pocket that was created by the bottom hem.

diy roman shade_createandbabble
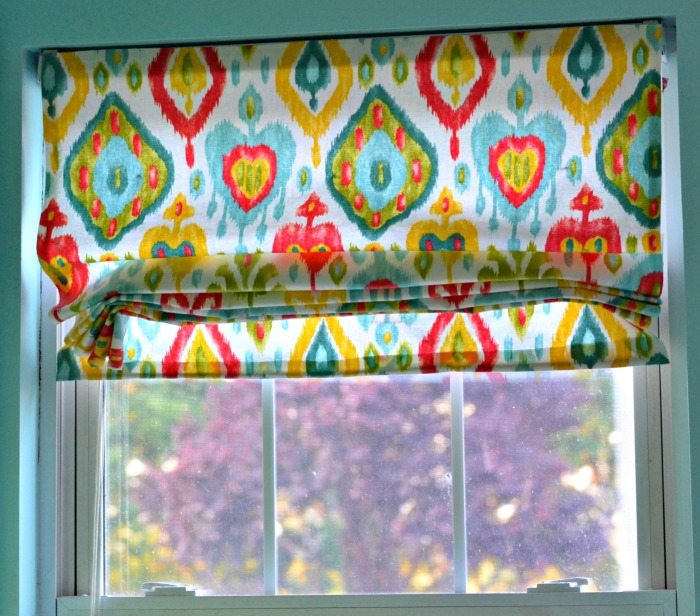
So there you have it…my kinda lazy easy and quick version of DIY roman shades. I didn’t go all out and double hem the edges, I didn’t measure precisely and I used hemming tape instead of sewing. Since this fabric is pretty bold, they will probably be replaced periodically and this is an inexpensive way to be able to change out window treatments.

If you like it, please share it!Share on pinterest
Pinterest
Share on facebook
Facebook
Share on twitter
Twitter
Share on stumbleupon
Stumbleupon
Share on google
Google
Share on linkedin
Linkedin
Share on reddit
Reddit

Filed Under: Home Decor, Tutorials

« DIY Business Cards {Sihouette Tutorial}
Canvas Photo Collage »

Comments

  1. Kim says

    June 13, 2013 at 9:57 pm

    It looks wonderful! Love the fabric and the green door is to die for!

    Reply
    • Jeanie says

      June 13, 2013 at 10:21 pm

      Thanks Kim! I couldn’t take a whole room of it but I love the door!

      Reply
  2. Lori @ A Bright and Beautiful Life says

    June 14, 2013 at 12:56 pm

    Those look so easy to make. Thanks for the tutorial ~ you make it look so simple. I, too, like the somewhat slouchy look when they’re pulled up.

    Reply
  3. Jamie @ Love Bakes Good Cakes says

    June 17, 2013 at 12:39 pm

    I agree that you make it look so simple! I love the bold colors šŸ™‚ Thanks so much for sharing at All my Bloggy Friends – I can’t wait to see what you share this week!

    Reply
    • Jeanie says

      June 17, 2013 at 12:45 pm

      Thank you Jamie!

      Reply
  4. Lindsey says

    June 19, 2013 at 6:32 pm

    Hey there! I absolutely love these roman shades! So cute! I am featuring your post this week @ emmylane.net (ThriftyThursday) Hope to see you again this week!

    Lindsey

    Reply
    • Jeanie says

      June 20, 2013 at 7:00 am

      Thank you so much Lindsey!

      Reply
  5. Mel says

    June 20, 2013 at 7:36 pm

    They look fantastic, I want to try this myself but I’m a bit scared of it šŸ™‚

    Reply
    • Jeanie says

      June 20, 2013 at 7:45 pm

      Thanks Mel! I say give it a go. You’ll be surprised at how easy they are to make : )

      Reply
  6. Jen says

    June 26, 2013 at 10:10 pm

    The roman shades are beautiful! Where did you buy the fabric? I love it!!!

    Reply
  7. Angel says

    March 28, 2017 at 8:06 pm

    That fabric is exactly what I’m looking for- do you remember where you got it?

    Reply
    • Jeanie says

      March 30, 2017 at 6:06 pm

      Yes, I got it at JoAnn Fabrics. I believe they still sell it.

      Reply
  8. Jonathan Lincoll says

    June 10, 2017 at 7:20 am

    What you have done to your blinds is topnotch. I am greatfull that you suggest this.

    Reply

Trackbacks

  1. Thrifty Thursday ~ Spicy Cooked Cabbage says:
    June 19, 2013 at 5:53 pm

    […] Jeanie @ Create & Babble- DIY Roman Shades […]

    Reply
  2. How to Stencil Fabric and Match Your Decor - Create and Babble says:
    August 30, 2013 at 5:52 pm

    […] in my kitchen. I was on a hunt for a houndstooth print in colors that are in the fabric of theĀ Ā roman shadesĀ that I made. Ā I have to honest, I didn’t look that hard. Just once at Joann Fabrics. […]

    Reply
  3. Pfister Faucet Giveaway - Create and Babble says:
    November 30, 2013 at 10:13 am

    […] my kitchen back in March when I painted the cabinets white, got rid of the hideous red wall, added bright patterns and colorĀ and painted the pantry door that can be seen from miles […]

    Reply
  4. How to Make Roman Shades: 31 DIY Patterns and Tutorials | Guide Patterns says:
    November 5, 2015 at 5:24 am

    […] Make Your Own Roman Shades […]

    Reply
  5. How to Make Roman Shades: 28 DIY Patterns and Tutorials | Guide Patterns says:
    April 20, 2016 at 8:45 am

    […] Make Your Own Roman Shades […]

    Reply
  6. Interior Design: How to Make Roman Shades: 28 DIY Patterns and Tutorials – CrochetingHearts.org says:
    April 23, 2020 at 6:09 am

    […] Make Your Own Roman Shades […]

    Reply

Leave a Reply Cancel reply

Your email address will not be published. Required fields are marked *

About Jeanie

About Jeanie

Welcome to Create & Babble. This is where I share my loves: crafting, hiking and camping

Read more about me here

Categories

Archives

AntiqueFarmHouse
Zots Craft Adhesive Dots

Amazon Associates Disclosure

Jeanie Hevener Emmert is a participant in the Amazon Services LLC Associates Program, an affiliate advertising program designed to provide a means for sites to earn advertising fees by advertising and linking to amazon.com.


hobby lobby

Copyright © 2025 · Site by Pretty Pink Studio

Copyright © 2025 Ā· Glam Theme on Genesis Framework Ā· WordPress Ā· Log in

This website uses cookies to improve your experience. We'll assume you're ok with this, but you can opt-out if you wish.Accept Reject Read More
Privacy & Cookies Policy

Privacy Overview

This website uses cookies to improve your experience while you navigate through the website. Out of these, the cookies that are categorized as necessary are stored on your browser as they are essential for the working of basic functionalities of the website. We also use third-party cookies that help us analyze and understand how you use this website. These cookies will be stored in your browser only with your consent. You also have the option to opt-out of these cookies. But opting out of some of these cookies may affect your browsing experience.
Necessary
Always Enabled
Necessary cookies are absolutely essential for the website to function properly. This category only includes cookies that ensures basic functionalities and security features of the website. These cookies do not store any personal information.
Non-necessary
Any cookies that may not be particularly necessary for the website to function and is used specifically to collect user personal data via analytics, ads, other embedded contents are termed as non-necessary cookies. It is mandatory to procure user consent prior to running these cookies on your website.
SAVE & ACCEPT