• Home
  • About
  • Contact
  • Partner
  • Privacy Policy
    • Facebook
    • Instagram
    • Pinterest
    • Twitter
    • YouTube

Create and Babble

  • DIY
    • Home Improvement
    • Upcycle
    • Furniture Makeovers
    • Build It
  • Craft
    • Silhouette
    • Sewing
    • Wedding DIYs
    • Seasonal
    • Gifts
  • Lifestyle
    • Bicyling
    • Travel
    • shopping

STAY UP TO DATE

Get the latest crafting and DIY tips, tricks and tutorials delivered straight to your inbox!

Paper Flower Centerpiece

March 2, 2015

If you like it, please share it!Share on pinterest
Pinterest
Share on facebook
Facebook
Share on twitter
Twitter
Share on stumbleupon
Stumbleupon
Share on google
Google
Share on linkedin
Linkedin
Share on reddit
Reddit

My sweet little granddaughter just had her first birthday and we celebrated this past weekend at a party in her honor. My daughter asked me to help out by making some decorations for her “cute as a button” birthday party. Did you see the invitations that I made? Since buttons were the theme of this party I made a paper flower centerpiece with button centers for the buffet table.
paper-flower-centerpiece
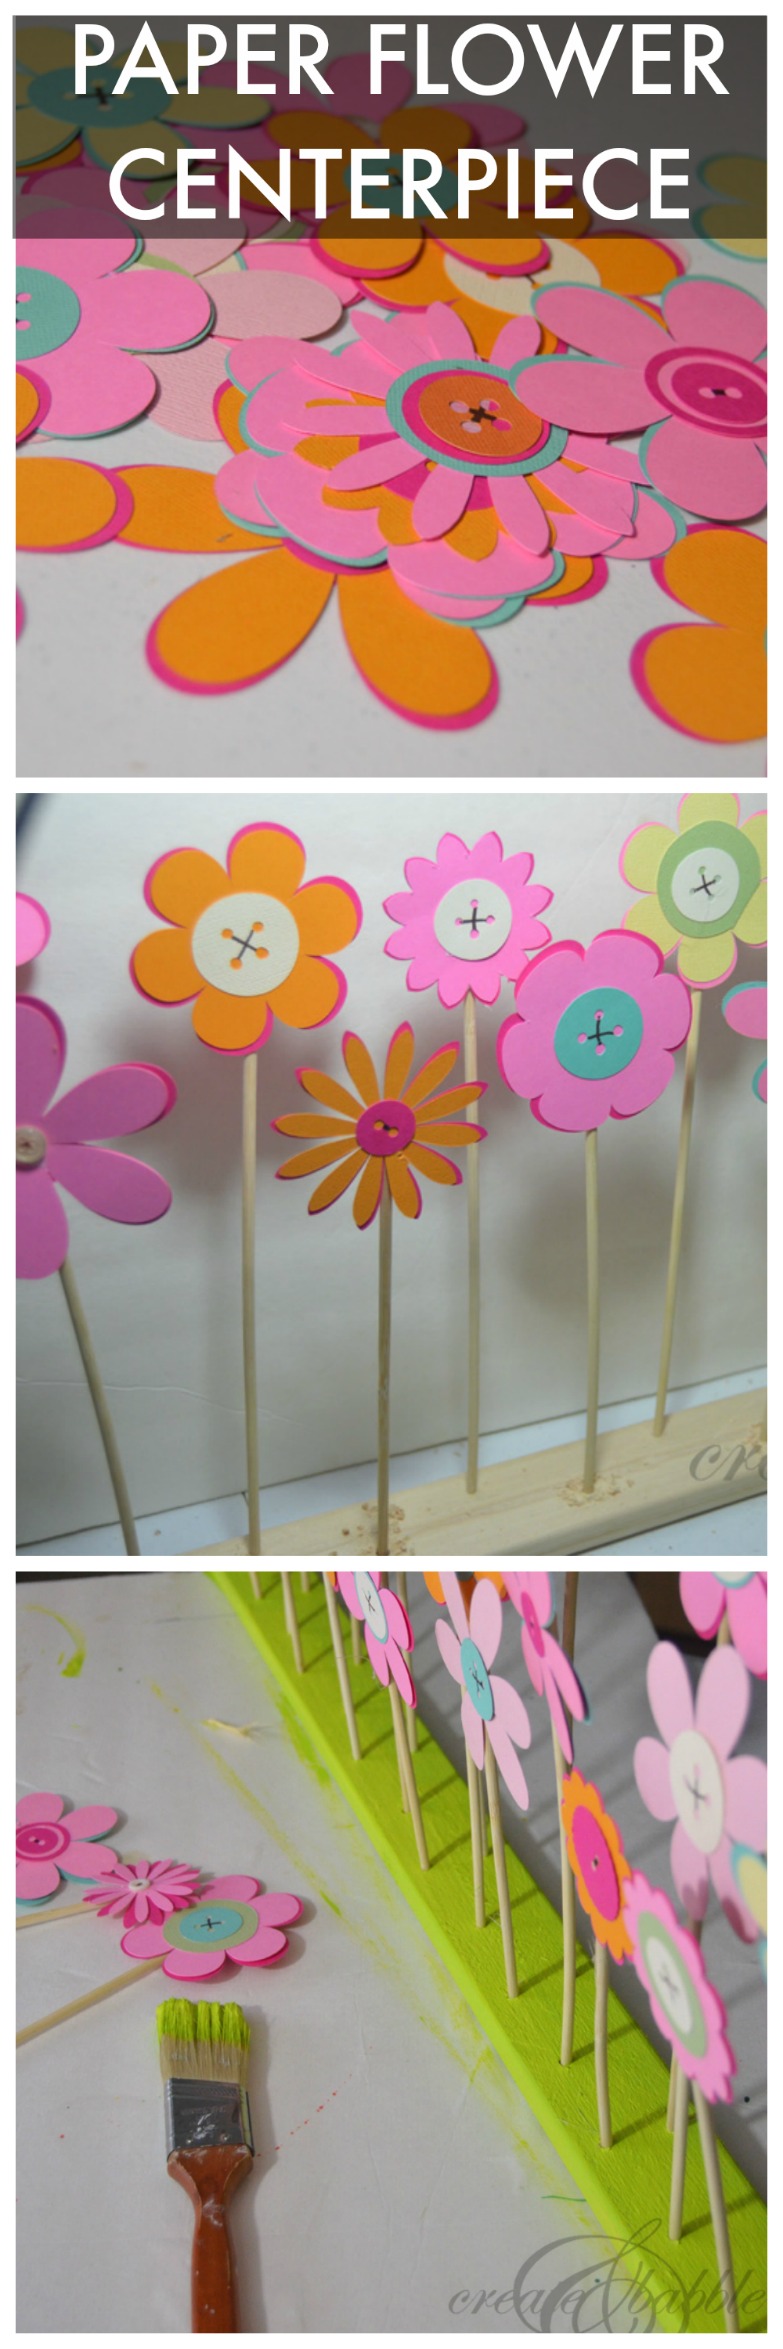
I made it by first cutting out a lot (and I do mean a lot!) of flower and button shapes using my Silhouette Cameo.
paper-flower-centerpiece

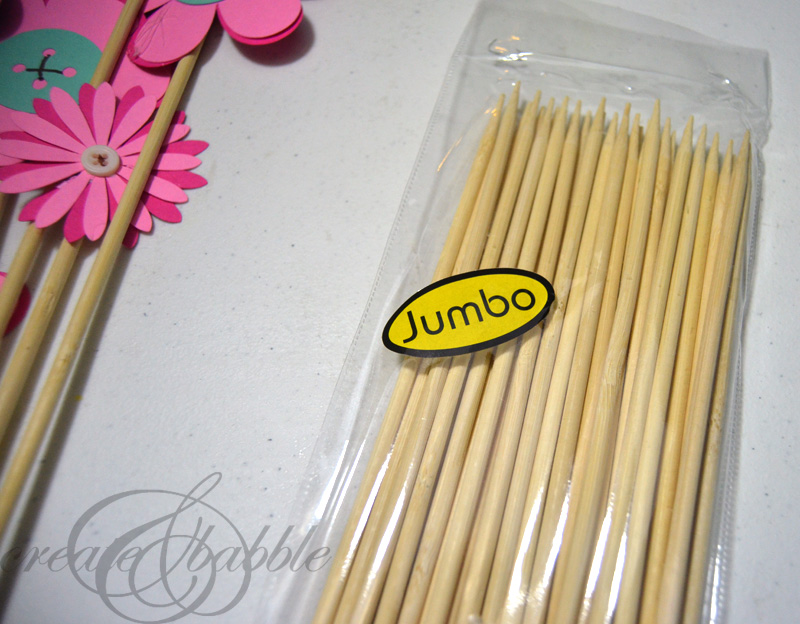
Once all of the flowers were cut and assembled, I hot-glued them onto jumbo-sized bamboo skewers.

paper-flower-centerpiece

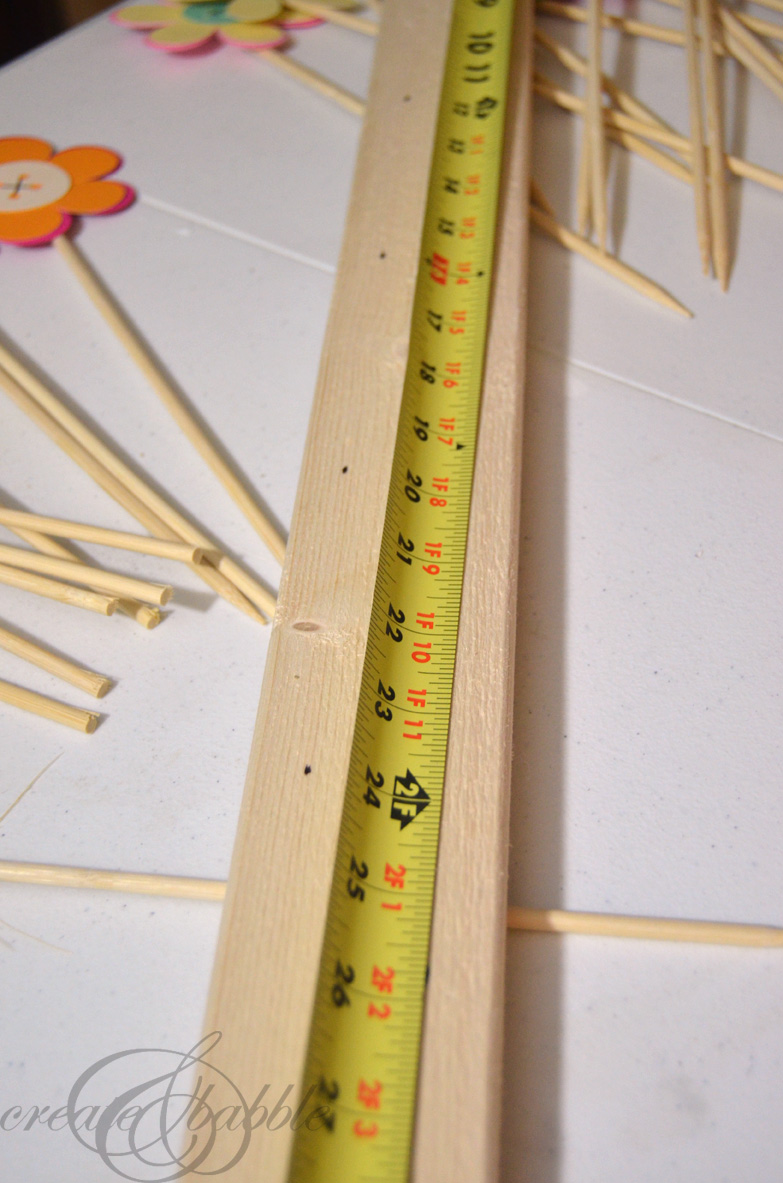
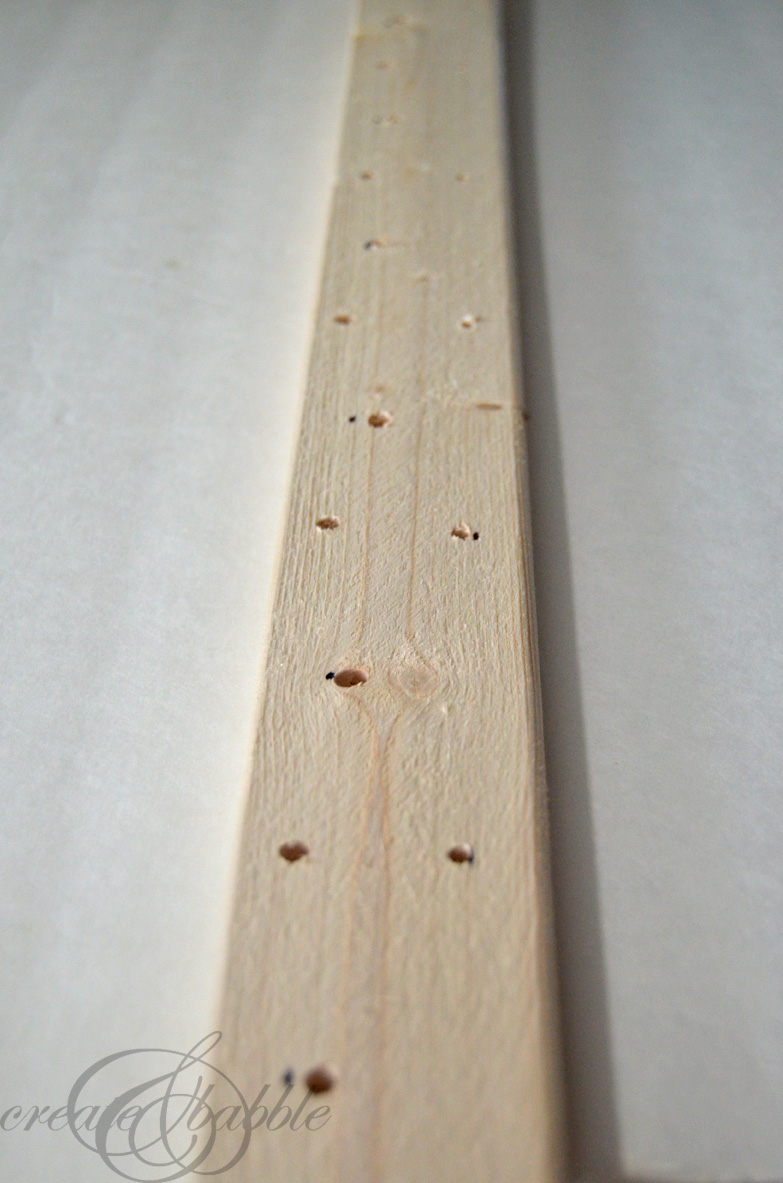
Then I took a leftover piece of a 1″ x 3″ board and marked 2″ increments with a dot of a marker.

paper-flower-centerpiece

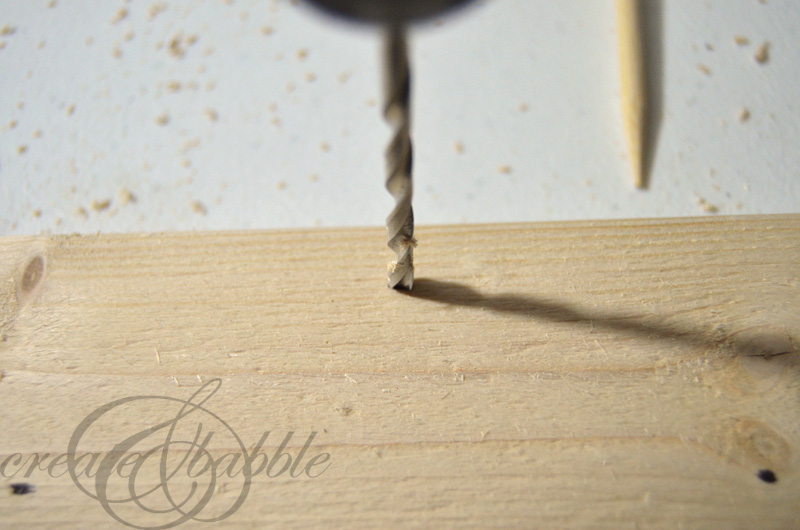
Next, I drilled holes at each mark using a drill bit close in size to the skewers.

paper-flower-centerpiece

Once I had all of the holes drilled, I cut down 1/3 of the skewers by about 3 inches, and another 1/3 of the skewers by about 4 inches.

paper-flower-centerpiece

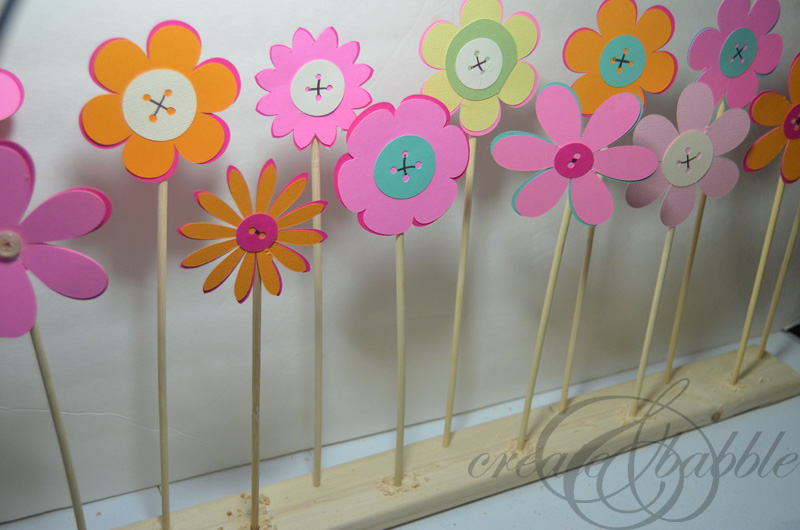
I cut them to different heights so that all of the flowers could be seen. Shortest in the front row and tallest in the back row.

paper-flower-centerpiece

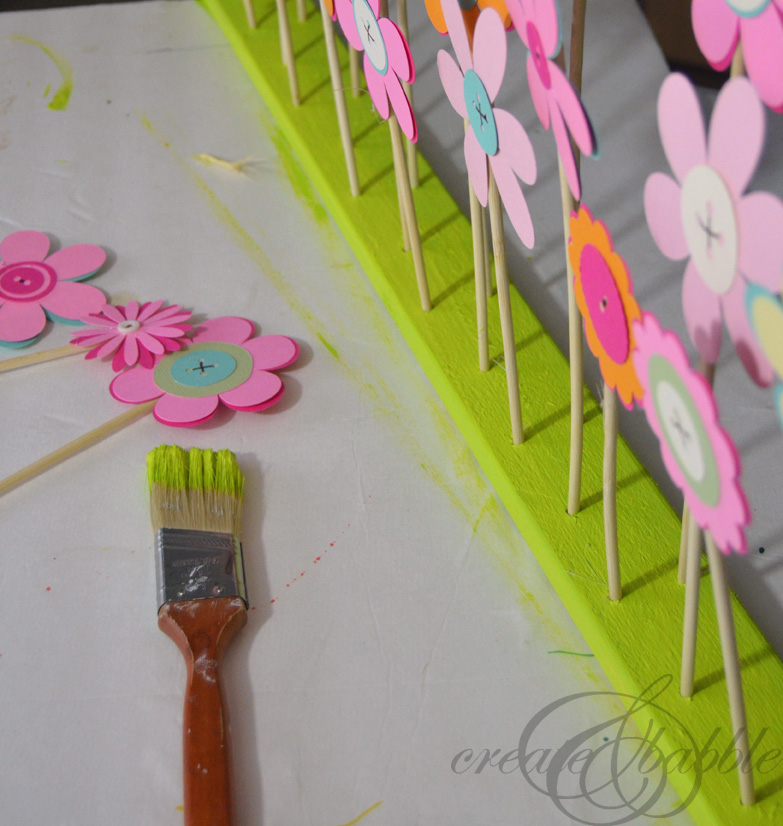
After I was happy with the placement of the flowers, I took them out so that I could paint the 1 x 3 board. I used leftover lime green paint. Now how many people can say they have leftover lime green paint??? Acrylic craft paint would work well also ; )

paper-flower-centerpiece

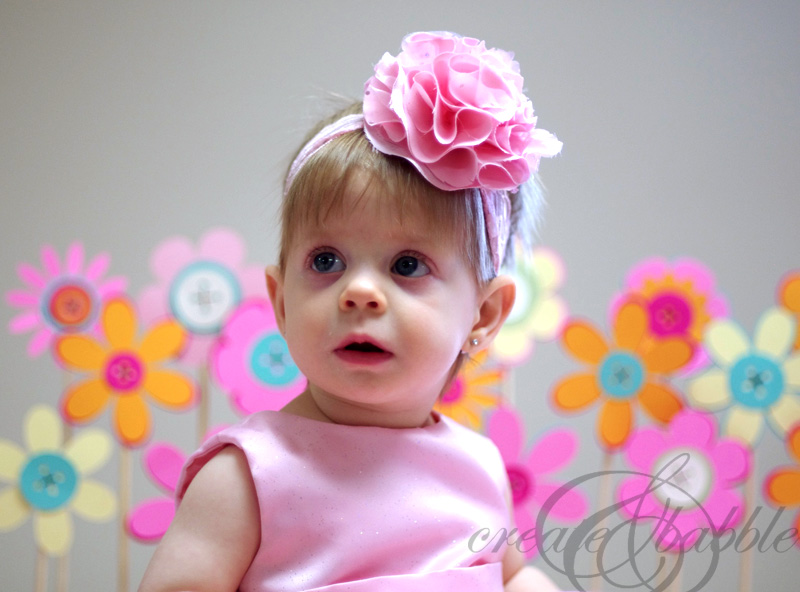
And here’s the birthday princess sitting in front of her colorful paper flower centerpiece. I also made her dress and fabric flower headband.

paper-flower-centerpiece

But I can’t take credit for the cake. Isn’t it sweet!

https://createandbabble.com/fabric-flower-baby-headbands/

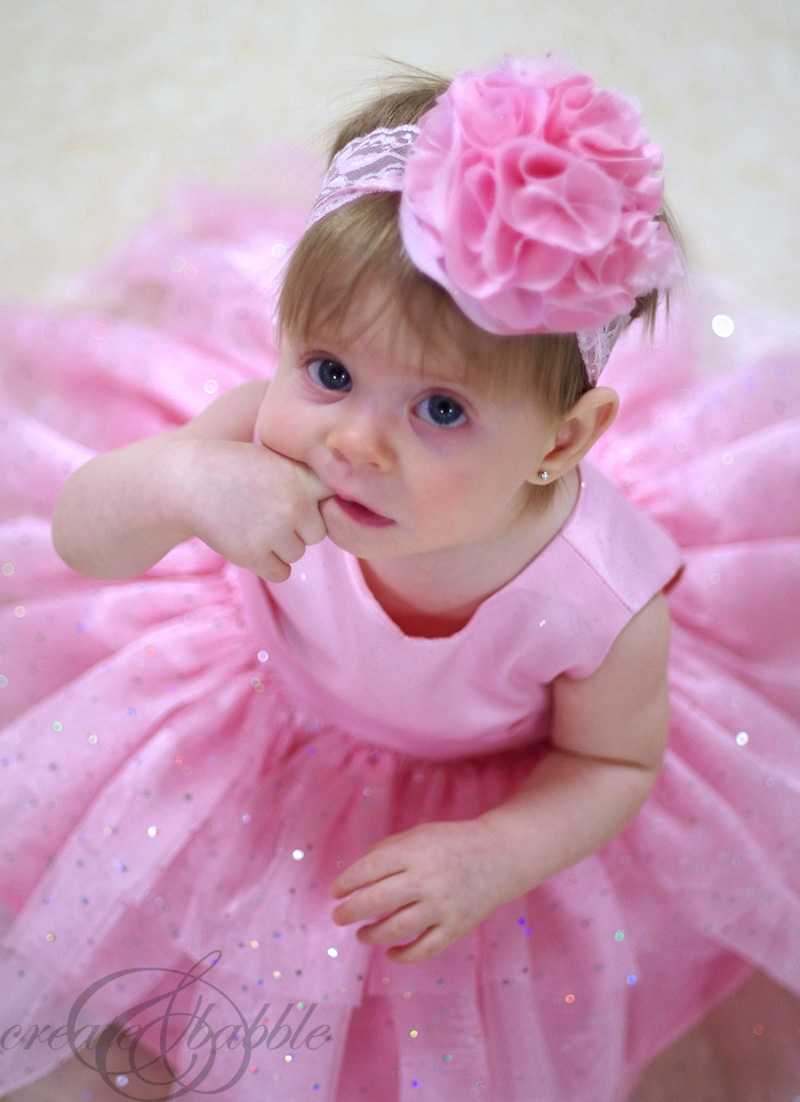
I had to include one more photo of the princess in her birthday dress. It’s McCalls pattern – M7037 if anyone is interested. Warning: it’s fully lined and has a zipper. But if I can make it, you can too!

If you like it, please share it!Share on pinterest
Pinterest
Share on facebook
Facebook
Share on twitter
Twitter
Share on stumbleupon
Stumbleupon
Share on google
Google
Share on linkedin
Linkedin
Share on reddit
Reddit

Filed Under: Silhouette, Tutorials

« Vinyl Wall Decal
An Easy Way to Make Lined Curtains »

Comments

  1. Laura / Pet Scribbles says

    March 4, 2015 at 11:52 am

    This centerpiece is so very pretty Jeanie! (And your granddaughter is adorable!)

    Reply
  2. Candace says

    March 8, 2015 at 9:02 pm

    Your granddaughter is absolutely precious! And that dress is definitely princess worthy :). Love the flower centerpiece! The skewers were a great idea to “plant” them.

    Reply
    • Jeanie says

      March 10, 2015 at 8:38 am

      Aww, thank you Candace! We simply adore her ; )

      Reply
  3. Bridget/The Recipe Wench says

    March 9, 2015 at 2:03 pm

    These are adorable. What fun! And your grand daughter is beautiful! Thank you so much for sharing this activity with us at the Inspire Me Mondays Link-Up!

    Reply
  4. Raquel says

    March 11, 2015 at 1:41 pm

    Oh your grand-daughter is precious! I love your flower centerpieces with the buttons. That cake is to die for too! Found you on Wonderful Wednesday.Good job on the dress too! 🙂

    Reply
    • Jeanie says

      March 12, 2015 at 2:09 pm

      Thank you Raquel!

      Reply
  5. Kathleen says

    March 18, 2015 at 7:36 am

    This is so sweet! I love the colors.

    Reply
  6. Lee says

    April 8, 2015 at 3:29 pm

    The whole theme of the party is just perfect. Thanks so much for getting back so fast w/ help on the dress.

    This is a new pattern so there is little advice out there. I think u will get a lot of ??? On it. I made the bodice w/ flower cotton print, lots of pink w/ tiny green leaves. I used green cotton for the waist band and pink tulle for the ruffles.
    Being lined made it easier, no hemming, no facings. The ruffle seems to be the problem. U said u used less ruffle, about how much less, if u don’t mind telling? The other dress same pattern done in red, she too used less ruffle. I used the full amount, it comes out to 17 feet of tulle for each ruffle, yes u read that right 17 feet. It fits very easy but it is full.

    This is what I hoped I could post w/o being out of line on your blog

    The 72in tulle does exist I only found rougher kind. So here’s my 2 cents. Get the reg. 60in get 2 yds exact, open it up and refold the opposite of the salvage and viola u have 72in. Place pattern on fold and cut u have very little waist. BUT!!! U will need to buy 4 yards total cut in 2 yard increments. If u get 2 1/2 yds refold it the half of yard extra is waisted. Tulle is cheap get the 4 yd
    Your little princess in her petty pink party dress is so lovely that it inspired me to get sewing.

    Reply
    • Jeanie says

      April 12, 2015 at 1:38 pm

      Thanks for the tip Lee! And you’re not out of line at all ; ) I’m happy that I’ve inspired you to get sewing!

      Reply

Trackbacks

  1. 1competitive says:
    January 12, 2022 at 6:57 pm

    3surgery

    Reply

Leave a Reply Cancel reply

Your email address will not be published. Required fields are marked *

About Jeanie

About Jeanie

Welcome to Create & Babble. This is where I share my loves: crafting, hiking and camping

Read more about me here

Categories

Archives

AntiqueFarmHouse
Zots Craft Adhesive Dots

Amazon Associates Disclosure

Jeanie Hevener Emmert is a participant in the Amazon Services LLC Associates Program, an affiliate advertising program designed to provide a means for sites to earn advertising fees by advertising and linking to amazon.com.


hobby lobby

Copyright © 2025 · Site by Pretty Pink Studio

Copyright © 2025 · Glam Theme on Genesis Framework · WordPress · Log in

This website uses cookies to improve your experience. We'll assume you're ok with this, but you can opt-out if you wish.Accept Reject Read More
Privacy & Cookies Policy

Privacy Overview

This website uses cookies to improve your experience while you navigate through the website. Out of these, the cookies that are categorized as necessary are stored on your browser as they are essential for the working of basic functionalities of the website. We also use third-party cookies that help us analyze and understand how you use this website. These cookies will be stored in your browser only with your consent. You also have the option to opt-out of these cookies. But opting out of some of these cookies may affect your browsing experience.
Necessary
Always Enabled
Necessary cookies are absolutely essential for the website to function properly. This category only includes cookies that ensures basic functionalities and security features of the website. These cookies do not store any personal information.
Non-necessary
Any cookies that may not be particularly necessary for the website to function and is used specifically to collect user personal data via analytics, ads, other embedded contents are termed as non-necessary cookies. It is mandatory to procure user consent prior to running these cookies on your website.
SAVE & ACCEPT