


I’m back up at my daughter’s house helping to finish the powder room. Remember the new powder room that’s in the laundry room that used to be the kitchen? Yeah, it’s confusing I know ; ) The room is still not done, but it’s getting close. Especially since my daughter and I installed the DIY wood plank walls (on the cheap). On the cheap? Yes! We planked the walls of this small room for well under $100.
The theme for this month’s Power Tool Challenge is Home Decor and wood plank walls are certainly a popular home decor trend right now!

Be sure to read to the bottom to see all of the details of entering the Reader Home Decor Event!
So how did we plank the walls on a tiny budget? By using inexpensive plywood underlayment. It’s less than $12 for a 4′ x 8′ sheet. We had Home Depot cut the wood into 6″ planks to not only save us time but to make it easier to transport home. Plus the idea of dragging the table saw out in the cold weather did not sound appealing at all. (We gave Home Depot a few days notice and they had the wood planks cut and ready to pick up.)
It seems everyone loves the look of painted wood plank walls! As I said, it’s one of the hottest trends in home decor right now. Did someone say “Fixer Upper”, Joanna Gaines or hashtag shiplap??? Another reason to love wood plank walls: We are not drywall finishers. (And don’t want to be ; )
This is such an easy and inexpensive way to finish walls and they look fabulous!
Here’s the step-by-step tutorial explaining how we did it. I’ve included links for the tools and supplies that we used for your convenience. These are affiliate links – if you make a purchase using these links I will earn a small commission at no additional cost to you. Thank you!
Materials:
- inexpensive plywood underlayment (cut into 6″ planks)
- wood filler
- primer
- paint
Tools:
- circular saw
- spacers (I had spacers left from my flooring installation but nickels would work too)
- inexpensive plywood underlayment
- circular saw
- circular saw
- nails
- circular saw
- circular saw
- sanding sponge
Step One – Mark placement of studs
This was easy for us since we were installing the planks over unfinished drywall and could easily see the seams and screws. Otherwise, use a stud finder and make “X” marks at the stud locations from top to bottom.
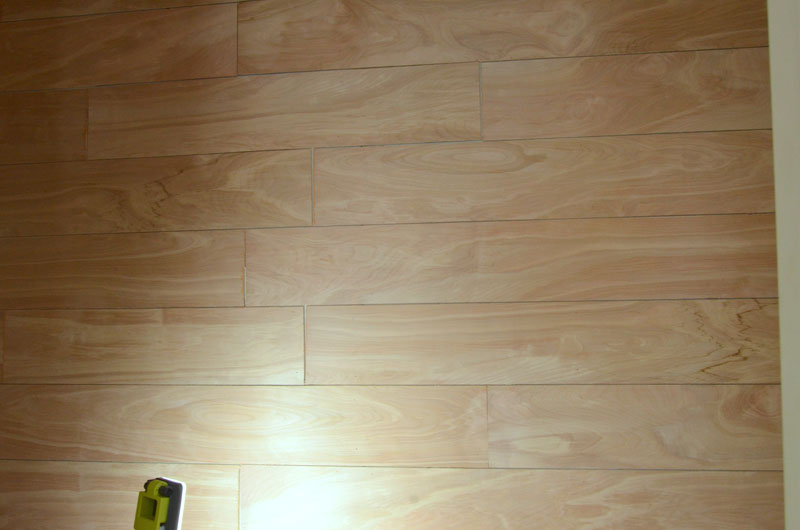
Step Two – Cut and sand wood planks
The plywood is fairly smooth so just the cut edges may need sanded just a bit. We had to cut all of our planks to fit in this small space so we used a circular saw. A sliding miter saw would have worked too (and probably better and faster) but I was at my daughter’s house without my beloved miter saw. So the circular saw had to do.
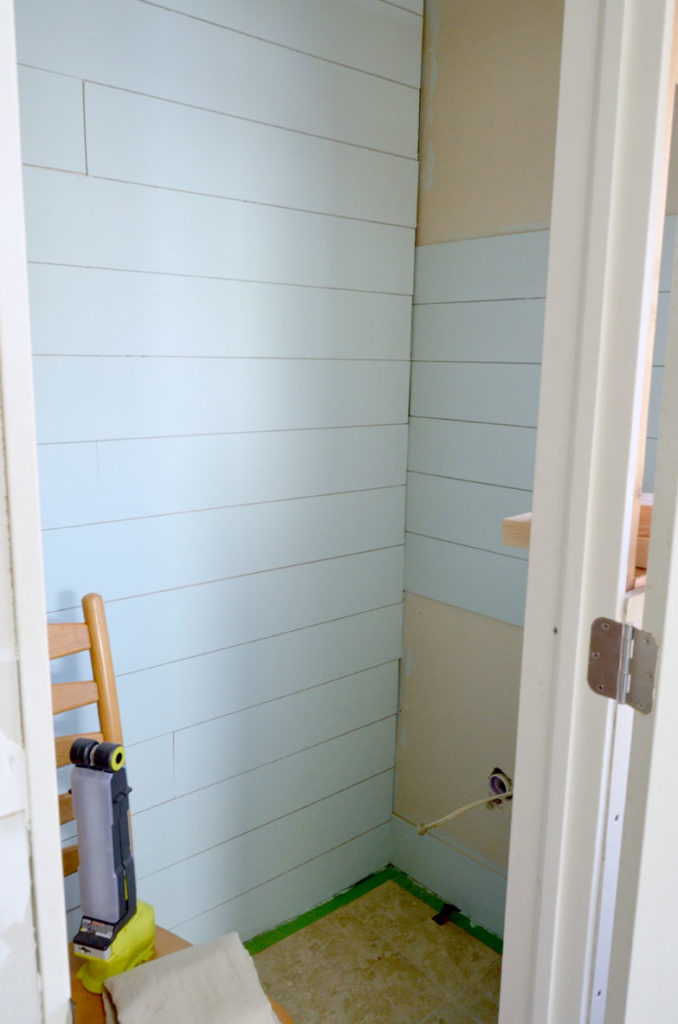
Step Three – Attach planks to the wall
Starting at the top, place a plank on the wall at the ceiling. Make sure the plank is level. (This is a 2-person job for sure!) Attach wood with brad nailer. We chose to have space in between each plank so we used plastic spacers but coins would also work.
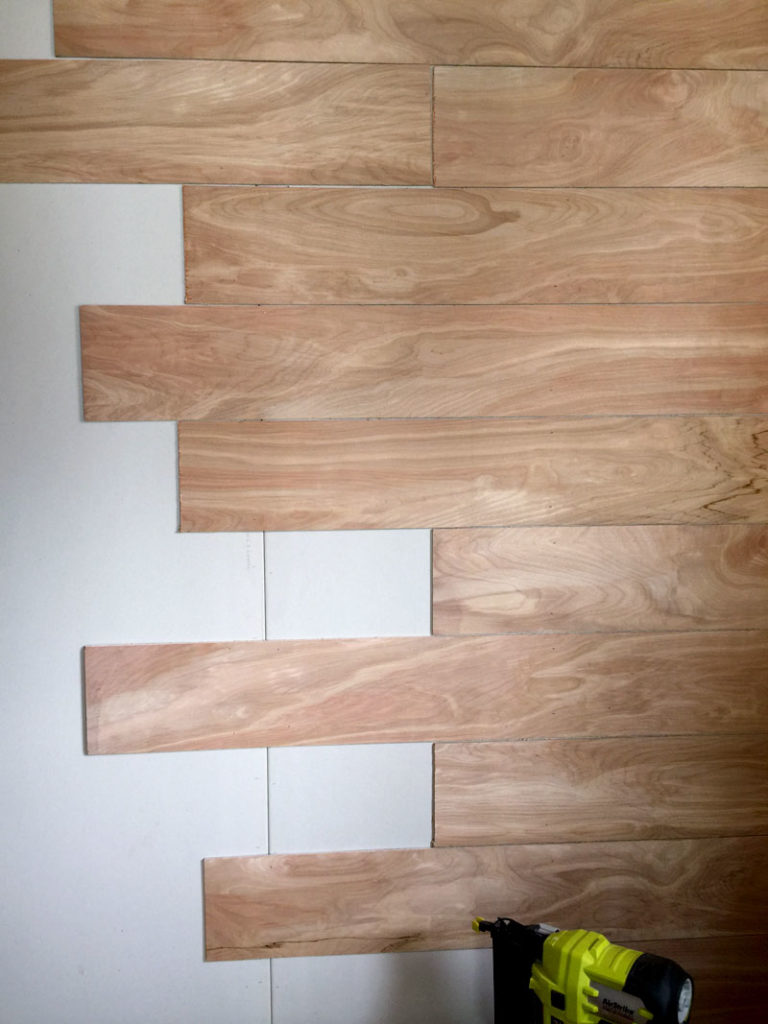
As I said, we had to cut all of our planks since this is a small room. We started on the longest wall and staggered the planks so that joints would not stack on top of each other.
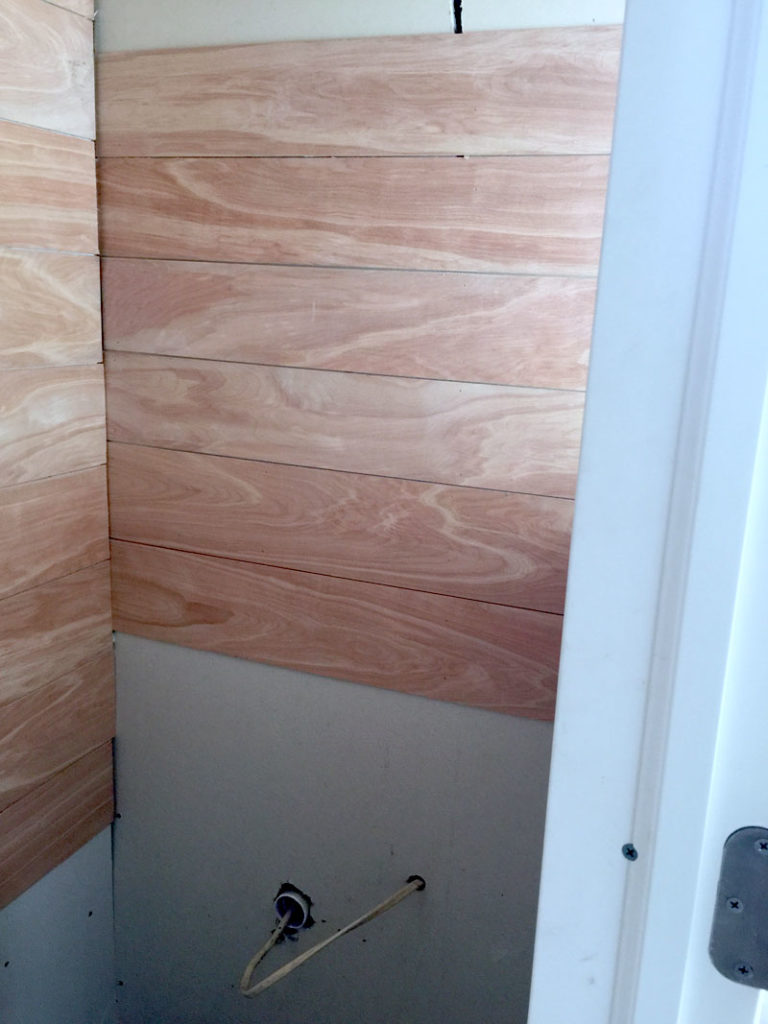
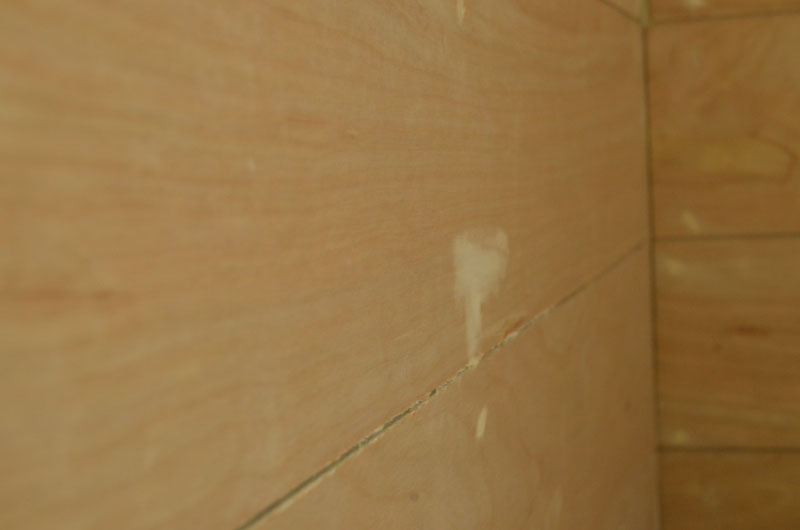
On the other “short” walls, we decided not to cut and stagger the planks. Since these walls are so small we thought it would look to “chopped up”. We love how that looks! But we did mess up.
When the planks were cut there was one narrow piece left over from each sheet. We should have separated that narrower plank from the rest and not used it or used it at the bottom. We accidentally used it and it caused the seams to not match up at the corners. This might bother a lot of people – like me. But my daughter does not worry about such things and said “let it go”. So we let it go.
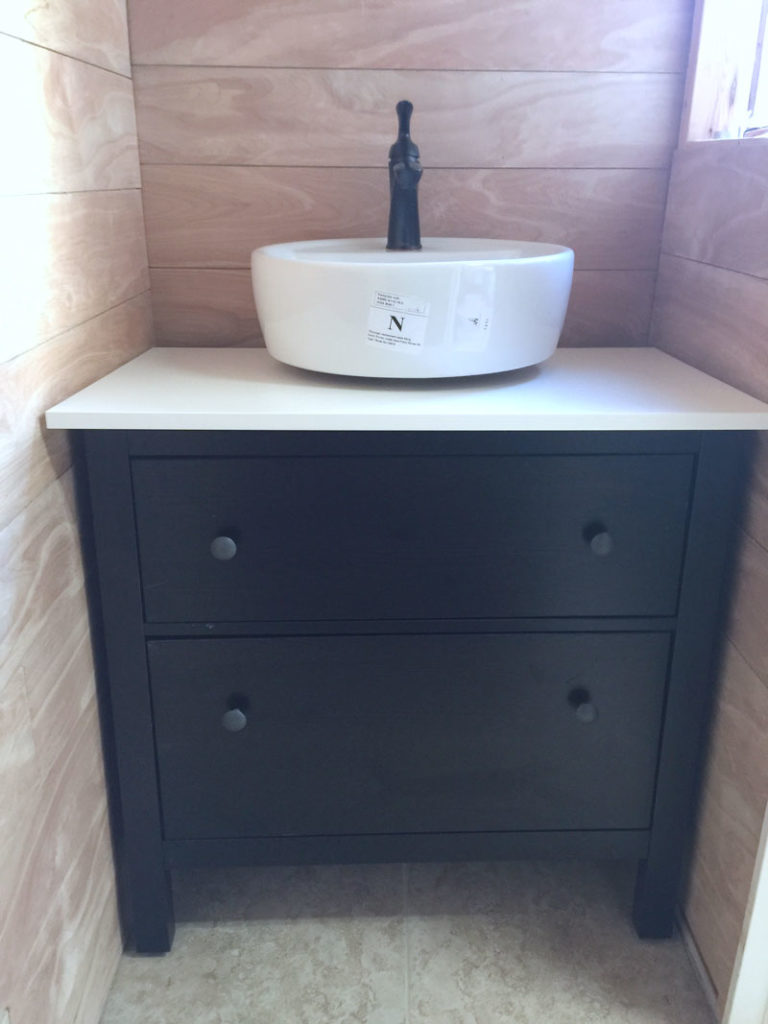
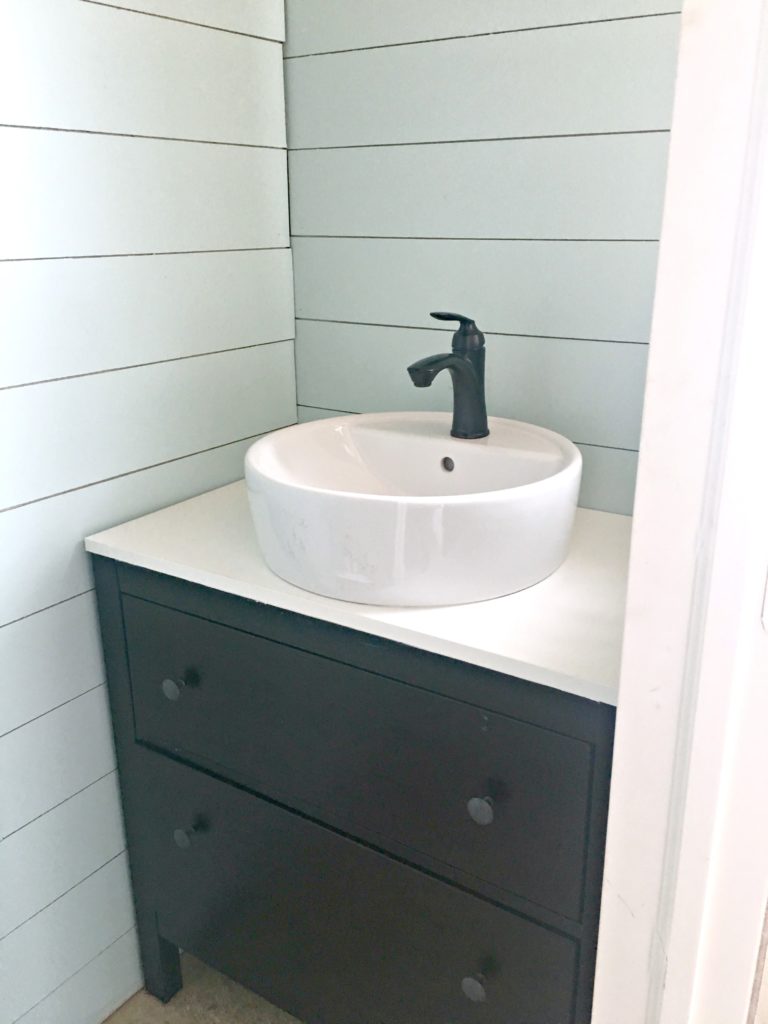
We were both getting impatient and wanted to see how the new vanity and sink would look in this new room. Mostly we wanted to make sure it fit! And it did. With no room to spare. It reminds me of my powder room makeover, but at least we didn’t have to perform carpentry surgery on this vanity ; )
Okay, back to work on the walls . . .
Step Four – Fill holes, sand, and paint!
At first we said we weren’t going to fill the holes – just paint over them and enjoy the shabbiness of them. Uh. No. We quickly nixed that idea and went about filling the holes with wood putty and then sanding them smooth.
This step went by very quickly especially since we were working together.
We couldn’t wait to how the walls would look painted. We love how they look!
What do you think?
We still need to add trim at the corners, ceiling, and baseboard. We were going to do it this week but Mother Nature ruined those plans.
Please take a look at the Home Decor Projects that my Power Tool Challenge friends have made:
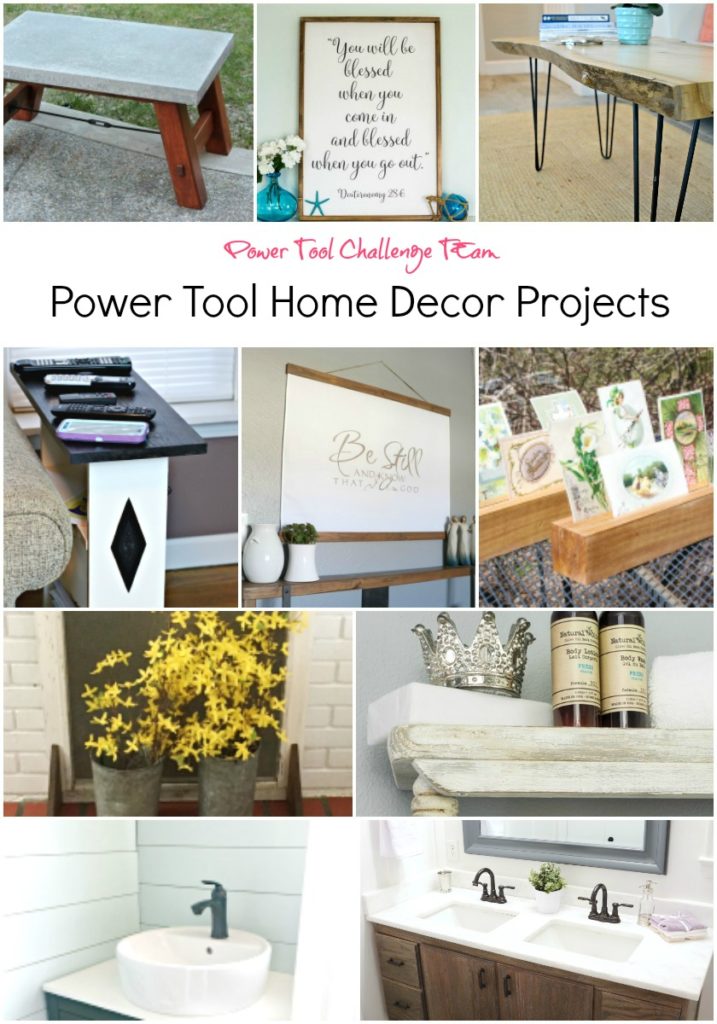
The Kim Six Fix – Pottery Barn Inspired Concrete Top Coffee Table
Domestically Speaking – Large DIY Wall Sign
H2OBungalow – DIY Live Edge Coffee Table With Hairpin Legs
My Repurposed Life – Sofa Side Table
My Love 2 Create – Fabric and Wood Wall Hanging
Virginia Sweet Pea – Card Display Holder
The DIY Bungalow – Repurposed Fire Screen
Designed Decor – Upcycled Wall Shelf
Create and Babble – DIY Wood Plank Walls
Thrift Diving – DIY Bath Vanity
Now we would love to see your projects.
The details:
The project can be made from anything as at least 1 power tool was used to build it.
The Home Decor Power Tool Project Challenge is open for entries from 3/16 through 3/30 via a link up.
Submit an old or new project as long as it’s a home decor item.
Anyone can enter, the more the merrier ![]()
![]() ?
?
Each participant can enter up to 3 projects.
Winners must be 18 or older and live in the US.
The Power Tool Challenge Team and HomeRight will vote on the best project and one winner will be selected. The winner will receive a HomeRight DIY Paint Package which includes a Finish Max Pro Paint Sprayer, Large Paint Shelter and Small Paint Shelter and a Rapid Clean cleaning tool for the Finish Max.
Void where prohibited.


Great idea, Jeanie! I saw some planks like this at the store the other day and thought they’d be an easy solution. You’ve proven me right. 🙂 Looks great!
Thanks Serena! Now I’m wondering what else I can make them!
I will always love planked walls! This makes me want to do my bathroom! I looks great! Pinned!
Planked walls are so “in”, we had to join the craze! Thanks for pinning Mindi!
Love the idea of using underlayment board! What an awesome budget idea. The spacers are smart too. I wanted more space on my plank walls and never thought about using nickels or spacers. I love that we learn so much from each other!
You are so right – we do learn so much from each other! I’ve referred back to many of your projects numerous times!
Using underlayment for your planks is such a great budget saving idea. The bathroom looks great with its new wall treatment.
Thanks Paula! I can’t wait to get that bathroom done and getting the walls done was a big part of it.
Jeanie,
Your diy wood plank walls look fabulous! I used the same method on my faux wall for staging, but I put them directly on the studs, and it shows. (at least I see it) This thin plywood has so many uses. I usually try to keep a sheet on hand for various projects.
Love the small vanity in that space, it looks perfect!
pinning!
gail
Thanks Gail! This is the first time I ever used this thin plywood but it won’t be the last for sure!
What a great project! I love the farmhouse look! Pinned and shared!
What a beautiful makeover! I love the bathroom, love the sink but I especially love the wall! Such a great job!
They turned out gorgeous! I’m planning out a plank wall in my office – so lots of good tips here!
I’d like to do this over our popcorn ceilings. Great idea getting giving Home Depot a heads-up to cut them! Your wood plank walls in your powder room look great, Jeanie.
Jeanie, The bathroom looks great. I like the look of the wood planks and I think they are a clean and classic look.
Great budget saver! The finished project looks great without having to spend a lot. This will work to all homeowners who wish to have a home improvement or just a mini makeover. Thanks for sharing your ideas.
So creative! The outputs look amazing. Well done!
It was really insightful.
Thanks for such a nice content.
Cheers
BTW if anyone interested more have a look sawfinder thanks
Thanks for sharing amazing wood planks steps. Stay blessed 🙂
What a amazing post. Really appreciated
the best post
thanks for sharing home decor idea
Thanks for sharing quality content
Thanks for sharing these type of ideas
Download Pokémon Go Mod APK joystick latest version 0.231.0 for ios, android, and pc with unlimited coins and money 2022. To download this Game follow the below steps.
Thanks for sharing quality content
I really love to read such an excellent article. Helpful article
Now you can easily download and install all game and application from our site by just one click on APK JADE.
Great topic
Nice topic thanks for sharing……..
GenYouTube
This is a great blog post on DIY wood plank walls! The step-by-step tutorial is very easy to follow, and the materials needed are inexpensive
The bathroom looks great. I like the look of the wood planks and I think they are a clean and classic look.
Get the best of both worlds with our high-performance MMA boxing gloves at Uniswift.ae. Perfectly suited for mixed martial arts and boxing training, these gloves are designed for maximum flexibility, comfort, and protection. Train confidently with gloves that deliver the durability you need for any fight.
Get the best of both worlds with our high-performance MMA boxing gloves at Uniswift.ae. Perfectly suited for mixed martial arts and boxing training, these gloves are designed for maximum flexibility, comfort, and protection. Train confidently with glove that deliver the durability you need for any fight.