


When Cricut announced last year that they were coming out with a Knife Blade that could cut thicker material like heavy chipboard, wood, and leather, I was beyond excited. Most of you know that I love woodworking as much as I love paper crafting so I couldn’t wait to try this. But wait I did. Until this past week when I made the time to get out that Knife Blade, calibrate it with my Cricut Maker, and make my first project with Heavy Chipboard. Now I can’t wait to show you how cutting chipboard with the Cricut Maker using the Knife Blade is a game changer.
Today I have teamed up once again with my Cricut-loving friends to share with you some Fall-inspired projects. Similar projects can be made using a Silhouette machine too. I haven’t forgotten about my Silhouette users! I still have that paper medallion wreath. Today’s project is similar to the Fall wall art I made last year with purchased letters. But this time I didn’t have to buy any wooden letters. I was able to cut heavy chipboard with my Cricut Maker and the Knife Blade.
Cutting Chipboard with the Cricut Maker Using the Knife Blade
I made this cute 2-D pumpkin with the following tools and supplies (affiliate links are provided for your convenience):
- Cricut Maker
- Cricut heavy chipboard
- Strong Grip cutting mat
- patterned cardstock

- Mod Podge
- wood glue
- scrap wood or wooden canvas
- stain or paint


How to cut chipboard with the Cricut Maker and Knife Blade
Friends, this is so simple. You simply change out the cutting blade for the knife blade. The first time you use the knife blade you have to calibrate it but that takes seconds and the software walks you step-by-step right through the process. It couldn’t be any easier.
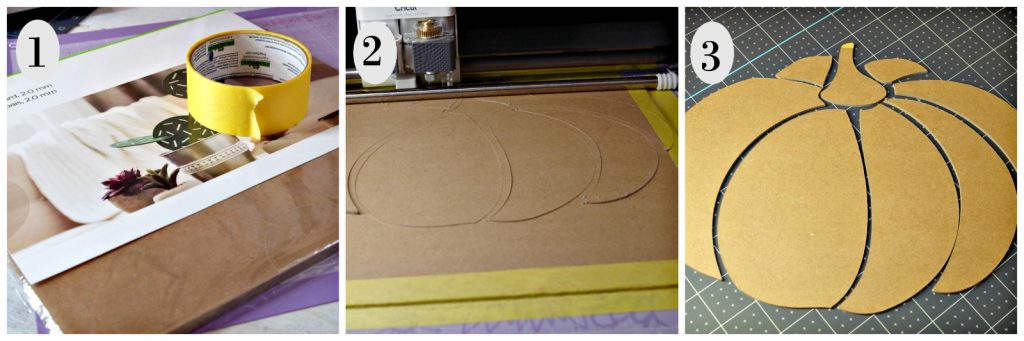
- Supplies (I use painters tape)
- Cutting (notice star wheels are pushed all the way to the right)
- Perfectly cut shapes
You must use the Strong Grip cutting mat and adhere masking tape all around the edges to firmly secure the chipboard. It will take several cuts but the cool thing is that the software tells you how much time it will take. So go throw a load in the washer or take a very short bike ride! Wait until you see the results in person!!! Amazing!
I then cut out the shape three more times using three different patterned pieces of cardstock.
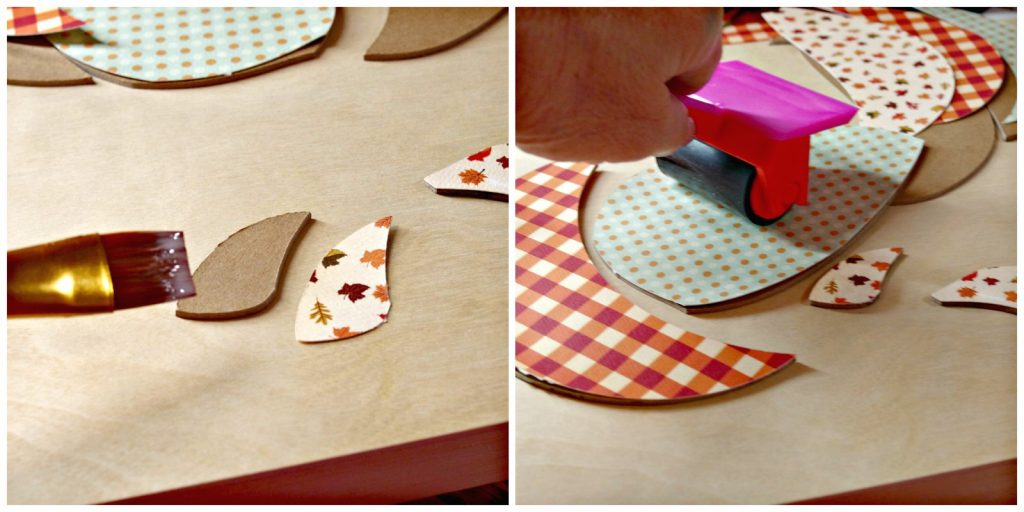
I adhered the patterned paper onto the pieces of the pumpkin using ModPodge. I also used a brayer to firmly attach the paper.
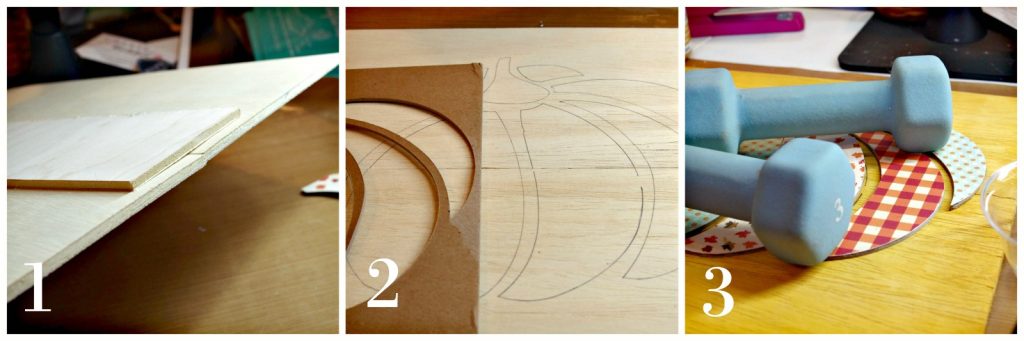
- I put two pieces of scrap wood together with a third piece of scrap wood using hot glue to make my board for the background of this pumpkin wall art.
- Using the “negative space” of the cutout pumpkin design, I lightly traced onto the board so I knew exactly where the pumpkin pieces should go.
- I glued the pieces onto the board using wood glue. (the weights helped keep everything nice and flat)
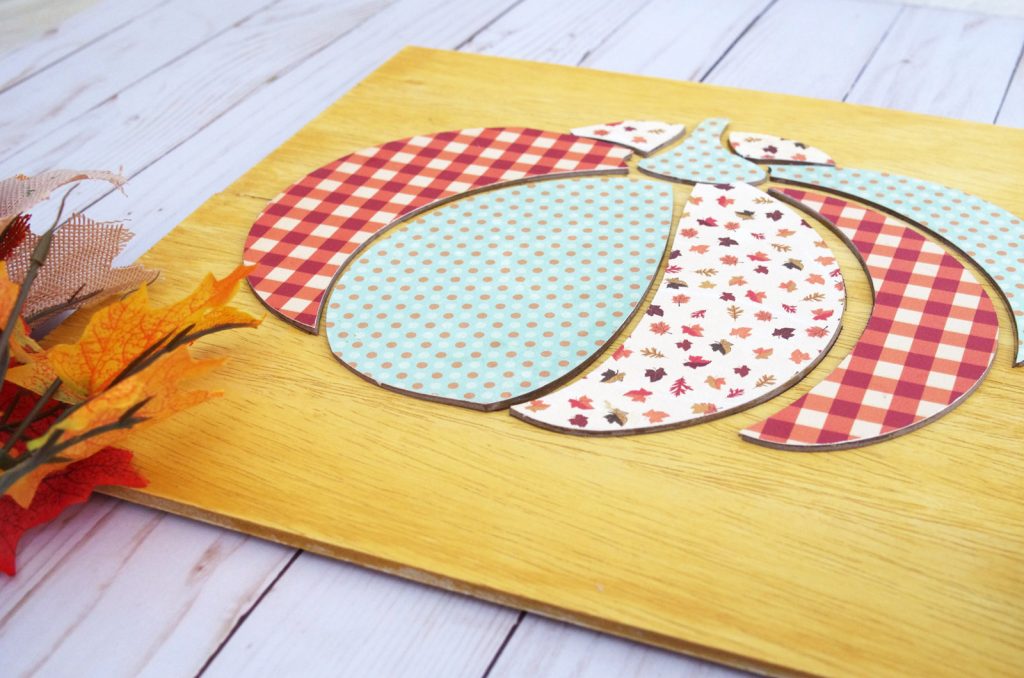
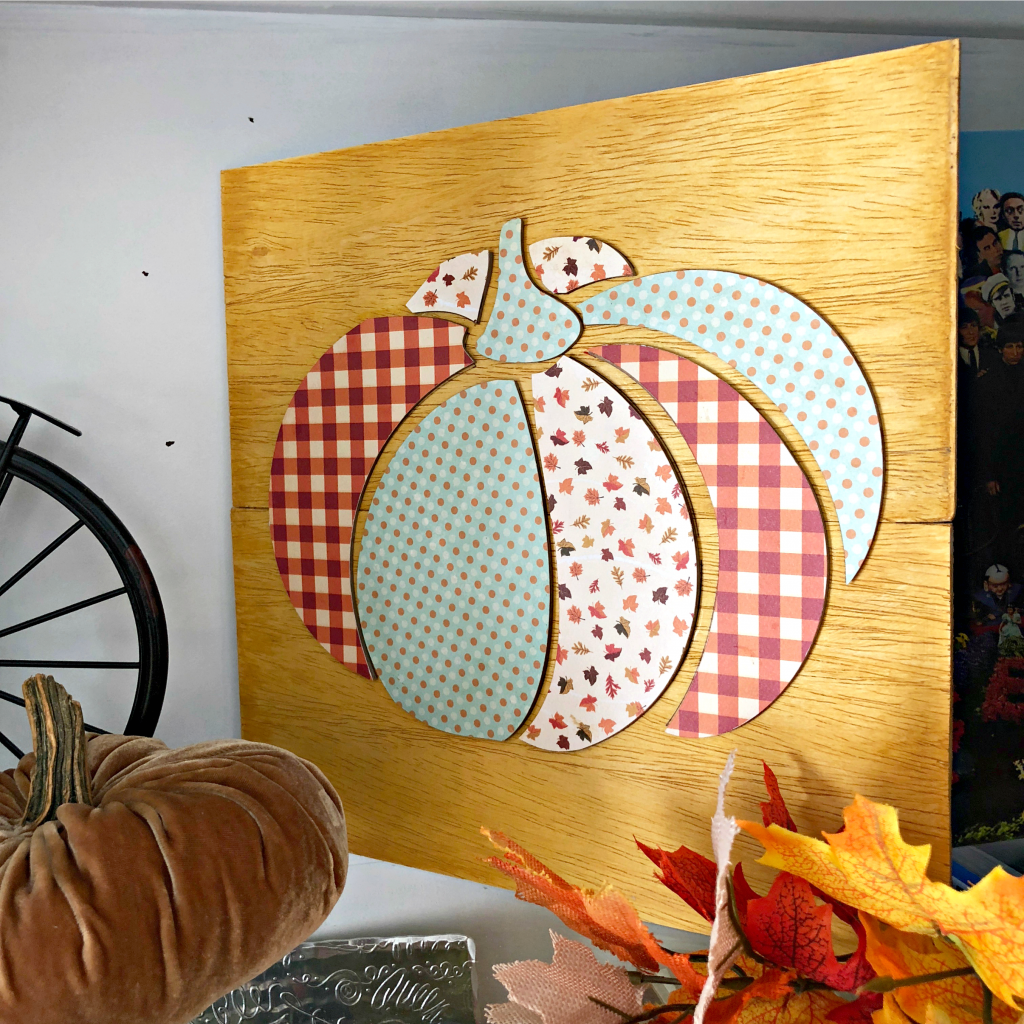
I am thrilled with how this turned out! I was deciding on whether or not to add a frame to the piece. Laziness won and there is no frame. But I can always add one later if I want.
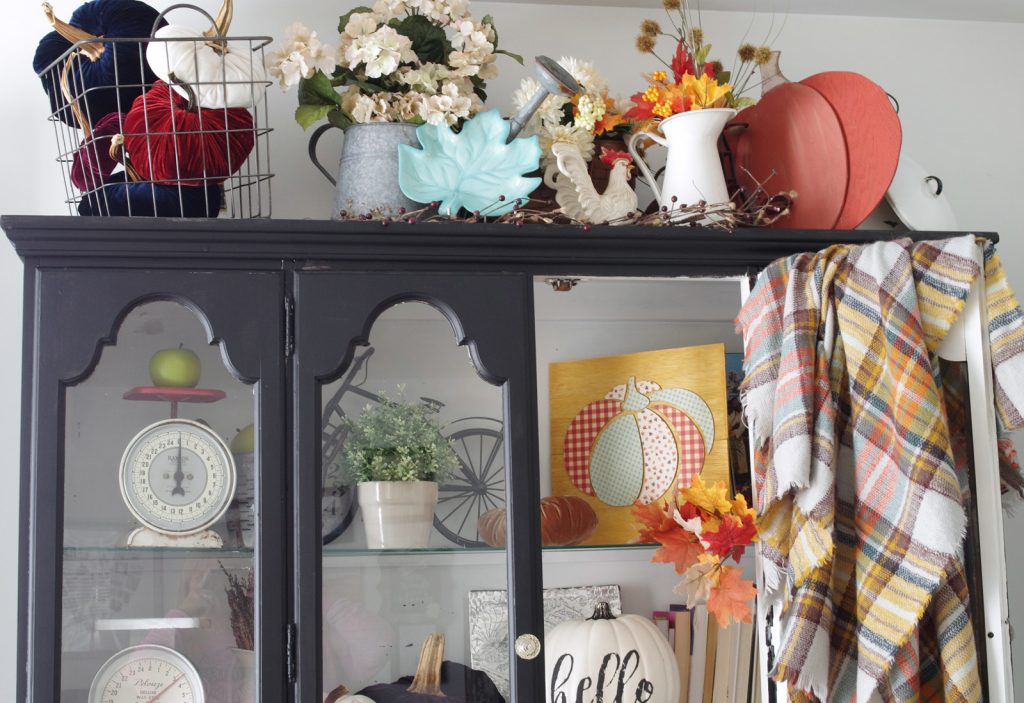
My newly painted hutch is now completely decorated for Fall!
Here are eight more Fall Cricut Crafts to make:
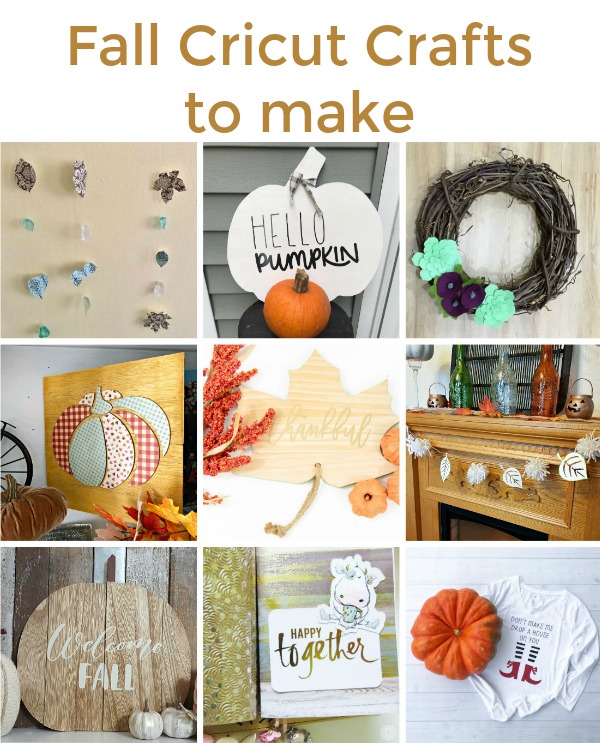
Fall Paper Leaf Wall Hanging / Wooden Pumpkin for Fall- Larger Than Mat Cricut / Felt Flower Grapevine Wreath / Wooden Fall Leaf customized with Cricut / Quick & Easy Fall Banner / Welcome Fall Wood Pumpkin Sign / How to Cut Die Cuts for Your Planner / Halloween T-Shirt


I love to make fun things with and for my 12 grandchildren.
Love this, looks fabulous!
The pumpkin is beautiful! I haven’t used the knife blade yet, but this makes me want to. The paper is very pretty.
I love the pumpkin and how you added the various card stock patterns. A project using chipboard is next on my to-do list! I am pinning this tutorial for reference.
I live for the new knife blade. I love this pumpkin and the scrapbook paper.
Beautiful, and so easy! Thank you for sharing at Party In Your PJs!
That is beautiful! I have been a bit afraid to try cutting anything thick with my cricut. Pinned.
Congratulations! Your post was my Most Clicked at #OverTheMoon this week. Visit me on Sunday evening and to see your feature! I invite you to leave more links to be shared and commented upon. https://www.marilynstreats.com. Please be sure to leave your link number or post title so we can be sure to visit!
Nice& easy. Really smart thinking. I always appreciate this kinds of exceptional ideas. Keep doing the great job.
The pumpkin is beautiful! I haven’t used the knife blade yet, but this makes me want to. The paper is very pretty.
Love this. Thanks for the easy instructions
Does this blade cut the wood also? I want a woodcutter blades to use with circular saw. Can you please suggest something?
Actuallyi love to do doodle art and creativr paper cutting artwork. For that I’ve used so many tools to cut the cardboard accurately but never find this type of accuracy. Love the pumpkin. Fantastic work and lovely activity for kiddos. Thanks for sharing and keep on sharing.
Hi,
Where would I get your SVG file?
This article is very interesting and useful for all new comers who do not know about the knife blade and i will also not have any idea about the use of knife blade before useful reading of this article..
Thanks for introducing us with this interesting article
Wow interesting and amazing article for all readers.. this article is a good piece of article.. I learnt allot from this article..
Thanks for sharing this article to us..
Amazing article I just wanna to say that this is really an art work and from your these crafting hacks I learnt easily that how can we make such crafts by using these knife blades… This article is very helpful to me in my crafting class..
Thanks for your easy crafting arts..
This is really good idea about the cutting chipboard cricut maker knife and thanks share good article and informative .
This is information very use full and help us thanks sharing this article
This is really good art and thanks sharing this article and amazing about the cutting chipboard circuit maker knife blade
very useful and informational really before that article I also don’t have an idea about the use of knife blades. Thank you for sharing.
Such a great idea about the cutting chipboard circuit maker knife blade thanks sharing this article
Wow this is really to good information cutting chipboard circuit maker knife blade thanks sharing this article
Thanks sharing this article about the cutting chipboard circuit maker knife blade
Thanks sharing this article
Thanks sharing this article cutting chipboard cricut
This is really too good about the cutting chipboard cricut maker knife blade thanks sharing this article
Wow this is really too good about the cutting chipboard circuit maker knife blade thanks sharing this article
this is really very amazing and informative article. i thinks these tips are very helpful for everyone. thanks for sharing this amazing article about cutting chipboard circuit maker knife blade.
Wow this is lovely idea about the cutting chipboard circuit maker knife blade thanks sharing this article
Wow this is wonderful idea about the cutting chipboard circuit maker knife blade thanks for this article.
Wow this is really too good about the cutting chipboard circuit maker knife blade thanks for sharing this article
Wow, this is a lovely idea about the cutting chipboard circuit maker knife blade thanks for sharing this article.
Wow, this articel is absolutely stunning! Your step-by-step guide is so detailed and easy to follow, and the end result is just beautiful. I love how you were able to cut heavy chipboard with the Cricut Maker and the Knife Blade, it’s amazing what this machine can do. The pumpkin wall art is perfect for fall, and the patterned paper you used really adds a nice touch. Your newly painted hutch looks fantastic with all of your fall decorations. Thank you for sharing this project with us and for providing links to other fall-inspired Cricut projects, I can’t wait to try them out!
Cutting chipboard with the Cricut Maker using a knife blade is impressive! This technique opens up so many creative possibilities for projects. A fantastic way to enhance crafting while living well!
informative blog post please keep sharing
this artical very informative