• Home
  • About
  • Contact
  • Partner
  • Privacy Policy
    • Facebook
    • Instagram
    • Pinterest
    • Twitter
    • YouTube

Create and Babble

  • DIY
    • Home Improvement
    • Upcycle
    • Furniture Makeovers
    • Build It
  • Craft
    • Silhouette
    • Sewing
    • Wedding DIYs
    • Seasonal
    • Gifts
  • Lifestyle
    • Bicyling
    • Travel
    • shopping

STAY UP TO DATE

Get the latest crafting and DIY tips, tricks and tutorials delivered straight to your inbox!

Reversible Holiday Pillow Made With Metallic Heat Transfer Vinyl & SVG Files

October 30, 2017

If you like it, please share it!Share on pinterest
Pinterest
Share on facebook
Facebook
Share on twitter
Twitter
Share on stumbleupon
Stumbleupon
Share on google
Google
Share on linkedin
Linkedin
Share on reddit
Reddit

Are you like me: the leftover Thanksgiving turkey is still warm and Grandpa has barely taken his last bite of the pumpkin pie and I’m ready to jump up and deck the halls! This means I also tend to skimp on Fall and Thanksgiving decorating because I’m too busy thinking about my Christmas decorations! Is this you too?

Well I have a simple solution for you! How about one pillow that does double duty! One side is  for Thanksgiving and the other side is for Christmas!

How to make a Reversible Holiday Pillow using Metallic Heat Transfer Vinyl

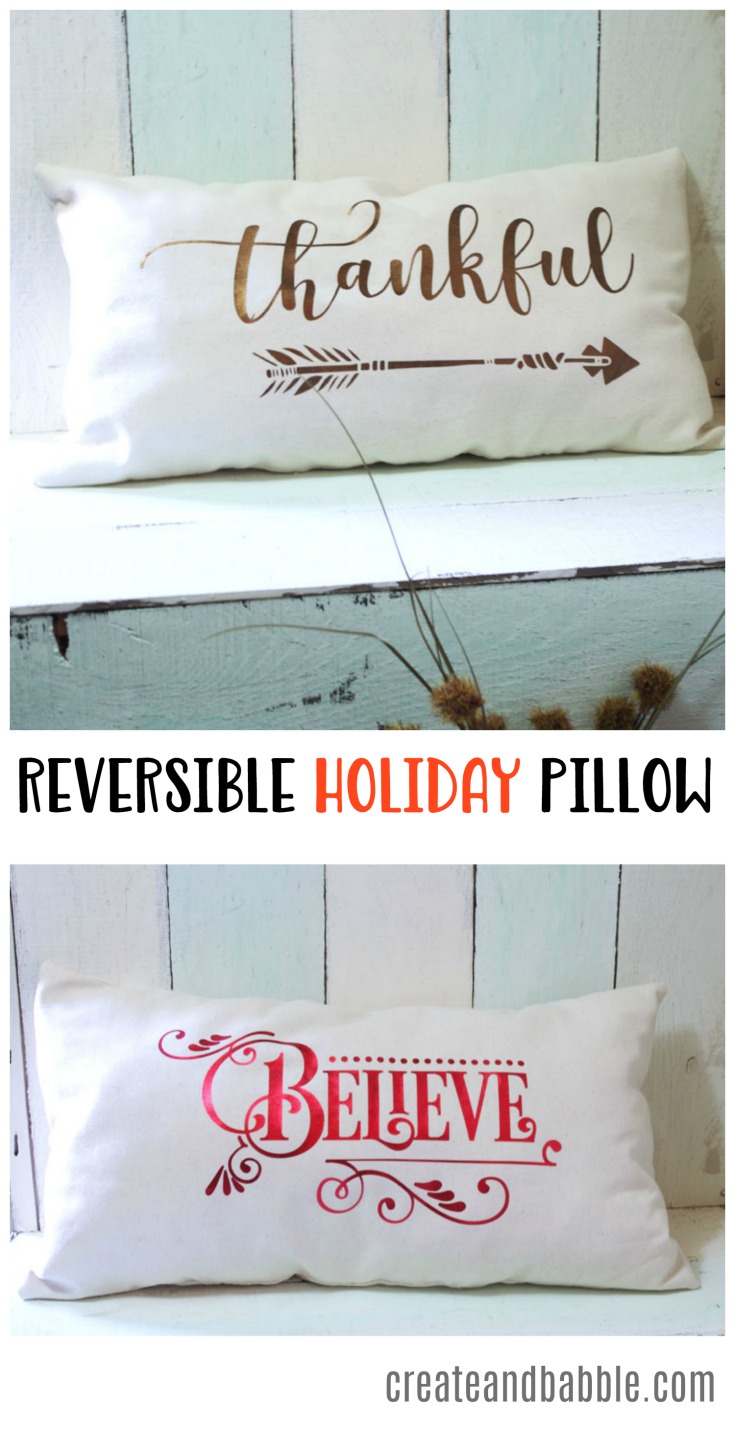
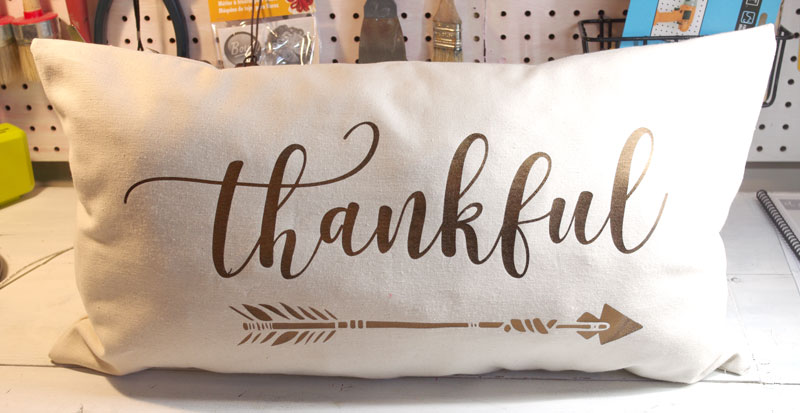
“Thankful” pillows are very popular and when I saw a photo of an oblong one on a bench, I knew I had to have one for my entryway bench.

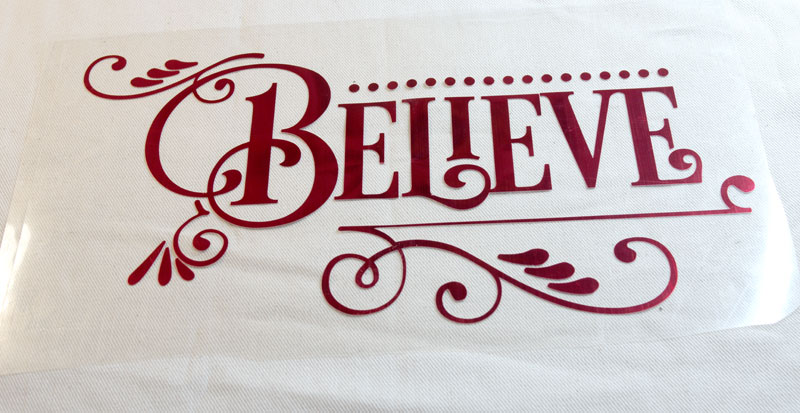
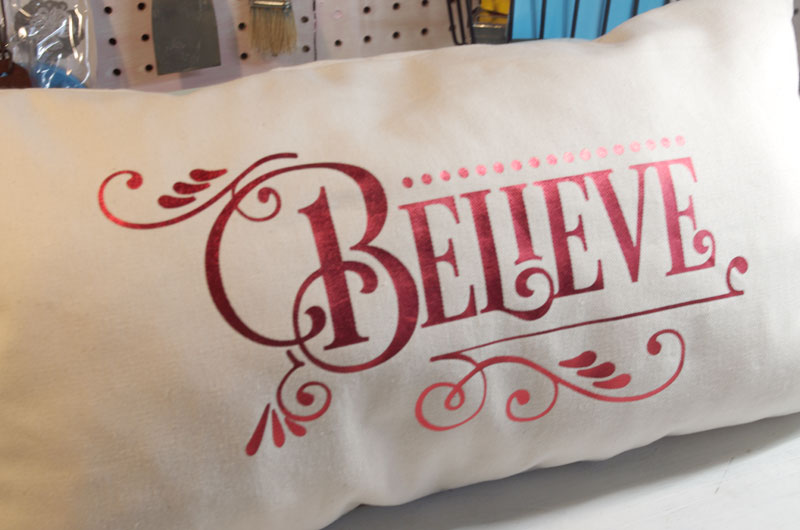
Then the idea to make a Reversible Holiday Pillow Made with Metallic HTV and SVG Files occurred to me once I started designing the cut file for the “thankful” side. I was playing around with different fonts in Silhouette Studio for the word “thankful” when I remembered that I had previously downloaded an already-made beautiful “thankful” svg file from SVG Salon. So then I got the idea to look for a suitable Christmasy SVG to use on the other side of the pillow. I found this “Believe Flourish“ and I love it and knew it would be perfect on a pillow.

Why spend hours looking for just the “right” font, swirls, and embellishments? I’ll leave that to the talented designer who makes these beautiful SVGs. They’re affordable and save time. And those two things are very important to me.

Want to make one? It’s very easy. And you don’t even need to sew the pillow cover if you don’t want to. This pre-made pillow cover would be perfect.

Materials needed to made a Reversible Holiday Pillow:

  • fabric to make pillow cover or pre-made cover (mine is approx. 14 x 24) I used off-white denim
  • metallic heat transfer vinyl (I used Happy Face Shine Heat Transfer Vinyl from Happy Crafters: in the colors Fire Engine and Spicy Cinnamon)
  • Silhouette machine or Cricut (I used my Cricut Explore Air 2)
  • Iron or Heat Press (this is the heat press that I own and I love it!)
  • Sewing machine (if you are making your own pillow cover)
  • Pillow form (if you are using a pre-made cover)
  • Fiberfill (if you are making your own pillow cover)

Steps to Make Reversible Holiday Pillow

Step 1 – Upload SVG File to Silhouette Studio or Cricut Design Space

Step One Upload SVG File to Silhouette Studio

Step 1 Upload SVG to Cricut Design Space

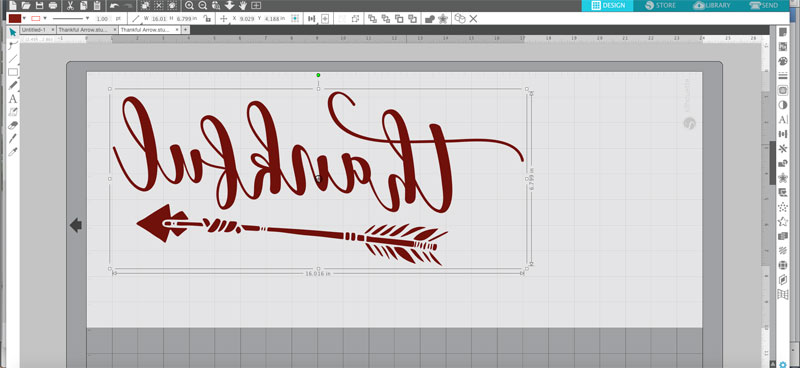
Don’t forget to mirror the image!

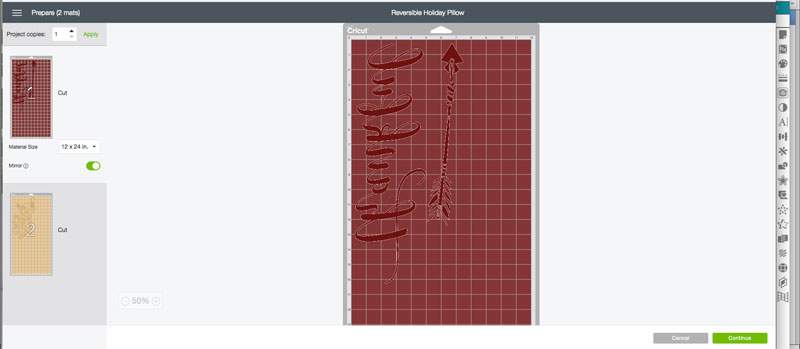
Step 2 – Cut and Weed

Step 2 Cut and Weed

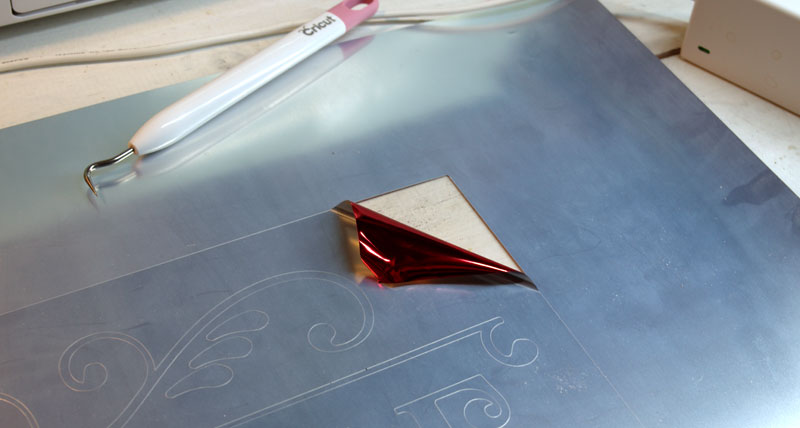
Cut shiny side down.

  • Cricut Explore Setting: one dot between HTV and Light Card Stock.
  • Silhouette: Speed 2, Thickness 8, Blade Setting 5

Step 3 – Preheat fabric with iron or heat press

Whether you are using an iron or a heat press, preheat the pillow cover fabric for a few seconds.

Step 4 – Align design on the fabric or pillow cover

Step 3 Align design on pillow cover fabric

Step 5 – Apply Design

Iron: cover with a cover sheet (such as a pillow case) and press for 25-30 seconds on linen setting with firm pressure. Turn the fabric over and press again.

Heat Press: Preheat to to 280°, Press 15-20 seconds. Turn over and press additional 5-10 seconds.

Step 5 Press Design

Allow to cool, then peel off plastic carrier.

Reversible Holiday Pillows

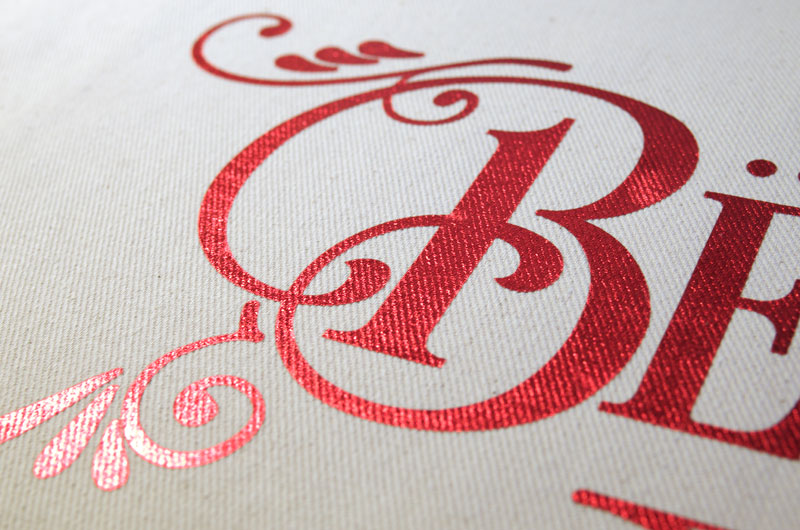
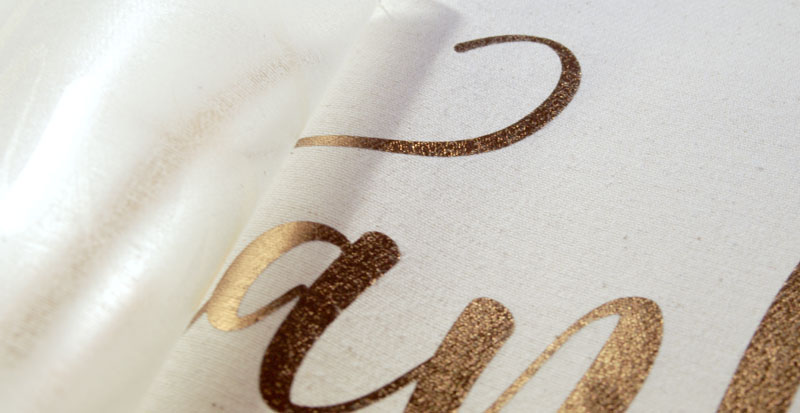
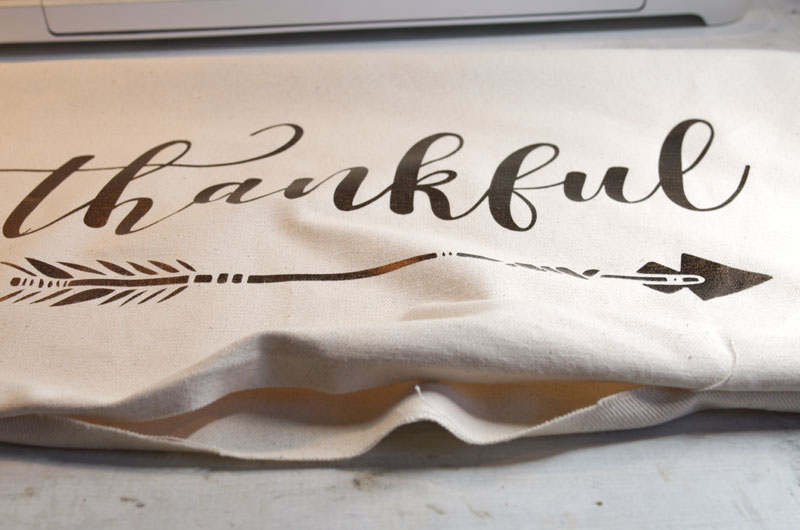
Notice how the texture of the fabric shows through the Shine HTV.

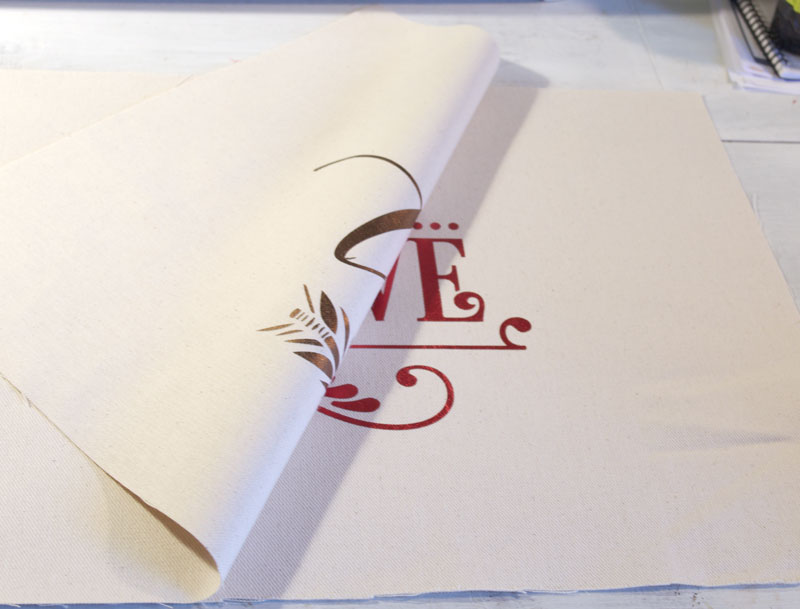
Step 6 – Repeat steps above for other side of reversible pillow

Sew sides of pillow together

Step 7 – Sew pillow cover

With right sides together, sew sides of pillow cover together.

turn pillow cover right side out

Turn right side out and stuff with fiberfill.

Thanksgiving side of dual holiday reversible pillow

Hand sew opening shut.

Christmas side of dual holiday reversible pillow

I love the idea of dual holiday decor pieces. As soon as the guests from Thanksgiving Day have left, I’ll just flip this pillow over! Don’t you wish all Thanksgiving Decorations were reversible?!? Like these . . . .

Reversible Holiday Blocks-createandbabble.com

Reversible Holiday Blocks-createandbabble.com

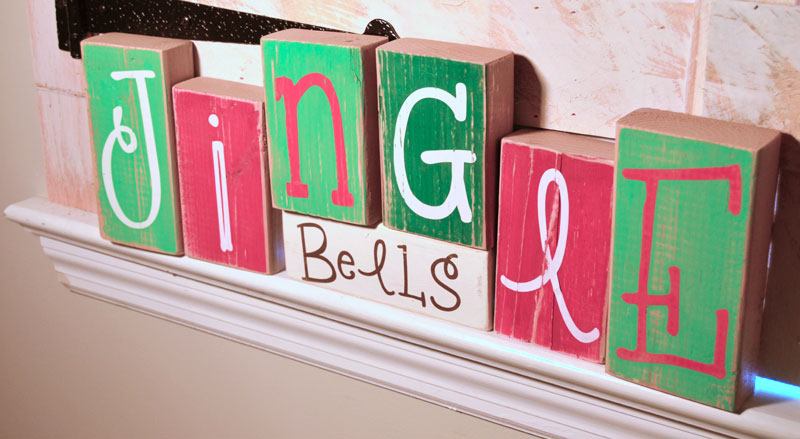
. . .  Holiday Blocks


If you are not interested in making pillows, here are some pretty Thanksgiving Pillows I found for you:


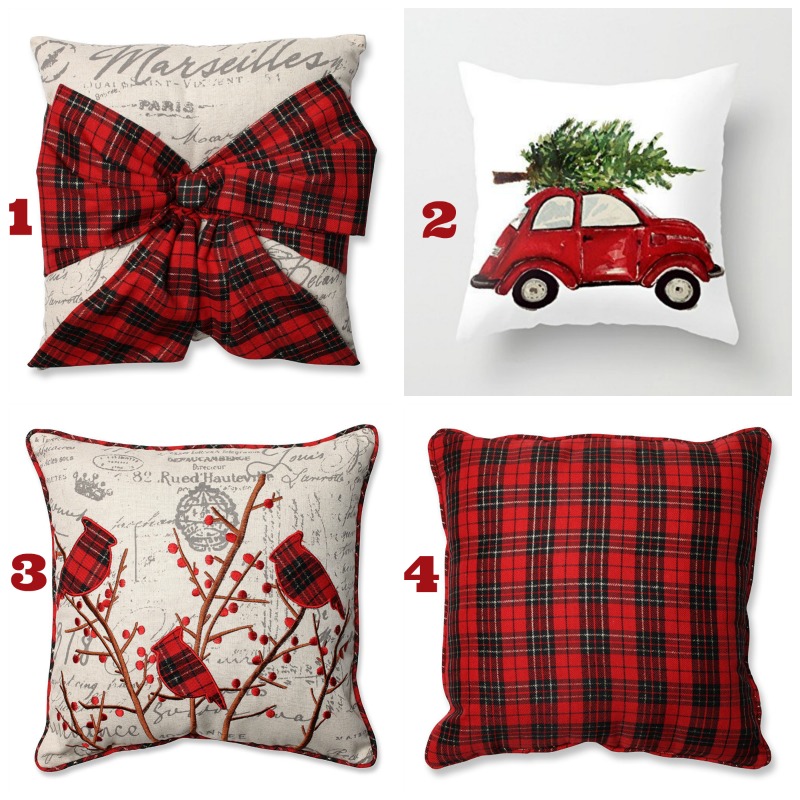
And here are some pretty Christmas pillows. I am loving the plaid!


If you like it, please share it!Share on pinterest
Pinterest
Share on facebook
Facebook
Share on twitter
Twitter
Share on stumbleupon
Stumbleupon
Share on google
Google
Share on linkedin
Linkedin
Share on reddit
Reddit

Filed Under: Crafts, Cricut, Home Decor, Sewing, Silhouette, Thanksgiving

« Thrift Store Makeover
Lighting and Accessories for the Master Bedroom »

Comments

  1. Maureen says

    October 30, 2017 at 12:49 pm

    So pretty Jeanie! I really wish the cutters weren’t so expensive in Canada 🙁

    Reply
  2. Jeannee Taylor says

    October 30, 2017 at 2:33 pm

    This pillow is really beautiful and chic! I love that it has a dual purpose too! It makes life easier and easy on the budget as well!
    Jeannee

    Reply
  3. Victoria @DazzleWhileFrazzled says

    October 31, 2017 at 8:11 am

    Great idea, esp. with these holidays falling back-to-back. Visiting from Recipe and DIY Linky Party.

    Reply
  4. Mary Beth says

    November 9, 2017 at 7:15 pm

    You are so smart and crafty, Jeanie, I love this!

    Reply
  5. Tammy says

    December 10, 2017 at 5:53 pm

    Thank you so very much for this step by step tutorial,Jeanie! I just made two on burlap covers that came in a two pack from amazon. They turned out beautiful and what a brilliant idea for two seasons! LOVE! Tammy

    Reply
  6. Shiree | Confessions of Parenting says

    September 6, 2018 at 7:37 am

    This is such a brilliant idea! Why aren’t all seasonal pillows like this?!

    Reply
  7. Kate | The Organized Dream says

    September 9, 2018 at 9:13 am

    This is such an awesome project! It’s such a great idea to utilize your decor for more than one holiday and is this is such a pretty way of doing it! I have pillow #2 with the car and the tree by the way. It is one of my favorite Christmas decor items! I’d love for you to share this project at the Make Life Pretty Monday link party beginning tonight at 8 pm!

    Reply
  8. Kippi says

    September 11, 2018 at 3:18 pm

    Great idea to save money and space storing the pillows. Decor that works hard through the holiday season. Thanks for sharing. Happy Fall, Kippi

    Reply
  9. Miguel Cardona says

    February 18, 2019 at 11:29 pm

    Nice post! This really helps me to find the answers to my question. that you will continue posting articles having lots of useful information. Thanks a lot!.

    Reply
  10. Nicholas says

    August 25, 2019 at 12:06 pm

    I love it because you can un-tie and throw it in the wash. Thumbs up!!

    Reply
  11. Broke says

    November 23, 2019 at 2:01 am

    Thank you so much for providing this step by step tutorial along with beautiful pictures. But if you want to make your interests in crystal painting than you can visit my official website. Read more here.

    Reply
  12. Jamie says

    November 29, 2019 at 8:12 pm

    Such a great guideline to make reversible holiday pillow! Your post give me a lot ideas to save money and space storing the pillows. Thanks for sharing.

    Reply
  13. Pillowtopics says

    December 12, 2019 at 3:27 am

    Yes, I’m also. You are really brilliant,

    Reply
  14. Happy Hiller says

    September 23, 2020 at 9:41 am

    Wow! Looks amazing!
    And thank you for your DIY guide!

    Reply
  15. tanklon says

    August 4, 2021 at 11:55 am

    I learn step by step from your tutorial . I made a beautfull pair of pillow .
    You share a great info with us .
    Thank you for sharing this post

    Reply
  16. mickey says

    August 11, 2021 at 12:20 pm

    You’ve probably heard that sleeping on your back is the best position for your spine, but it is also the sleep position of choice for vertigo sufferers. Sleeping on your back may keep fluid from building up and may prevent calcium crystals from moving where they don’t belong.

    Reply
  17. bell says

    October 25, 2021 at 2:50 pm

    Thanks sharing this article

    Reply
  18. Ahmed Khan says

    April 30, 2025 at 5:18 am

    All foreigners are required to submit Malaysia Digital Arrival Card (as per following link) prior to their arrival in Malaysia effective from 1st December …

    Reply

Trackbacks

  1. Top 10 Crafts to Make This Week | Tip Junkie says:
    November 5, 2017 at 6:00 am

    […] DIY Reversible Holiday Pillow ~ Make a holiday pillow that you can use for two holidays instead of just one. Vinyl and a die cut […]

    Reply
  2. Holiday DIY Ideas - Decor, gift, recipe and ornament ideas says:
    November 6, 2017 at 4:48 am

    […] This pillow made by Jeanie of Create and Babble really caught my eye.  She made a reversible holiday pillow using her metallic vinyl and her cutting machine.  You can see the entire tutorial here. […]

    Reply
  3. Everything Thanksgiving | Yesterday On Tuesday says:
    November 11, 2017 at 10:20 am

    […] Easy to Make Reversible Holiday Pillow from Create and Babble […]

    Reply
  4. Reversible Holiday Pillow – DIYFix.org says:
    November 11, 2017 at 10:19 pm

    […] Reversible Holiday Pillow […]

    Reply
  5. Everything Thanksgiving - 26 Tablescapes, Crafts, Decor, and Recipes ⋆ Home with Cupcakes and Crinoline says:
    November 12, 2017 at 5:46 am

    […] Easy to Make Reversible Holiday Pillow from Create and Babble […]

    Reply
  6. Master Bedroom Decorated for Christmas Create and Babble says:
    September 22, 2018 at 11:36 pm

    […] And here’s the window seat decked out for Christmas. I hung the tablecloth curtains and brought up the reversible pillow. […]

    Reply
  7. How to Make Pretty Christmas Pillows with Chalk Couture - Create and Babble says:
    October 22, 2018 at 6:00 am

    […] have made lots and lots of Christmas pillows over the years. I’ve made pillow covers using metallic heat transfer vinyl, glitter heat transfer vinyl, and polka dot fabric. But I must say that the ones I just made last […]

    Reply
  8. How to Make a Double-Sided Canvas - Create and Babble says:
    October 30, 2018 at 10:43 am

    […] love double-sided or reversible decor pieces. Like this dual holiday pillow and this framed farmhouse style sign. Not only are they pretty AND functional; they take up less […]

    Reply
  9. 3pedantic says:
    January 12, 2022 at 4:17 pm

    1replacement

    Reply
  10. The Ultimate Thanksgiving Guide - Shaping Up To Be A Mom says:
    November 12, 2022 at 12:23 pm

    […] Reversible Holiday Pillow […]

    Reply

Leave a Reply Cancel reply

Your email address will not be published. Required fields are marked *

About Jeanie

About Jeanie

Welcome to Create & Babble. This is where I share my loves: crafting, hiking and camping

Read more about me here

Categories

Archives

AntiqueFarmHouse
Zots Craft Adhesive Dots

Amazon Associates Disclosure

Jeanie Hevener Emmert is a participant in the Amazon Services LLC Associates Program, an affiliate advertising program designed to provide a means for sites to earn advertising fees by advertising and linking to amazon.com.


hobby lobby

Copyright © 2025 · Site by Pretty Pink Studio

Copyright © 2025 · Glam Theme on Genesis Framework · WordPress · Log in

This website uses cookies to improve your experience. We'll assume you're ok with this, but you can opt-out if you wish.Accept Reject Read More
Privacy & Cookies Policy

Privacy Overview

This website uses cookies to improve your experience while you navigate through the website. Out of these, the cookies that are categorized as necessary are stored on your browser as they are essential for the working of basic functionalities of the website. We also use third-party cookies that help us analyze and understand how you use this website. These cookies will be stored in your browser only with your consent. You also have the option to opt-out of these cookies. But opting out of some of these cookies may affect your browsing experience.
Necessary
Always Enabled
Necessary cookies are absolutely essential for the website to function properly. This category only includes cookies that ensures basic functionalities and security features of the website. These cookies do not store any personal information.
Non-necessary
Any cookies that may not be particularly necessary for the website to function and is used specifically to collect user personal data via analytics, ads, other embedded contents are termed as non-necessary cookies. It is mandatory to procure user consent prior to running these cookies on your website.
SAVE & ACCEPT