


Wood signs are very popular. You see them for sale everywhere. But here’s the thing. They are so easy to make yourself. Today I want to show you how to make a simple box frame wood sign. And the best part about this box frame wood sign is that you can use both sides of it. Read on to find out how to make a double-sided framed wood signs.
I have written a few tutorials on framed wall art like How to Make Simple Wood Frames, How to Make Farmhouse Style frames with pallet wood, Fall Wall Art, and even how to make a Wooden Quilt Block, but never a double-sided framed wood sign.

I love how this double-sided sign turned out. I used Chalk Couture products to decorate both sides of the sign. If you would like to learn more about Chalk Couture and see how to use it, please watch the following video:
If you would like to learn even more about Chalk Couture, please comment below or send an email to me: jeanie@createandbabble.com. If you’re ready to start using Chalk Couture, go right to my online store to place an order.
I used the Chalk Couture transfer called You Are My Sunshine on one side and the Fresh Pumpkins Transfer on the other side. I’ll be able to transition from end of Summer decor to Fall decor just by turning over the sign! I like that kind of decorating! Don’t you wish you could do that with everything?!?!
You can watch the Facebook videos of how I painted the signs here and here.
Okay, let’s get started.
How to make Double-Sided Framed Wood Signs
Supplies
You will need:
- 1/4″ or 1/2″ plywood
- 1/2″ x 2″ x 48″ poplar boards
- wood glue
- pin nailer or brad nailer
- wood filler
- paint
- stain
Tools
- framing square
- table saw or circular saw with a guide
- miter saw
- corner band clamp
Steps
Step One
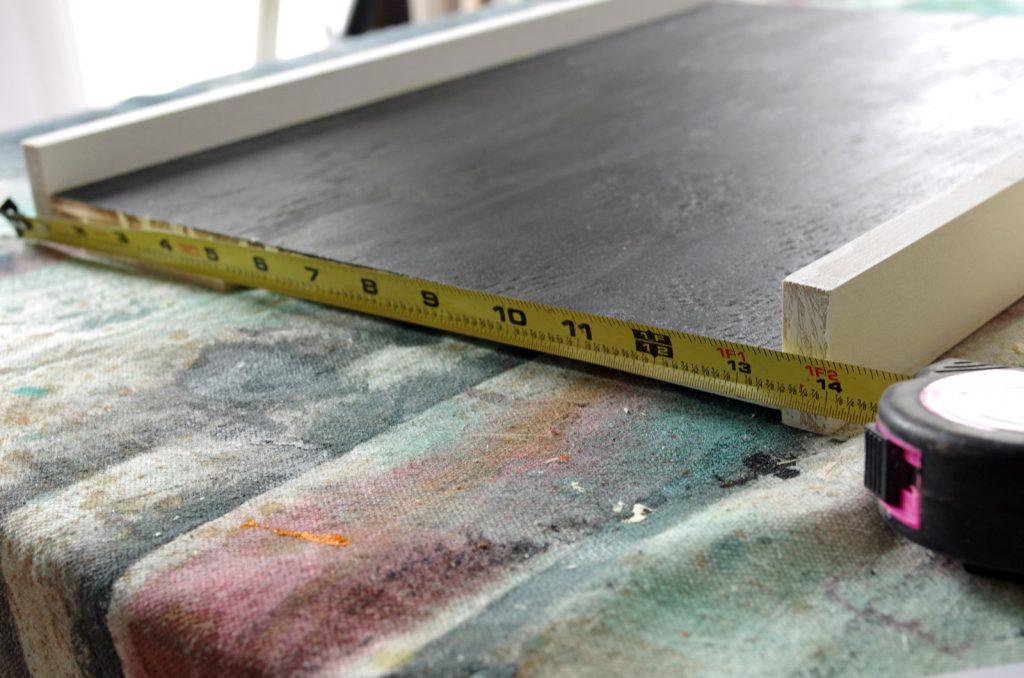
Using a table saw or circular saw, cut the plywood to the desired size of your sign (plus 1″ if using 1/4″ plywood). I like to use up my plywood leftovers, but if I don’t have any scraps big enough, I buy the 1/4″ and 1/2″ 2′ x 4′ sheets from Home Depot and cut them down. The most important thing to remember in this step is to make sure that the cuts are absolutely straight. Use a framing square to be sure your boards are “square”.
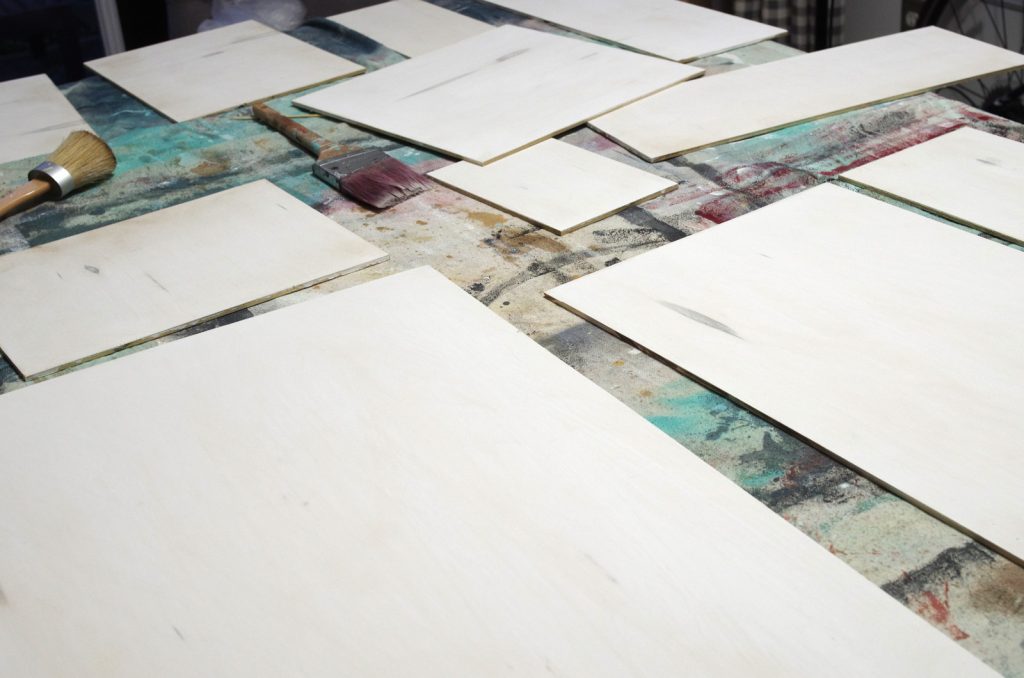
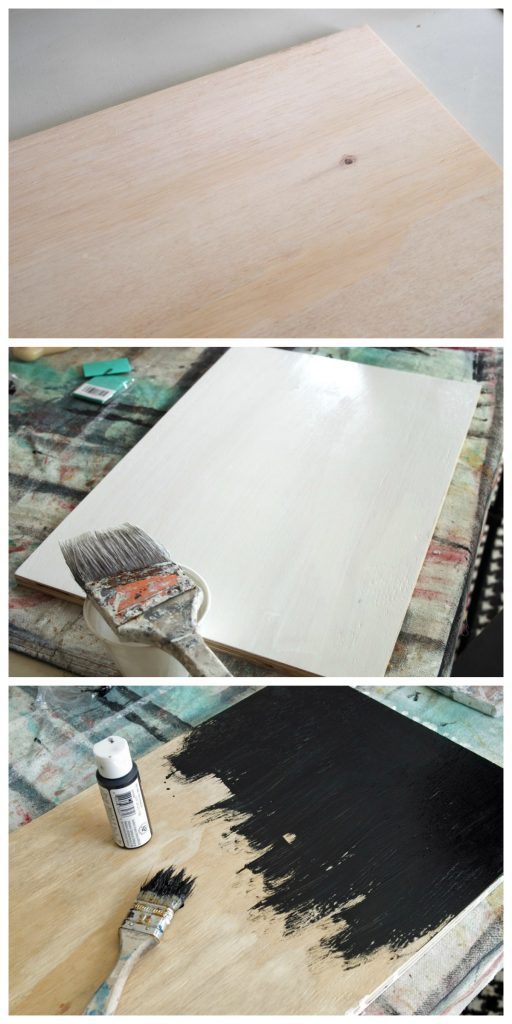
Once the boards are cut to size, paint or stain them as desired. One side of the boards in the image above was painted with watered down white chalky style paint for a white-washed effect. I apply two coats and sand in between coats, then I use antiquing wax to achieve a distressed, worn appearance. I painted the other side with chalkboard paint. Also, two coats of paint, sanding, and wax.
Step Two
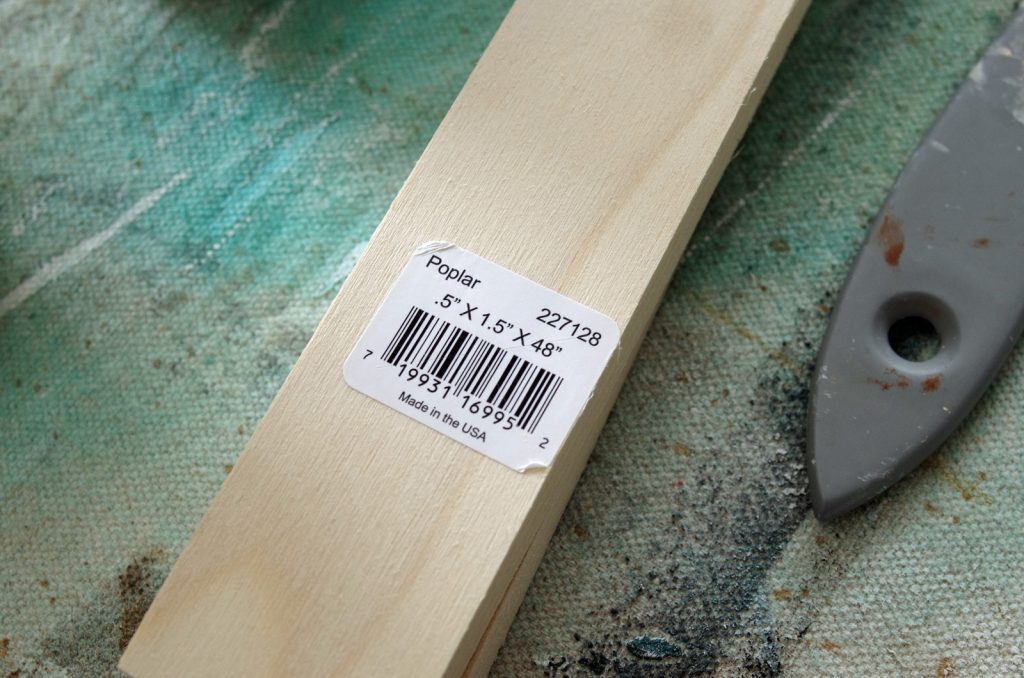
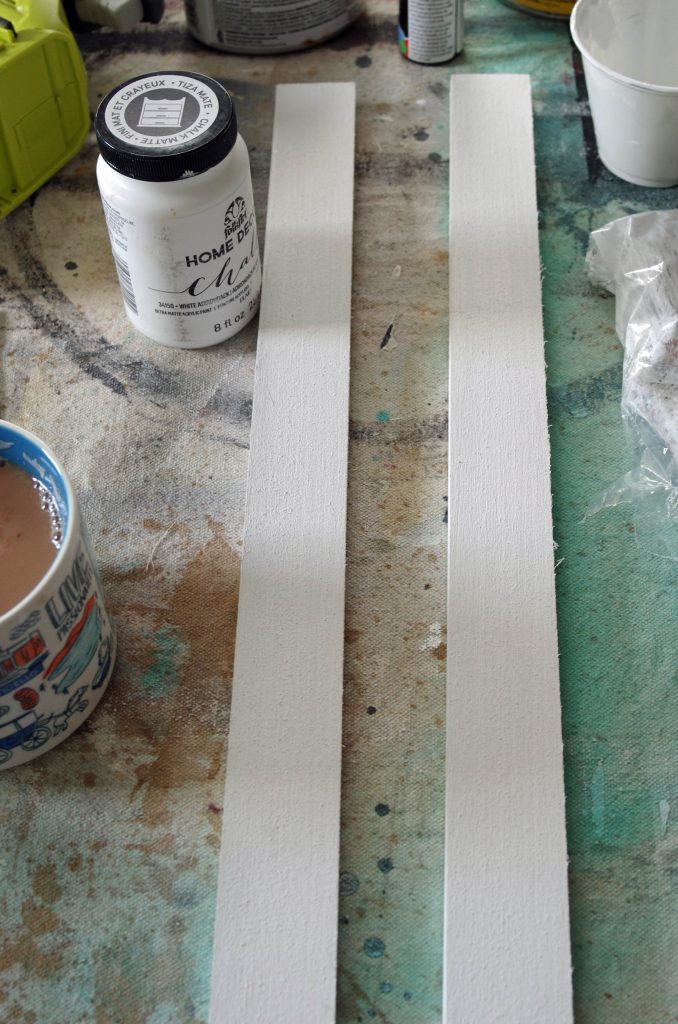
Cut frame pieces from the poplar boards. You could use 1″ x 2″s for the frame pieces, but I prefer the thinner 1/2″ thick boards even though they cost a little more. Cut two at the same dimensions as the sides of your board. Cut two more at the dimension of the width of your board plus the thickness of the two side frame pieces. Sand, paint or stain as desired.
Step Three
Attach the two side frame pieces.
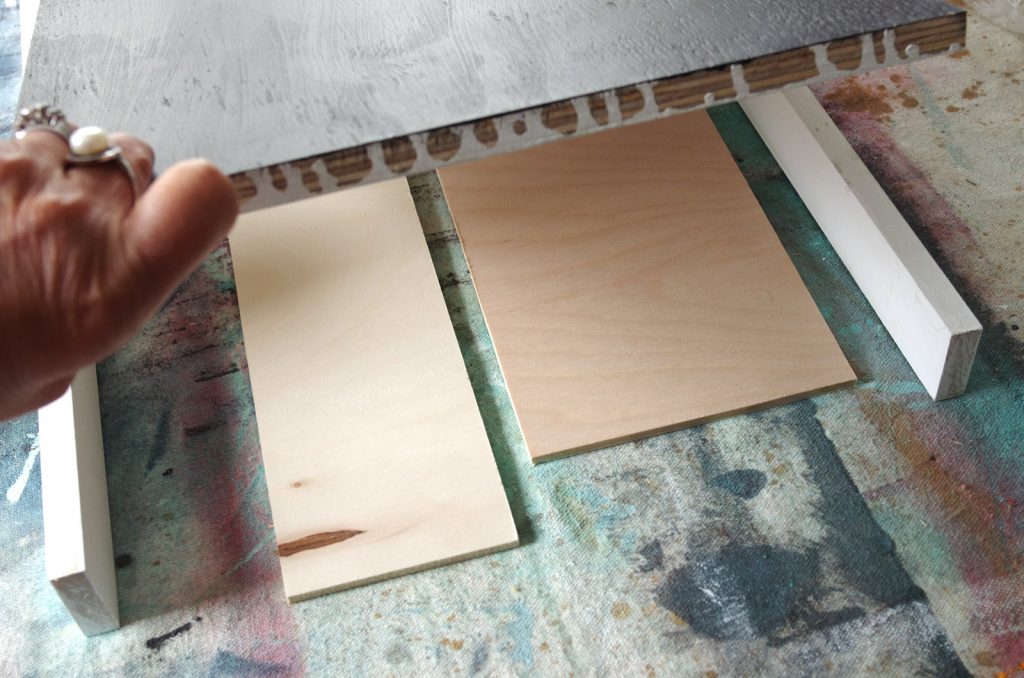
If you are using 1/2″ or thicker plywood, lay the board face side up on some scrap pieces of 1/4″ plywood. This raises the board just a little, allowing there to be a “lip” of frame on the back. Attach the frame to the edges of the plywood base with wood glue.

Once the frame pieces are attached with wood glue, use a pin nailer or a brad nailer to secure.
If you are using 1/4″ plywood for the base of the sign, you will want to make a box frame. You do this by attaching the frame pieces to the top of the base instead of the edges.
You make this box frame by building the frame to the exact dimensions of the base, securing the butt ends with brad nails. Glue the base onto the frame as shown above.
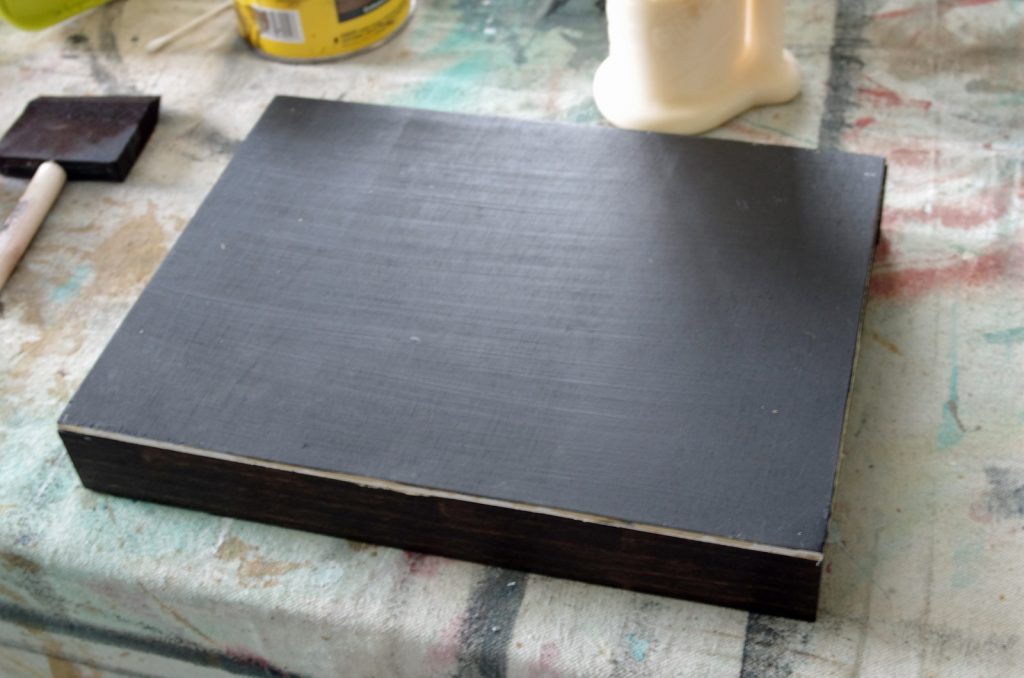
 The image above shows a closeup of the glued edges. Once the glue is dry, I will sand the edges as smooth as possible and then apply a thin coat of wood filler and allow that to dry and then sand and paint and paint again.
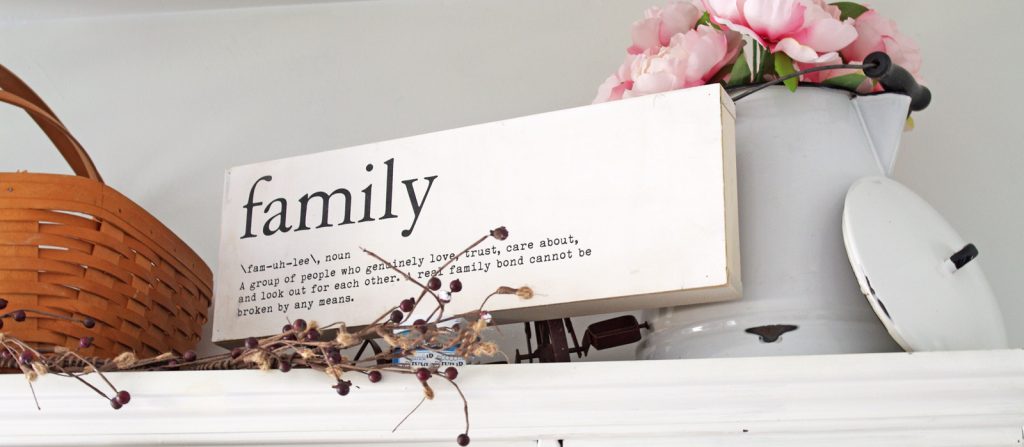
The back side of these box frame signs can also be used.
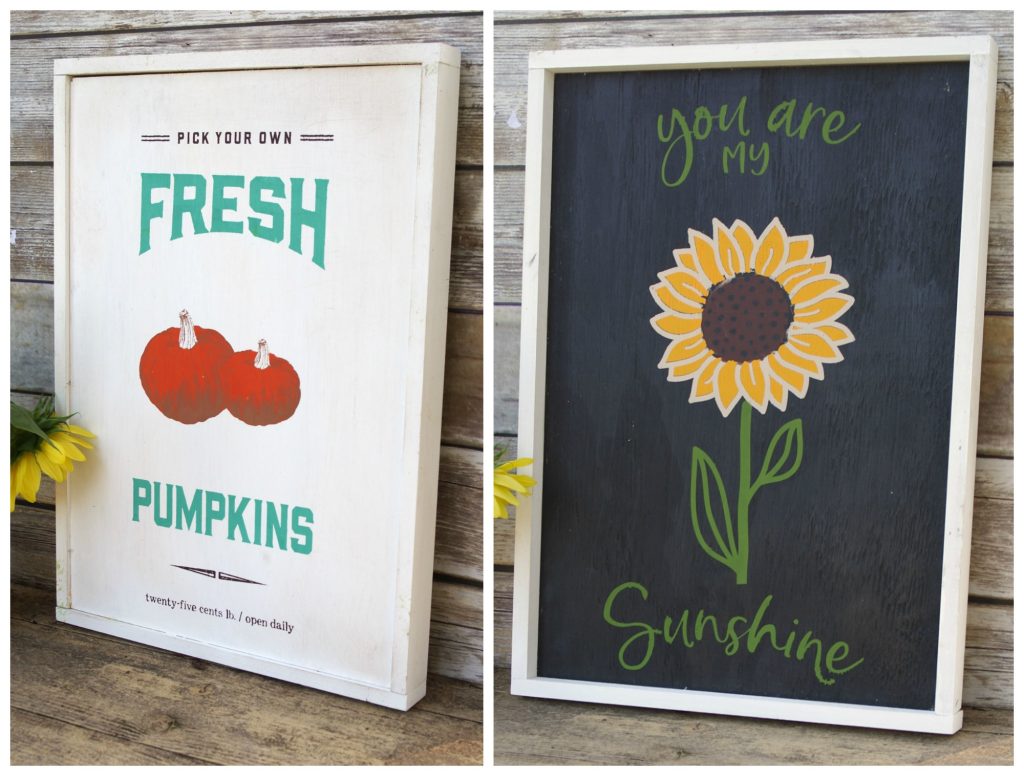
I just love these transfers – the detail on the pumpkins is amazing!!!
Shop for Chalk Couture products here. If you are interested in seeing more Chalk Couture products, please join me on my Chalk Couture Facebook page. I show a lot of live videos and projects on that page. I’d love to see you there! I’m telling you, it’s the best thing since sliced bread and has taken the DIY home decor world by storm!!!!
Click here if you’re asking yourself What is Chalk Couture??? and watch these videos.


Now check out these other creative wood signs that you can make:
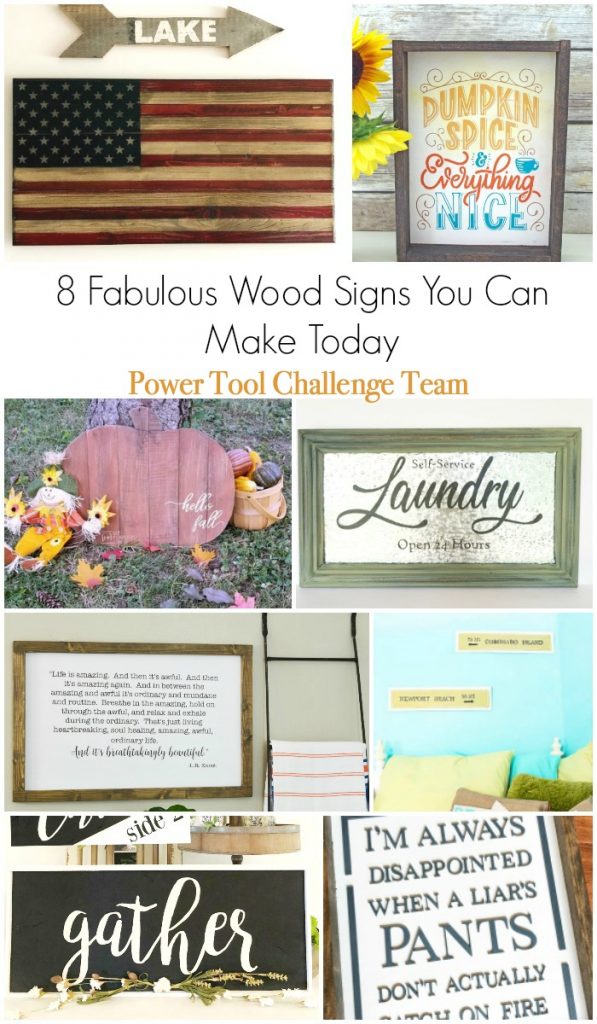
Virginia Sweet Pea – How to Make a Pallet Wood Arrow Sign
My Repurposed Life – Hello Fall Rustic Pumpkin Sign
Designed Decor – Framed Laundry Room Sign
H2OBungalow – Large Modern Wall Decor Sign Tutorial
Domestically Speaking – Beach Signs
Refresh Restyle – How to Make a Two Sided Sign
The DIY Village – DIY Raised Wood Lettered Sign


What a brilliant idea! They turned out so cute!
What an awesome idea to make a two sided sign! You get double the use out of the sign and you have less to store when you aren’t using it.
Jeanie,
Your double sided sign and your box frames are fabulous! I have so many scrap pieces of plywood. I need to get busy!
great tips and ideas as always.
pinned!
gail
I love your fall themed signs! I’d be spinning that sign around from side to side it’s so cute. Good tutorial too on the frames:)
I love the signs! I pinned it so I can make it later.
Great job! I pinned and shared with the world.
What a great tutorial! I love that you made it double sided! We would love to have you link up this project with us for our Wall To Wall DIY Wednesday! You can find it over on my blog at aheartfilledhome.com 🙂
I’m loving these box frames already! Thanks for sharing this idea. I can just imagine making one and putting my favorite word on it and displaying it in my room. So beautiful! Love lots, xoxo
This is brilliant and I love it!!! Thanks for sharing on To Grandma’s House We Go!
Hi JEANIE,
I have seen the Double Sided framed wood sign and enjoyed a lot. Really, awesome and impressing DIY craft by using simple supplies and tools. I appreciate your ideas, dedication and gained experiences.
Thanks for sharing the amazing craft.
I have seen your tutorial. It’s really helpful for Wood signs lover. I have a little woodworking experience and I will try to make the box frames soon. Thank you for sharing your idea.
I definitely try this for my home and Garage door. Love the way you describe every steps.
Did you recommend or use any type of planers in your project?
I love Chalk Couture! What a great idea to make wooden signs that are double sided too…makes it super easy to change from season to season or holiday to holiday. Definitely going to try this tutorial for my next sign project. Thanks Jeanie!
Step by step instructions to get adherents on Instagram 11 basic tips.Have a mindful Instagram procedure.
Hey Jeanie
A helpful resource to choose for my home and Garage door. This was simply a great post. I loved all the photographs. Yes, Sears #DistinitionDad may be spot on. Our local stairs have only recently closed and unfortunately we are no longer on the edge. Once we did that though, my husband always used to play kid in the candy shop when we got there.
Very good idea. Now I have to come up with some Christmas pictures and decorate my house with them for the holiday. Pin-Pin-Pin:)
Hi Jeanie
You Explain completely the guidelines about DOUBLE-SIDED FRAMED WOOD SIGNS. Your description is very helpful for a beginner. I have a question for you. Could you please solve my question? Your answer will enthusiasts me to do woodwork.
Specifically, What kind of Nailer do you use for picture frames?
Hope will get your answer soon.
Thanks
Wow! I loved it. I will try this sing today! Thanks for sharing. Please share some more signs like this. I want to decor my own room.
This article is very interesting and informative i love to seek some informative kind of stuff from this article and it is looking very nice to make some frames or sign boards like this..
Thank you for this post
Wonderful you are in search to get the steering to manner the steps on the display screen mirroring feature, you can get the crisp clarification of the stairs on this weblog. If you face the trouble on permitting the display mirroring on the Roku device , you can get the fine guide and steps to treat the display screen mirroring troubles through this blog.
Thank you
Absolutely Great article. I Really love to looking some informative kind of stuff from this article and it is looking very nice to make something different.
this article is very helpful for me, for decorating the house.
this is a good post for enhancing the decorating skills and help in decorating the house.
I like your idea. this is so easy to make double sided framed wood. I really love this idea. Thank you for sharing it.
Eliminating old paint isn’t glamorous, but it’s the first step toward a closing ceremony look. There are a few choices, including media blasting, varnish chemicals, and baking soda, but refinishing is usually the most straightforward, especially if your car has many coats of paint. Of course, to go this method, you’ll need two things: solid skill and a decent vehicle paint remover sander.
Best sander for auto paint removal
An automobile enthusiast is the one who is desperately in need of this best heat gun for vinyl wrapping. Moreover, your new project can achieve success through this mind-blowing heat gun. If you have heard this word before then, you must have known the purpose of this great heat gun as it helps in easy wrapping.
Daunting task always comes in when you have to find them and it might be time consuming for a lot of people but this is what we here for, to help you. We’ve made a list of best Milwaukee impact driver considering the expert’s opinion as well as customers reviews
This article is full of decorative ideas which make home decorative at a cheap price.
Angle grinders are portable power tools that may grind, buff, polish, cut, sharpen, and clean depending on the blade or extension used. These multi-purpose tools are great on various surfaces, including ceramic, metal, stone, concrete, brick, and wood. That makes them a fantastic introduction to the toolbox of any DIYer who deals with metal, wants to install tile, enjoys woodworking, or works on any project that involves smoothing, cutting, or sharpening diverse materials.
What fabulous projects! Impossible to decide. Just a beginner but I’m hooked. Would love to get these patterns. Great for those snowed in days or weeks
Great article. Thanks for sharing this blog.
Have a woderful dayانحصار وراثت
I’m absolutely enjoying your blog and look forward to new posts.پرستار در منزل
Thanks to this article I can learn more. Expand my knowledge and abilities. پرستاری در منزل
PAYE Calculator NZ helped me compare salary offers by showing what I’d actually receive after deductions.