


Here’s a cute way to protect hands and furniture while enjoying a hot bowl of soup, stew, chili, or oatmeal!
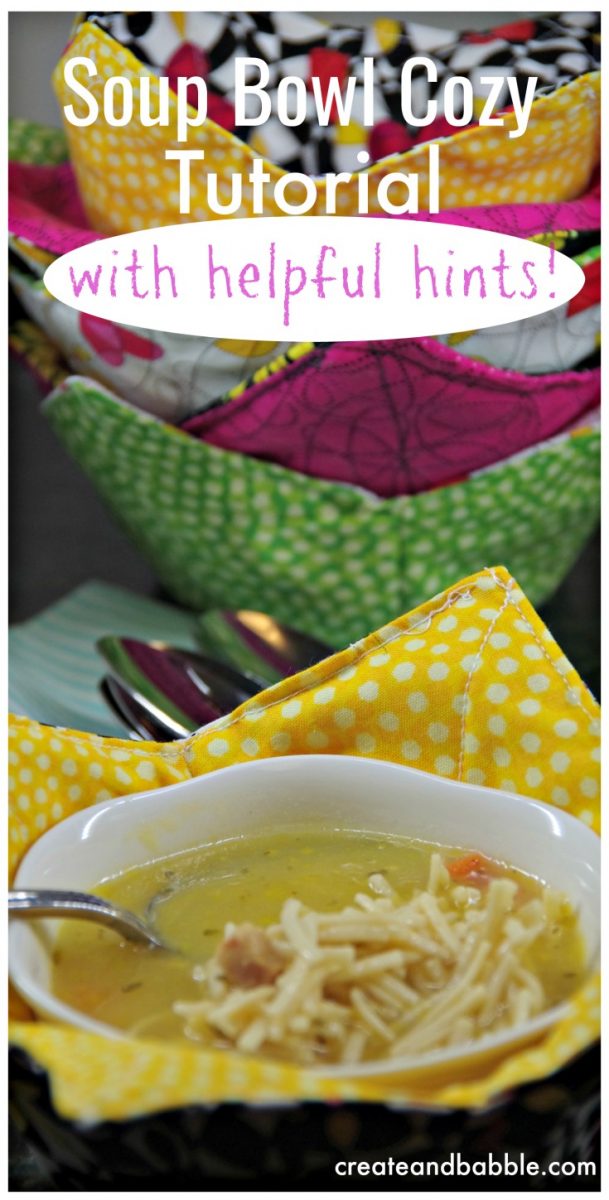
These soup bowl cozies are fast and easy to make and make wonderful gifts. I made two of them in less than 45 minutes.
After making quite a few of these I’ve come up with a list of helpful tips to save you time, money and aggravation! You’ll find it at the end of the instructions.
How to Make Microwaveable Bowl Pot Holders
Materials:
- 2 10″ squares of cotton fabric

- 2 9″ squares of cotton batting
- marking pen
- cotton thread
- sewing machine
- iron
- rotary cutter
- rotary mat


Note: use only 100% cotton fabric, thread, and batting so that they are microwave safe!
Instructions
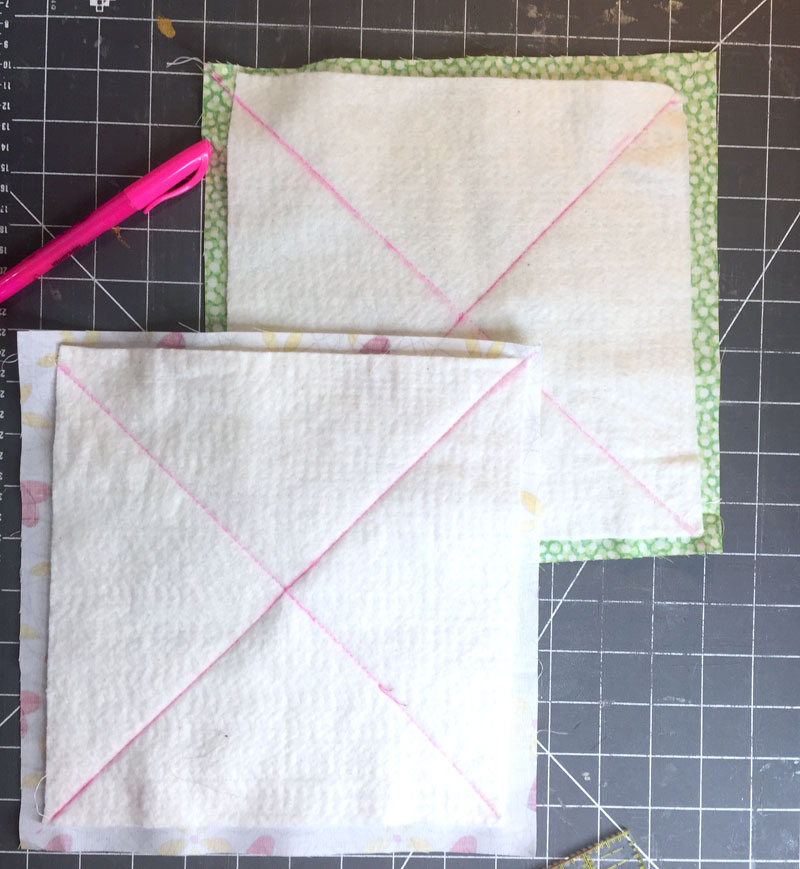
Step One: Center a batting square on a fabric square. Draw a line from corner to corner with marking pen . Stitch along lines.
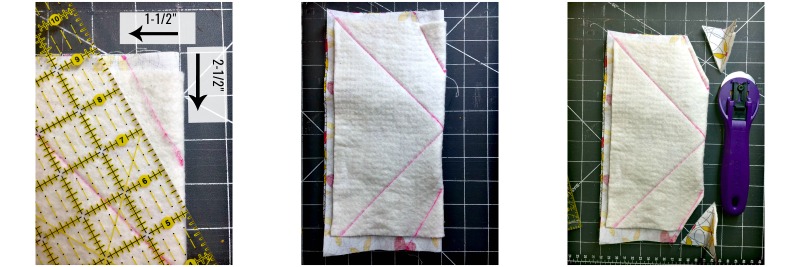
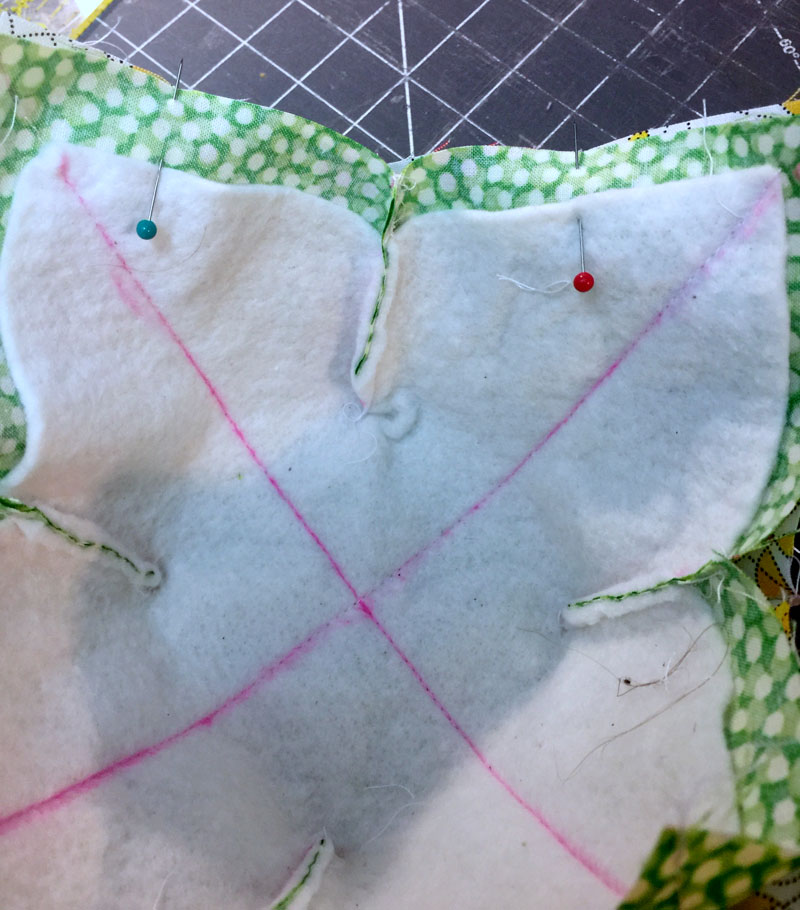
Step Two: Fold one fabric/batting square in half with batting side out. Mark a dot 1-1/2″ from the fold along the top edge and 2-1/2″ from the top along the fold. Draw a line to connect these dots. Stitch along the line. Trim seam allowance.
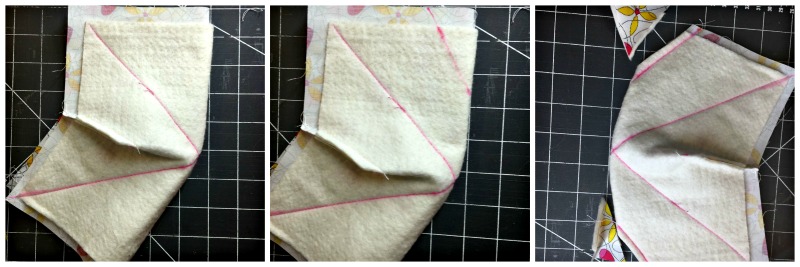 Step Three: Fold the square in the opposite direction. Mark the same as Step 2. Draw line, stitch, and trim seam allowance.
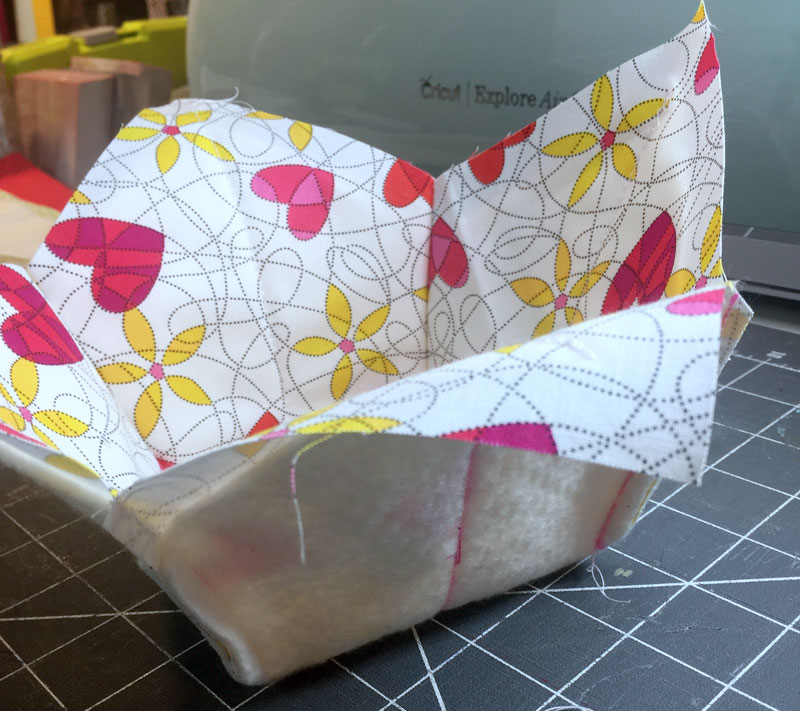
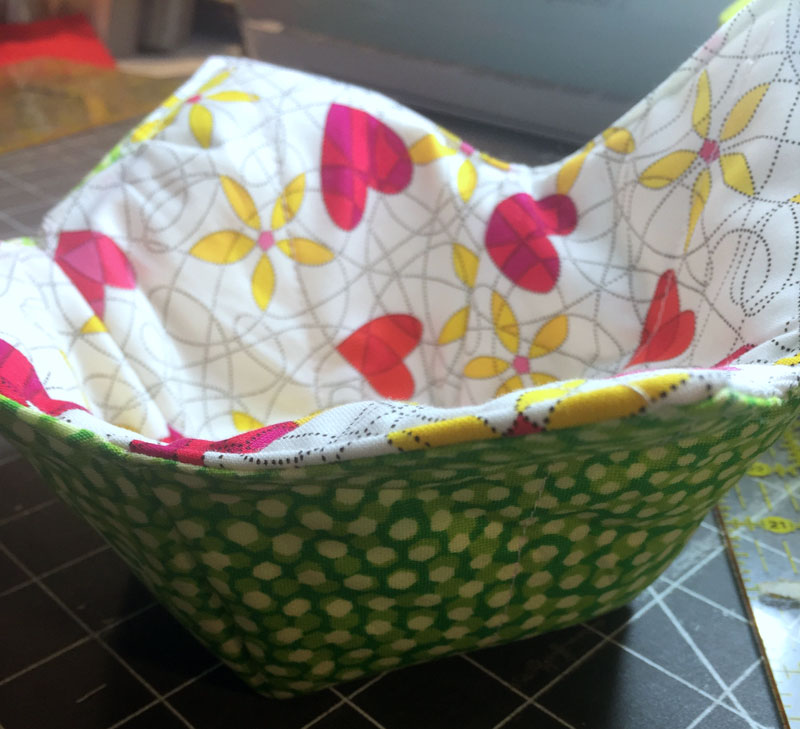
Step Four: Open the square. It will sit like a bowl! Halfway there!
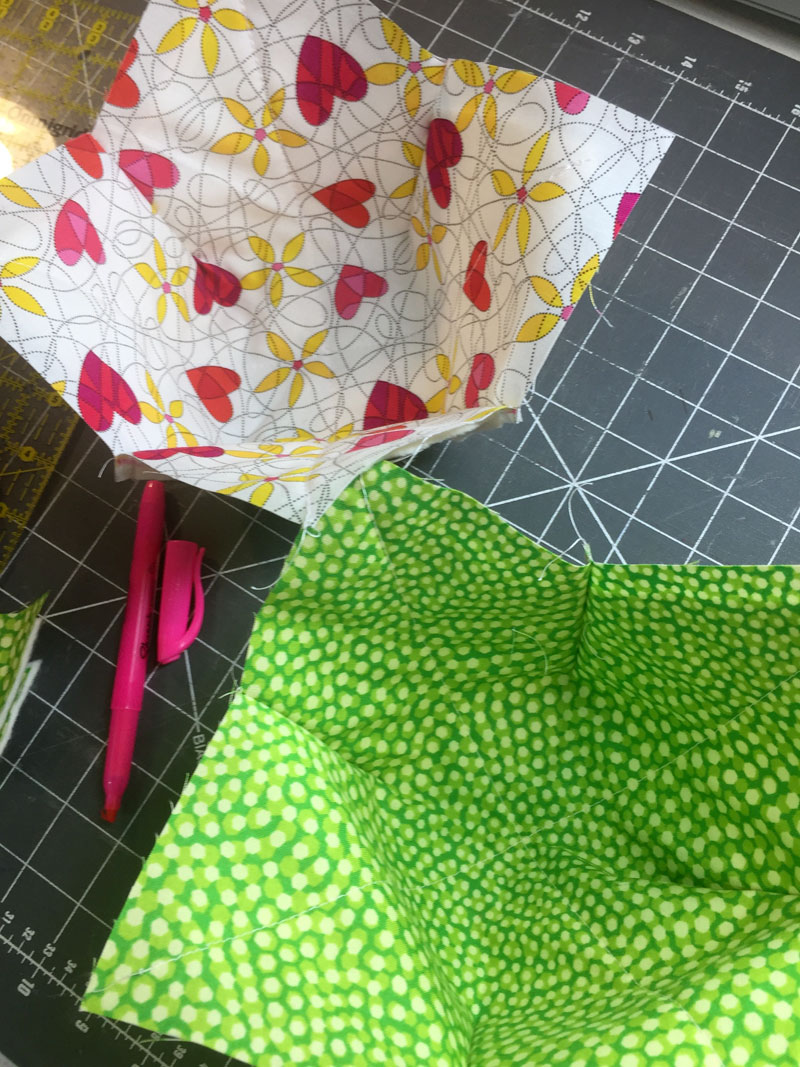
Step Five: Repeat Steps 2-4 for second fabric/batting square. You now have the outside and the outside ready to sew together to make the soup bowl cozy. (I love that these are reversible!)
Step Six: Turn one bowl inside out and pin the two bowl pieces together (right sides together). Sew around the edges of the layered bowl shapes with a 1/4″ seam allowance. Leave a 3″ – 4″ opening between pins for turning.
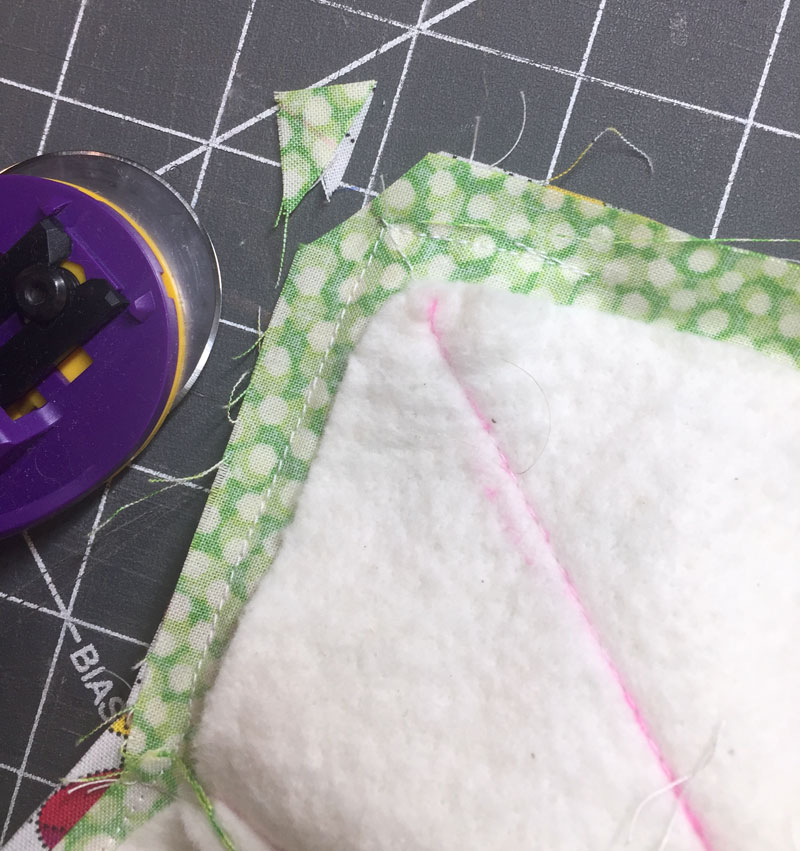
Step Six: Trim seam allowance to reduce bulk. Also trim seam allowance at points as shown above.
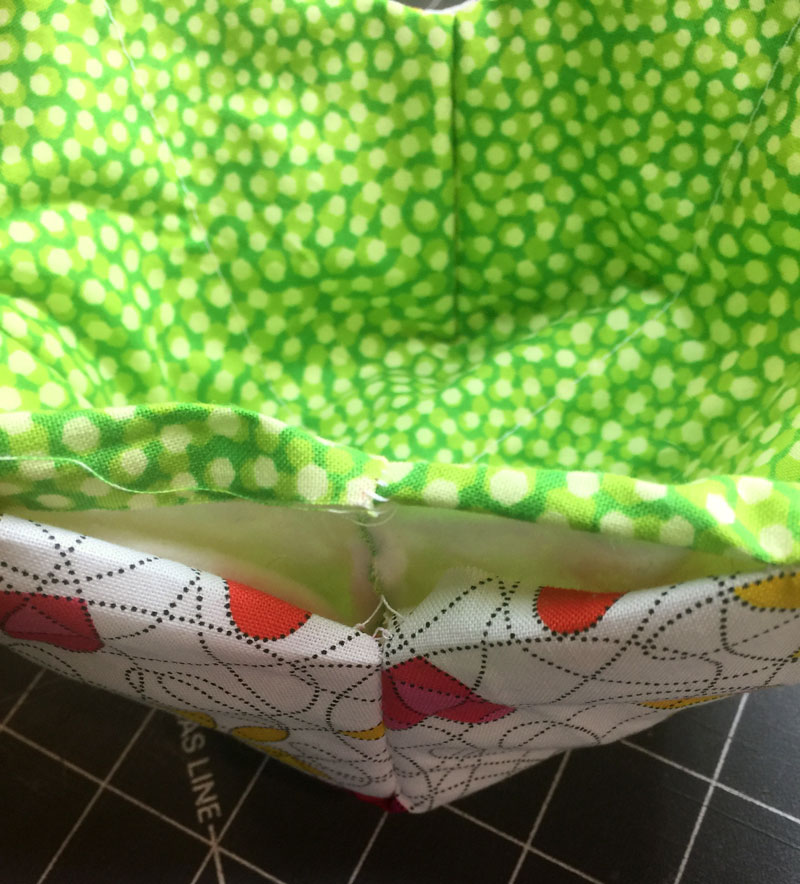
Step Seven: Turn right side out through the opening. Push out the points.
Step Eight: Top stitch 1/4″ from the edge of the bowl, turning in the edges of the opening.
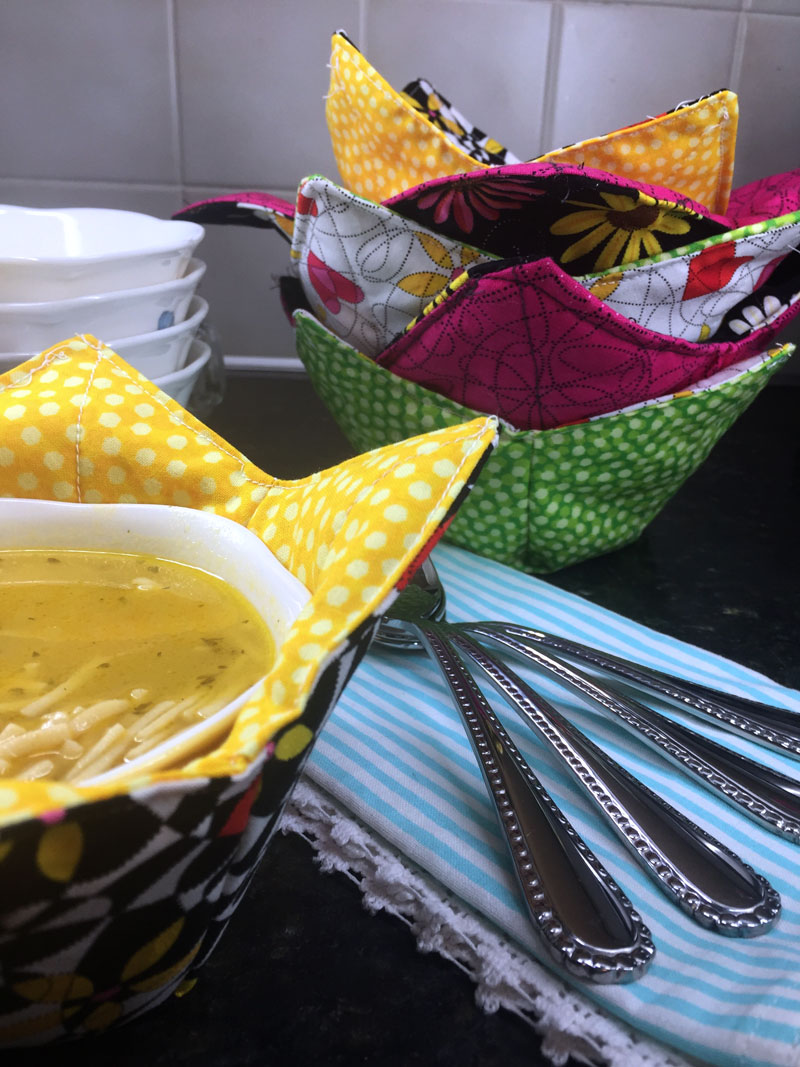
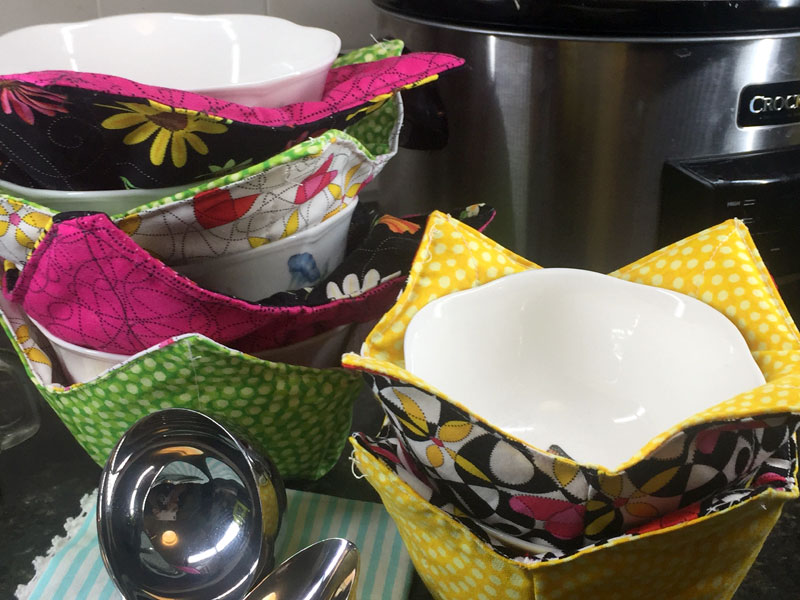
I made a total of six of these soup bowl pot holders in one afternoon. I plan to make a bunch more for Christmas gifts. These would be perfect for co-workers who heat up their bowls in the microwave at work!
By the way, you can make these bigger or smaller. I made two smaller ones using 9″ squares of fabric and 8″ squares of batting for the small bowls that you see in front in the photo above.
Here’s that list of helpful tips that will hopefully save you from making some less-than-gift-worthy bowls like I did when I first started making them.
- Use fat quarters. You can get two bowls out of two coordinating fat quarters.
- Use the lowest loft batting you can find to save bulk.
- Follow my instructions and cut the batting one inch smaller than the fabric square. If you don’t, the edge is too bulky to topstitch neatly.
- Measure the darts precisely.
- Press your fabric and batting
- Trim all of the threads before
photographing for the bloggiving as gifts. ?
Now it’s time to see all of the other handmade gifts. Oh, and be sure to enter the contest at the bottom to win some fabulous prizes from our sponsors!


These are great! I need to make a couple for sure!
Brilliant idea! I don’t know anyone who couldn’t use a set of these pot holders. I love the mix of fun fabric. Thanks for sharing!
These are great, and perfect for gifts. No more burned fingers!
Oh this is such a great idea! I’m always struggling to try to wrap a potholder around each side and not spill when I’m taking a bowl out of the microwave and this is just so much better! Thanks for sharing!
Oh my gosh, this is brilliant. How many times I’ve burned my fingers and nearly dropped the bowl on the floor. I need these, maybe I’ll show this to my mom and she can make a few of them for me as a Christmas Gift 🙂
Fabulous idea–thanks for sharing.
I need these right now!
What a cute idea. I bet everyone loves receiving these as gifts! Thanks for sharing your tutorial.
Fabulous soup cozzies!! Love the eaze of the tutorial your funny “cut threads before photographing” exerp! You are terrific and have been a follower of yours on FB since before this!! These are fun to use and as you said, to give as gifts!! Fun stacked too!!
Hi Jeanne,
Another great project to use all my hoarded fabric. Love it!
Love this idea! Pinning. Can’t tell you how many times I’ve reached into to pull out a steaming hot bowl from the micro. Visiting from Handmade Holidays.
This is brilliant! I could definitely use some of these in my life!! Great project and a fabulous gift idea!
My friend makes these and gets requests for them all the time, They are so great to keep you from getting burnt fingertips.
I love this idea! It’s so clever! These would definitely be appreciated, and they’re so bright and cheerful!
Neat project! I am the worst when it comes to using a sewing machine, but someday I’ll get brave and try to make something with it again. I like hand stitching, but it does take a long time.
How clever is this!
Fantastic idea. I really like the colors, gonna try to make a couple of these soon. Thanks for sharing.
OMG what a lovely and cute idea, I love it and I definitely need one! Just today I burnt myself with a plate out ot the microwave.
How important is the 100 per cent cotton thread.
Every spool I own, is not 100 0/0 cotton?
I need a regular spool for my machine
Thanks
kathy
It is very important! I’m just making these myself. Had to go find 100% cotton thread . It’s a safety issue because of microwave use.
Also , I just made my first one, and it is too small to fit any of my bowls. And mine are just standard Corelle bowls. I think 10 inches is too small for most of us. And I have 5 more already cut out. ???
Your posting shows the importance of reading through all the comments posted about directions for crafts because i had the same problem of the cozy being far too small for any bowls I own (and your comment would have warned me!), but being in the same predicament and not wanting to waste fabric already cut out, I figured out that changing the size of the “darts” makes all the difference! Instead of 1.5” and 2.5”, I measured 3/4” and 1.25” and the cozy is now the perfect size for standard soup/cereal bowls. Yay!
Yes you are right, changing the dart size makes a huge difference! Thanks
Also, you need to use 100% cotton batting and 100% fabric if using these in the microwave! Anything that contains polyester can melt or even cause a fire! I tried using Zap and Wrap batting which is designed for use in the microwave, but I found it way too thick for bowl cozies. Next time I will use the thinnest cotton batting ai can find.
I just made two of these and they are waaaaay too small for any bowl. I did the 10 inch fabric with the 9 inch batting. Came out just about the size of a cup.
Can you use fabric with sparkles or shiny gold or silver sparkles, hoe about flocking on fabric, is it microwave safe?
Love these, use them all the time. Also discovered I could make them to fit my canning jars. Excellent for taking jars of food to work–heat & eat has never been easier. This for sharing.
Hi there! Do you know if they make any plugins to help with SEO?
I’m trying to get my blog to rank for some targeted keywords but I’m not seeing very good gains.
If you know of any please share. Kudos!
Awesome! No words. You always go one step beyond.
There is so much great, useful information here. Thank you! Thank you! Thank you!
Read our guide if you wish.
thebestpickers
Thanks again 🙂
Use this batting and they will be microwave safe. ☺️
https://www.amazon.com/Pellon-Wrap-N-Zap-Batting-36-Inch-Natural/dp/B00F8MRLBG/ref=sr_1_5?dchild=1&keywords=cotton+batting&linkCode=ktl&linkId=25fa3393af7d2352afac5ce6b752b504&qid=1601230739&sr=8-5&tag=creaandbabb-20
I used this batting, and placed in microwave with bowl in it, empty bowl, and it did over heat! Any suggestions?
Can you use cut up old bath towels, which are 100%cotton in place of the batting? This way you can use up old worn out towels and save money.
Why is the material bulky in the middle inside once put together?
This is such a great pattern! I did 9″ squares with a total of four 8″ squares of slightly thicker cotton fabric in place of the batting, since I can’t find cotton batting here. I decreased the triangular corners to 1 1/8 and 2 1/8 and it works fine; I might just do 2″ and 1″ in the future though, simpler and might fit my bowls even better. I did one myself and one with my friend’s first grader who was interested in my sewing machine. He did the X’s and the corners with me, doing everything except guiding the fabric himself. What a great starter pattern! He was ready for legos by the time we got to the last couple steps, which I would have had to do myself anyway, guiding more carefully around the edges. 🙂
I am trying to understand how you can make two of these out of a fat quarter. There is no way to cut two 10 inch squares from 18X22.
Yes, you can. If you cut fabric in half, you have two pieces 11” x 18”. That’s how I get it to work anyway.
These are really cute and super practical too. I’ll definitely be making these soon
The dart sizes are to big for this size square. They should be 1″ and 2″. To small for anything, I thing you should amend your sizes. I made some of these years ago that were perfect, I couldn’t remember the dart sizes so looked up and found your pattern and unfortunately it didn’t work.
Love these. Everyone seems to have some, except me! Wondering why it’s 10-inch square of fabric when pattern is 11”. Am I missing something?
I wanted to make the bowl holder, however, I was not able to sew through the batting—-too thick and I’m guessing that I do not have the right sewing machine to do the project. I managed to do one couple months ago, though it was very challenging to do. Maybe I’m missing something?
Love the project , very easy to see.
Have made 10 soup sets for gifts
Thanks!
These cozy microwave-safe bowl holders sound like the perfect blend of practical and giftable—love the reversible fabric idea and thanks for the pro tips on precise darts and low-loft batting!
Using 100% cotton for every single layer is such a vital tip since I’ve seen some horror stories about polyester melting in the microwave. My kids are always struggling with hot soup bowls after school, so I can’t wait to try this pattern out for them.