• Home
  • About
  • Contact
  • Partner
  • Privacy Policy
    • Facebook
    • Instagram
    • Pinterest
    • Twitter
    • YouTube

Create and Babble

  • DIY
    • Home Improvement
    • Upcycle
    • Furniture Makeovers
    • Build It
  • Craft
    • Silhouette
    • Sewing
    • Wedding DIYs
    • Seasonal
    • Gifts
  • Lifestyle
    • Bicyling
    • Travel
    • shopping

STAY UP TO DATE

Get the latest crafting and DIY tips, tricks and tutorials delivered straight to your inbox!

Filling Grooves in Paneling

January 12, 2015

If you like it, please share it!Share on pinterest
Pinterest
Share on facebook
Facebook
Share on twitter
Twitter
Share on stumbleupon
Stumbleupon
Share on google
Google
Share on linkedin
Linkedin
Share on reddit
Reddit

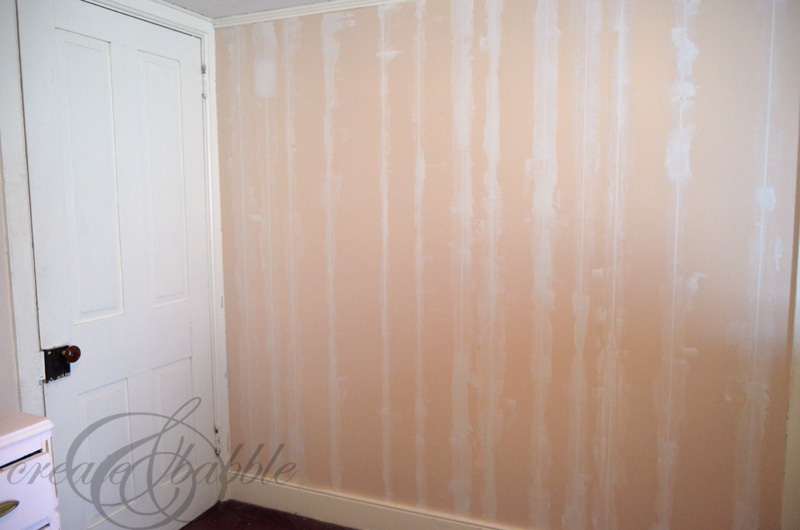
My goal this month is to complete the makeover of my granddaughter’s nursery. Since it’s almost the middle of the month I better get moving! We, (my daughter and I) spent the weekend filling the grooves in the painted paneled walls. Someone, at some point in time in this old home’s history, must have thought it would be a good idea to disguise the paneling with paint. While the concept was good, they missed one important step: they didn’t fill in the grooves of the paneling.

filling-grooves-in-paneling

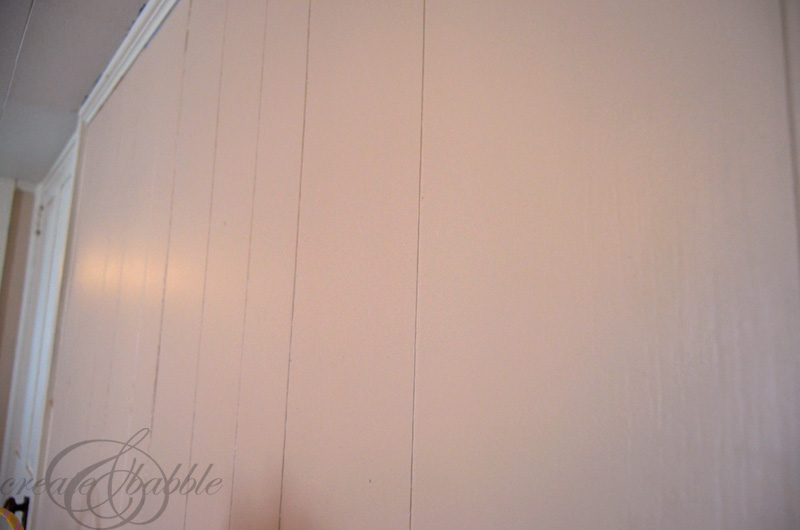
The result looks just like what it is: painted paneling. We wanted nice, smooth walls.

If you have paneling in your home and would rather have smooth walls (that don’t look like painted paneling) then read on to learn how to fill in the grooves.

filling-paneling-grooves-5

First let me say, if your paneling has NOT been painted yet, you will have a few extra steps. You will have to sand and prime the paneling first before filling the grooves. Once you’ve done that then you’re ready to fill in the grooves.

filling-in-paneling-grooves

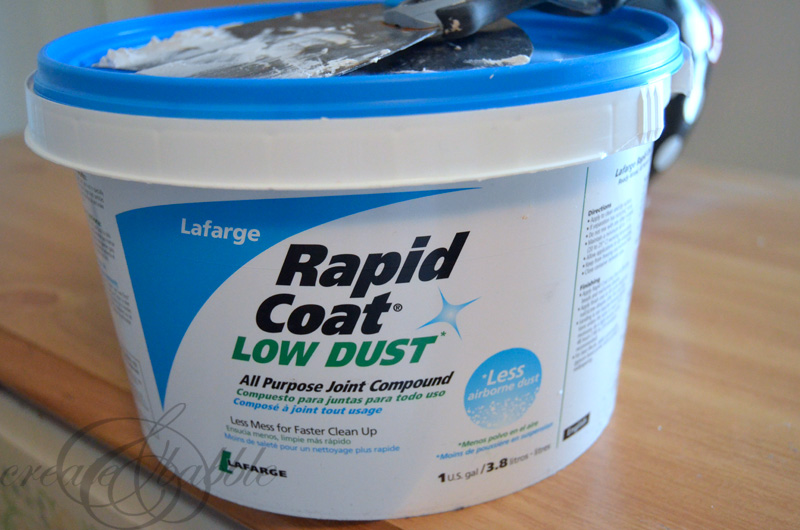
The supply list for this project is short.

  1. joint compound
  2. putty knife
  3. dust mask or respirator

Neither my daughter nor I had ever worked with joint compound, but I assure you, no big deal. It’s not difficult and you don’t have to be neat and precise. Just make sure the grooves are filled in. In fact, it’s a good idea to go back to where you started, carefully make sure that all of grooves are filled in and apply a second coat if necessary.

filling-grooves-in-paneling-createandbabble.com

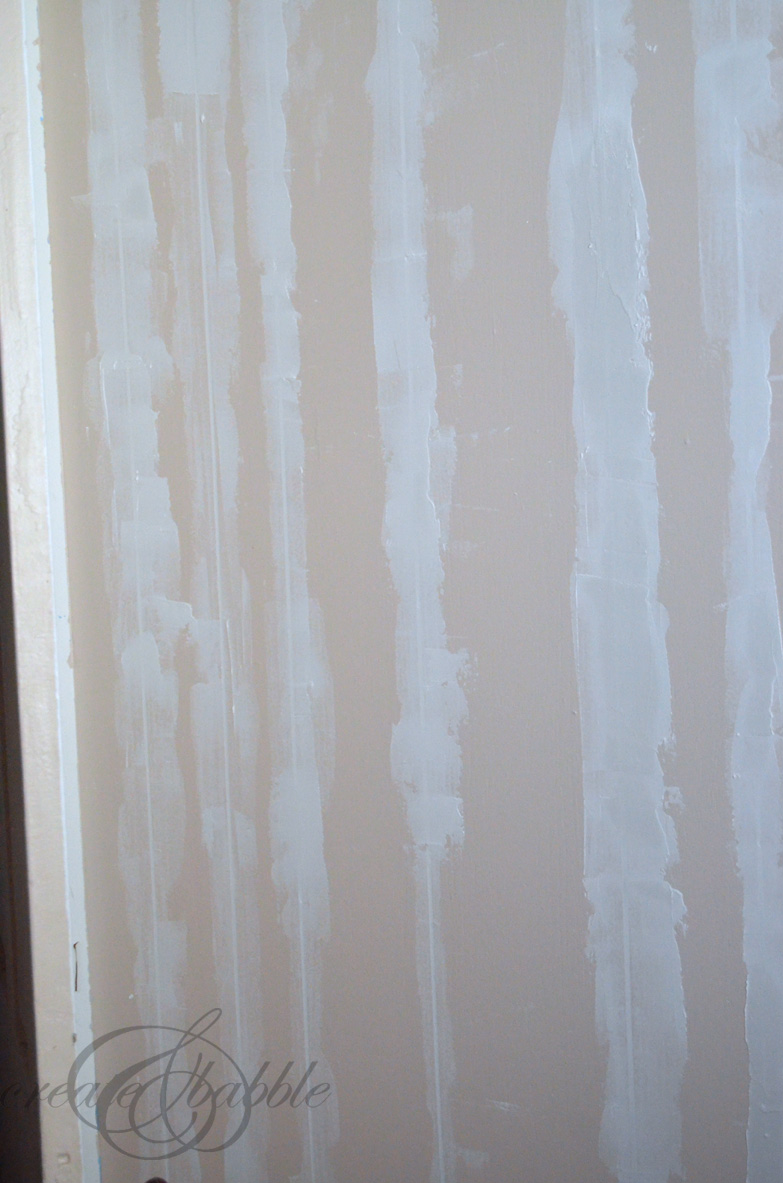
All of those rough edges will get sanded away on day 2.

Oh yeah, I forgot to mention: this is a 2-day project. The first day is applying the joint compound and the second day is for sanding and clean up. It’s an easy project but not a fast one.

filling-grooves-in-paneling-createandbabble.com

filling-grooves-in-paneling-createandbabble.com

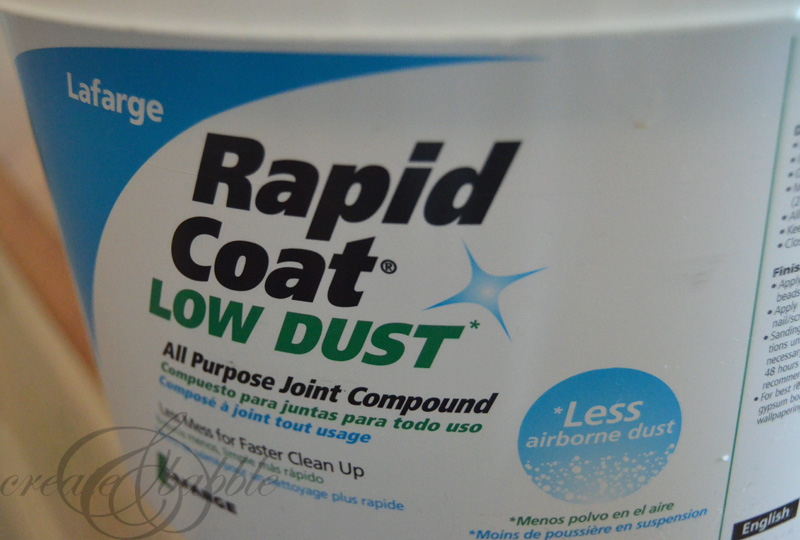
As mentioned above, day 2 is all about sanding. Sanding and dust. Lots and lots of dust. Like open a window, wear a dust mask, your hair is now white, dust. The joint compound we used said “LOW DUST”. Really?

Day 2 is also about the clean up of said dust. After you think you’re rid of all the dust, think again. Using a damp cloth for the final clean up and removal of the last particles of dust is recommended. I left my daughter to handle the final stages of the dust clean up. A perk of being “Nanny” ; )

If you like it, please share it!Share on pinterest
Pinterest
Share on facebook
Facebook
Share on twitter
Twitter
Share on stumbleupon
Stumbleupon
Share on google
Google
Share on linkedin
Linkedin
Share on reddit
Reddit

Filed Under: Uncategorized

« Baby Nursery Wall Art
Pretty Shadow Box »

Comments

  1. Patti Tatum says

    October 9, 2016 at 12:41 pm

    I’ve done this in several rooms of my house and am currently working on another. I’ve learned after the first go around that you don’t need to use so much joint compound. You really only need it IN the grooves. So, I take a small putty knife work it into the groove and then wipe away most of the excess mud. You are correct about needing two coats because it shrinks as it dries, leaving a little recessed groove still visible. But wiping away everything outside the groove with the putty knife considerably cuts down on the sanding and, most importantly, the dust. Hope that helps.

    Reply
    • Trinidy says

      February 16, 2017 at 3:29 pm

      How did you finish the corners in the room and doorways?

      Reply
    • Jeannie says

      July 26, 2019 at 8:10 pm

      Thanks, I will try that great idea

      Reply
    • Angela says

      July 23, 2022 at 3:16 pm

      Thank you so much for that tip!!

      Reply
  2. Deidre says

    November 26, 2017 at 9:44 am

    Any problems with it separating after time?

    Reply
    • Jeanie Emmert says

      November 27, 2017 at 3:29 pm

      No, it still looks great!

      Reply
  3. Natalie says

    January 30, 2018 at 7:32 pm

    Do you have a final picture?

    Reply
  4. Colin says

    February 8, 2018 at 5:59 pm

    What did you use to sand it?

    Reply
  5. Renee Graner says

    April 8, 2018 at 8:19 pm

    Years ago we pulled paneling off the walls and were pleasantly surprised to find sheetrock! Much easier to paint over. But I have filled the cracks so that I could wallpaper over paneling before and it is a very simple process.

    Reply
  6. Susan shindelka says

    February 1, 2019 at 11:21 pm

    I am in a catastrophe.I did a good job on lines except ever 4feet at the seams they don’t line up with next piece of panelling .Soon piece have puffed up,buckeled..even in different directions from top to bottom..mess..I have filled in and sanded can’t get a flat level point..I come close but not good enough.i haven hours trying to get the bumps to meet..dissolve..some ..Primed it today and want to hang a light there..Looks bad..few spots I can fill in but how many times can I fill and sand and redoo until I fix., I know I can’t use 220 paper on a sander as in pushed the primer and compound in another place and itt can’t be sanded to well as it has gotten hot from the heat.from sander..Think maybe I need to sand the whole warped 4/8sheet flat to be level to the lower side..any other ideas…please advice.a solution.as is bad in 3lines.thankyou

    Reply
  7. Joyce says

    March 5, 2020 at 6:40 pm

    I live in a mobile home. It is nice but didn’t look finished with paneling I have done this with all my rooms and they look just like dry wall
    All my rooms . I am 75 so if I can do it u can. ❤️

    Reply
  8. Amy says

    November 19, 2020 at 12:56 pm

    If there is paint, do you have to sand it first?

    Reply
  9. Rick says

    February 22, 2022 at 11:24 pm

    I read in one of the instruction videos that caulk should be used and not joint compound because joint compound (spackle) tends to crack. I also viewed one video where a bead of caulk was applied then topped off with joint compound. Hard to decide which method to use. What’s your opinion on this?

    Reply

Trackbacks

  1. Baby Nursery Update - Create and Babble says:
    January 20, 2015 at 8:04 am

    […] week I showed you how we dealt with the painted paneled walls by filling in the grooves with joint compound. The walls are now smooth – for the most part. There are a few places […]

    Reply
  2. Vinyl Wall Decal - Create and Babble says:
    February 25, 2015 at 6:22 pm

    […] to finish it up this weekend. But in the meantime, I want to show you one wall. Remember when we filled in the grooves of the paneled walls? Well here’s one of the reasons we did that. We wanted one wall decorated with a large vinyl […]

    Reply
  3. Baby Girl Nursery Makeover - Create and Babble says:
    March 11, 2015 at 6:02 am

    […] be so bare and boring without it. Speaking of walls, they started out as painted paneling until we filled the cracks, made it smooth, then painted them the perfect shade of gray. You can just barely see on the left […]

    Reply

Leave a Reply Cancel reply

Your email address will not be published. Required fields are marked *

About Jeanie

About Jeanie

Welcome to Create & Babble. This is where I share my loves: crafting, hiking and camping

Read more about me here

Categories

Archives

AntiqueFarmHouse
Zots Craft Adhesive Dots

Amazon Associates Disclosure

Jeanie Hevener Emmert is a participant in the Amazon Services LLC Associates Program, an affiliate advertising program designed to provide a means for sites to earn advertising fees by advertising and linking to amazon.com.


hobby lobby

Copyright © 2025 · Site by Pretty Pink Studio

Copyright © 2025 · Glam Theme on Genesis Framework · WordPress · Log in

This website uses cookies to improve your experience. We'll assume you're ok with this, but you can opt-out if you wish.Accept Reject Read More
Privacy & Cookies Policy

Privacy Overview

This website uses cookies to improve your experience while you navigate through the website. Out of these, the cookies that are categorized as necessary are stored on your browser as they are essential for the working of basic functionalities of the website. We also use third-party cookies that help us analyze and understand how you use this website. These cookies will be stored in your browser only with your consent. You also have the option to opt-out of these cookies. But opting out of some of these cookies may affect your browsing experience.
Necessary
Always Enabled
Necessary cookies are absolutely essential for the website to function properly. This category only includes cookies that ensures basic functionalities and security features of the website. These cookies do not store any personal information.
Non-necessary
Any cookies that may not be particularly necessary for the website to function and is used specifically to collect user personal data via analytics, ads, other embedded contents are termed as non-necessary cookies. It is mandatory to procure user consent prior to running these cookies on your website.
SAVE & ACCEPT