


Today I want to share how I made my own stencil and how I used that stencil to make curtain panels for my living room.
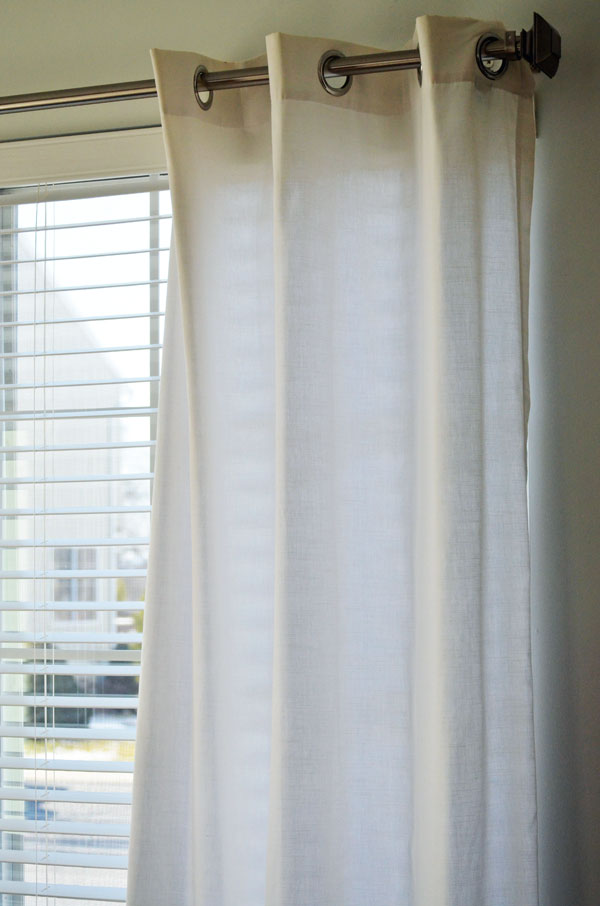
Well I didn’t make the curtains – they’re from Target. But I did stencil the curtain panels and they look completely different. (And yes, that is a purse below, not curtains – stay with me!) Let me back up here. Last spring, Dan and I repainted the living room. It was gold with two deep red stripes painted around the perimeter of the room. Yes, lovely (she says sarcastically). This was pre-blog so I don’t have photos to show how awful it was. Trust me – it was bad. Anyway, we painted the walls a soft gray color. I hung inexpensive, plain white curtains until I could decide what exactly I wanted for window treatments. Fast forward to Christmas when I received this awesome camera bag. It’s from Jo Totes and it’s called Coral Rose.

Not only do I love this bag, I love that color. As I was admiring my pretty, new camera bag, it hit me. This is the perfect accent color for the living room. I knew I wouldn’t find ready-made curtains in exactly that color, so I took a picture of that bag with my iphone and headed off to Lowe’s to get my paint. (Why didn’t I just take the bag????). The color is SunRose.
How about that match! Spot on, right? Okay, I have my paint. Now I need a stencil. Helloooo Silhouette Cameo! I went looking through the online store, looking for the perfect shape for my stencil and came upon a quatrefoil lace background single fold square card (that’s a mouthful!). I had to do a little tweaking. For you Silhouette users, that means ungrouping, releasing the compound path, deleting the card section, then making the compound path again, and finally resizing. Sounds like a lot, but it only took a few seconds. I cut the shape out of a stencil blank I found at Hobby Lobby.
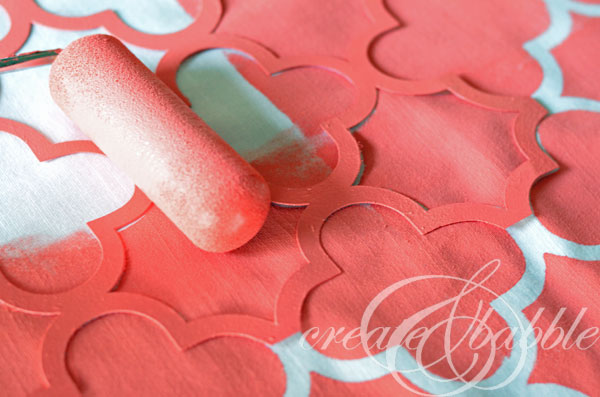
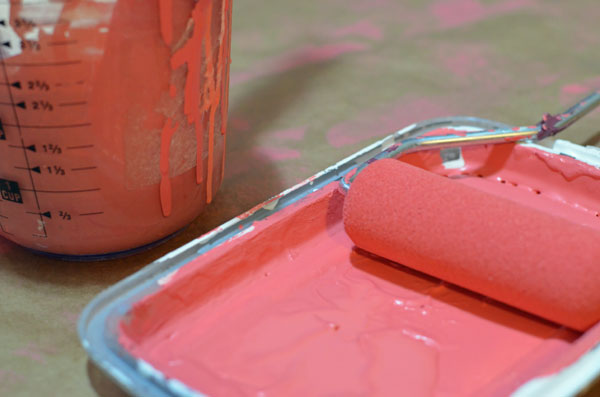
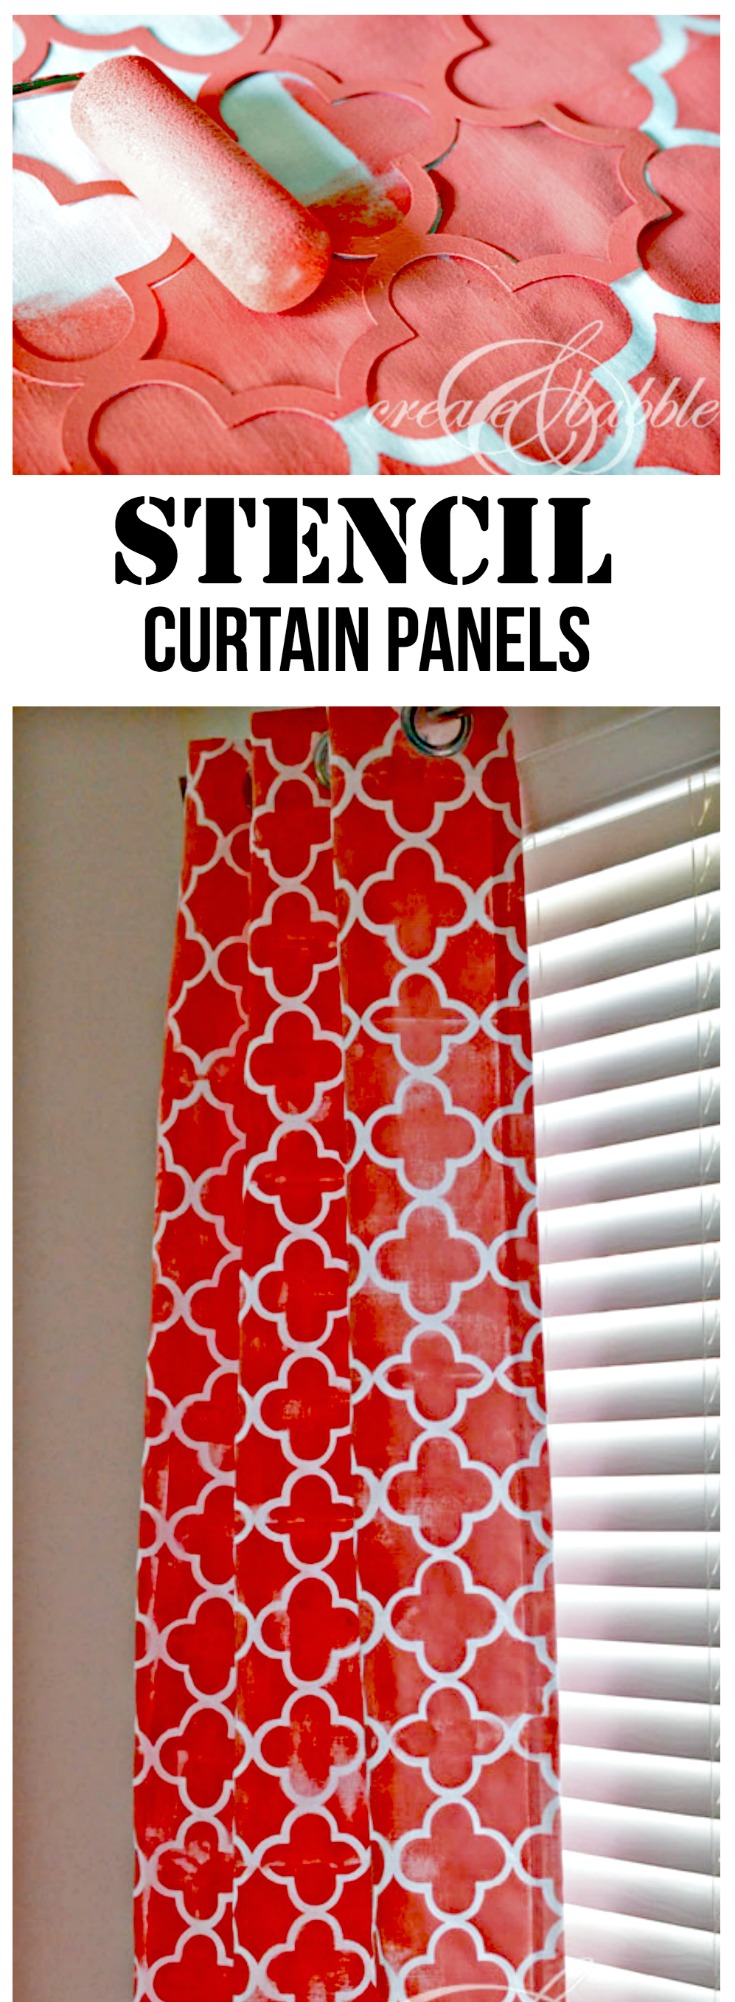
I covered the kitchen table with craft paper and got to work. I used a small foam roller to apply the paint. I wasn’t overly careful with it. I wanted the fabric to have a hand-painted look to it. The fabric does soak up quite a bit of paint. I used more than I thought I would. I started with a sample size and that didn’t even cover one panel. I went pack for a quart. Oh, and I did add fabric medium to the paint, although they still feel rather stiff. But who cares, they’re curtains, not blankets.
First, the before photo.
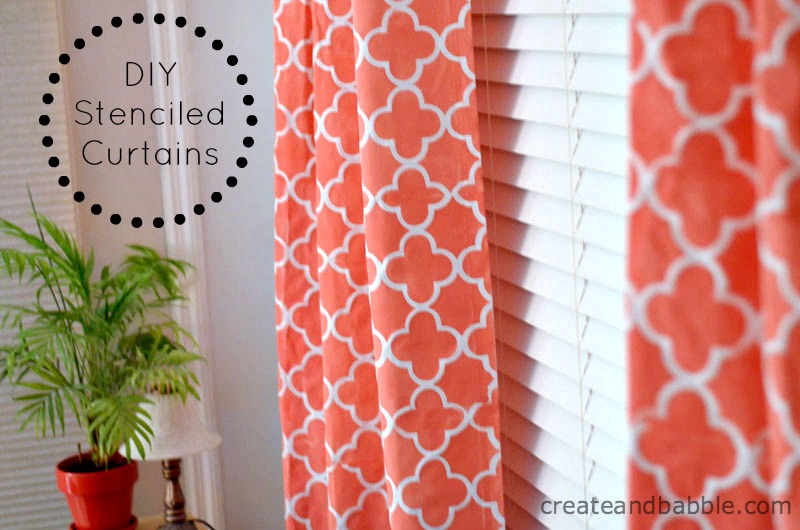
And after.
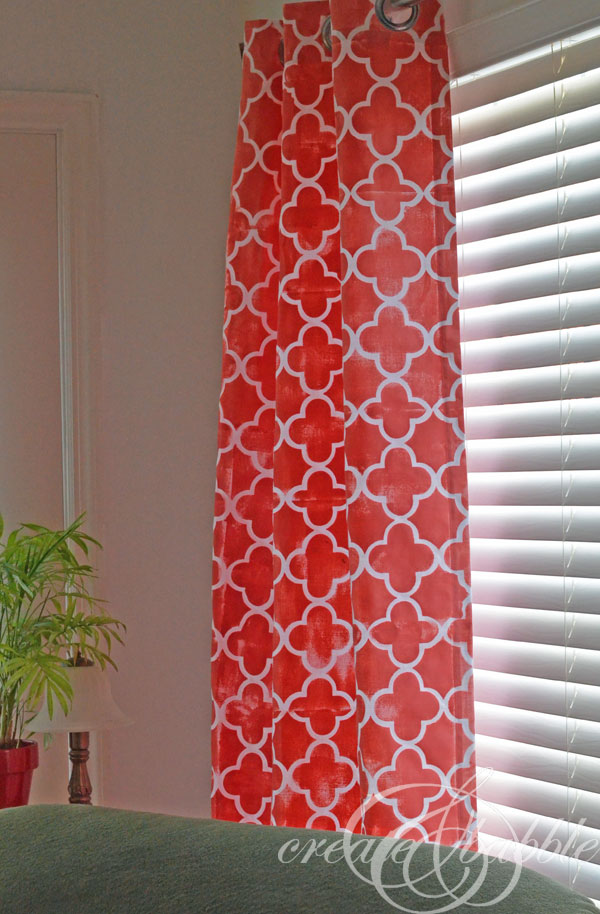
And there they are! I love them!
Stenciling plain curtain panels is an easy and inexpensive alternative to pricey designer fabric or designer curtains. And as often as I like to change things up around my house, easy and inexpensive are always good things!
If you’re interested in seeing more stenciled fabric projects, you might like theses seat covers and you just have to see what I did to an old favorite upholstered chair that was looking a little worn.


These look so good and easy. I think you have inspired me to get moving on my living room curtains. Great job.
Thanks April! It was easy and fast!
Beautiful! Love the color. Can you wash them?
I’ll find out! I think so!
Those look awesome Aunt Jeanie! What a great idea!!
Thanks Mary!
Beautiful! I might try that for my bedroom – I need new curtains.
Thanks Paula! Let me know if you do. Sometimes it’s hard to find the exact color curtains that you want and this way you can customize it!
They are gorgeous. I’m always afraid to do things like that. You inspire me. great job, Jeanie.
Thanks Lori! Start with something small, like a pillow.
I love these Jeanie!!! I have been trying to find just the right patterned curtains with just the right color for my dining room, this is an awesome project. I’m not the craftiest so I’ll let you know how I make out.
Thanks Kathy! Let me know if you need help : )
Thanks for the fantastic information and tutorial. It’s always handy to know how to actually “do it yourself” as this can save a whole load of money, which is important in this difficult economic climate in which we live. I liked how many photos you used to get your point across – very useful!
Thank you for your kind comments. I’m glad you like them!
What cut settings did you use on your silhouette to cut the stencil?
Hi Rebecca, I’m trying to remember the cut setting that I used. I believe it was higher than I thought it would be. I’d say try a test cut at 3 and go from there!
Loved seeing Mariel’s contributor spotlight on you over at Or So She Says. Was really curious to see how you pulled off this awesome look…and I love that your Silhouette Cameo was in part to blame! So lovely. And I didn’t know Hobby Lobby sold stencil blank…. Hmm…. This might be going on my projects to do list!
Love this!! I’ve been wanting to cut a stencil for my wall, I’m wondering if this technique would work. How did you move the stencil from space to space without transferring ink.. wipe it down between each placement? Or was it a non issue? Great Job!!
Thanks Deanna! I washed it off in the sink a few times just to be sure I didn’t get paint where I didn’t want it, but not every time I moved it. Good luck making yours, I’d love to see your wall when it’s done!
What type of paint did you use?
Bonnie, I used latex paint and added fabric medium to it until I ran out and then just used the paint! It’s a little stiff, but since it’s on curtains, the softness of the fabric doesn’t matter so much to me.
Boy do I wish that you sold these! I have been searching high and low for the perfect curtains for my daughters nursery and these would be absolutely perfect.
I love the color. I love your camera bag. And I really love your new curtains.
Cotton ware a shop that offers good laundry services classify the items that they serve so that each item is washed in its proper setting. Cotton ware will help you to get the excellent Living Room Curtains you want.