DIY Wedding Invitations
A Silhouette Tutorial
Of everything I made for my daughter’s wedding, the invitations are probably my favorite. There was never any question about buying or making the invitations. I just knew I wanted to make them.
It wasn’t a matter of saving money. In fact, I have no idea what wedding invitations cost. It’s because I own a Silhouette Cameo! I could get as creative as I wanted and only be limited by my imagination. And the best part: my daughter’s wedding invitations would be one-of-a-kind, just like her ; )
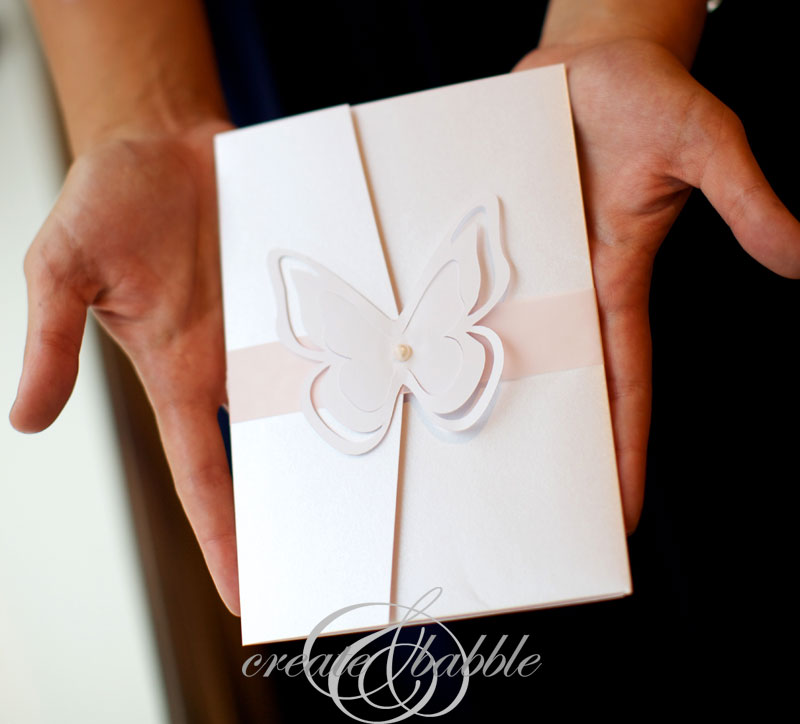
The first step in making your own invitations is determine the look you want. You’ll see so many styles of wedding invitations out there. The sky is the limit! From ultra formal to extremely casual and trendy….so many choices!
We (and we means: I) decided we wanted classic invitations with a touch of pretty. A little back story here: my daughter pretty much left all of the wedding decor decisions up to me. It’s really not her thing. Of course I ran everything by her to get her approval, but basically she trusted me. She’s just not interested in crafting, DIY, decorating….who is this child??? Maybe all of that skips a generation and she’ll give me a granddaughter that I can decorate and craft with some day! Back to the invitations.
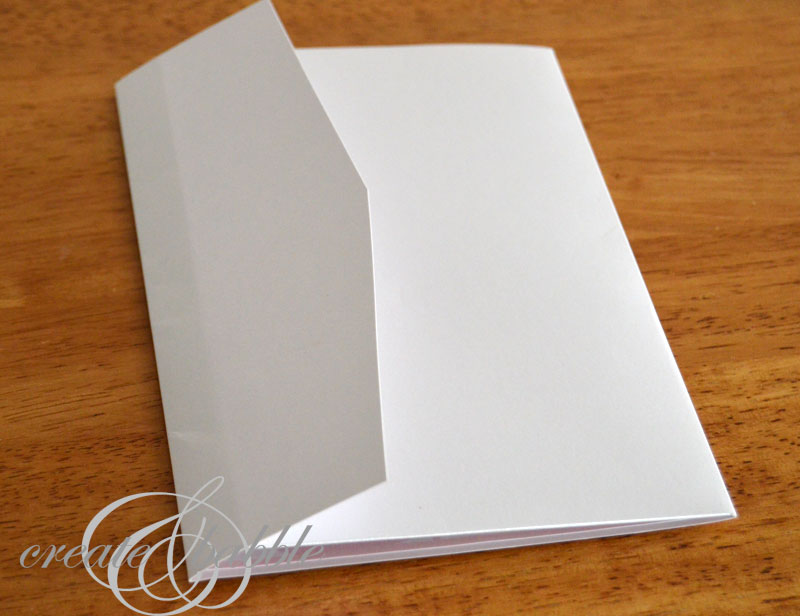
At first I thought I’d make the pocket card that holds the invitation and inserts, but quickly decided that I had enough to do and ordered the pocket cards from Paper and More.
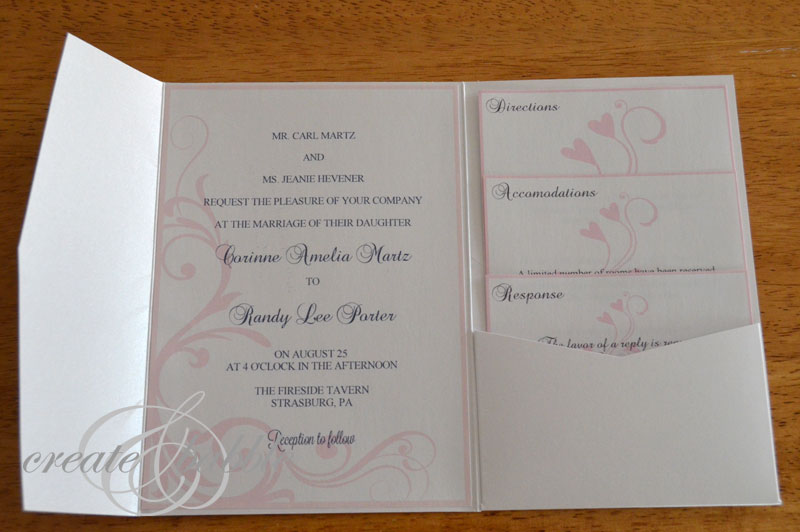
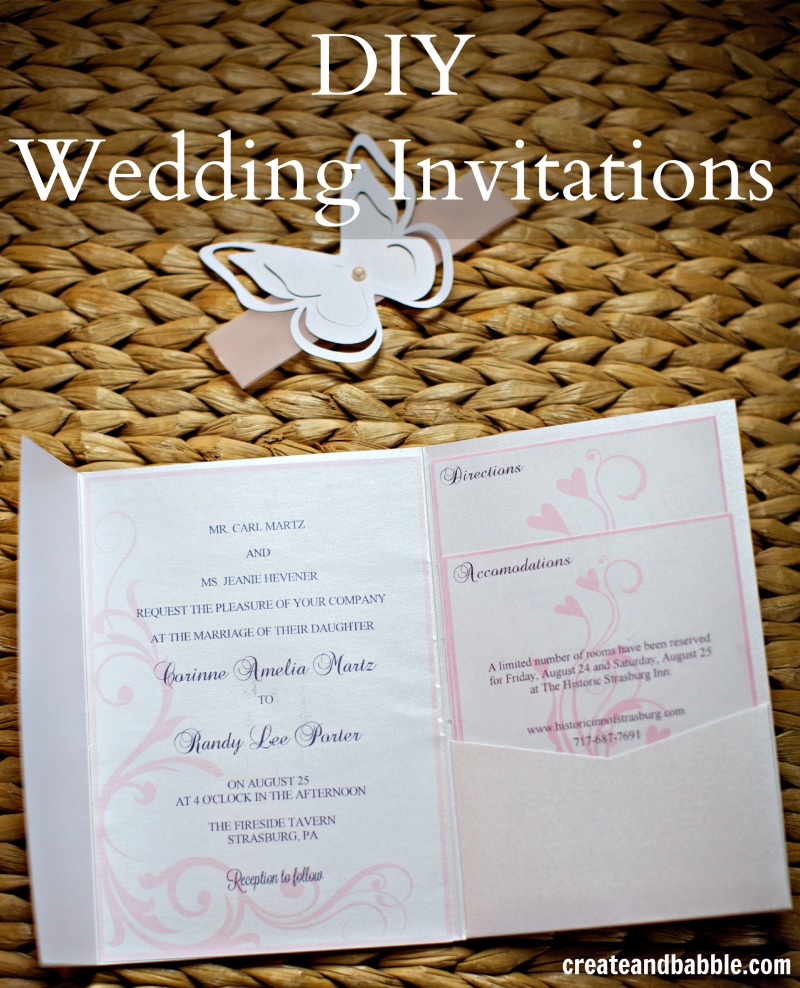
That left me with making the inserts:
- invitation
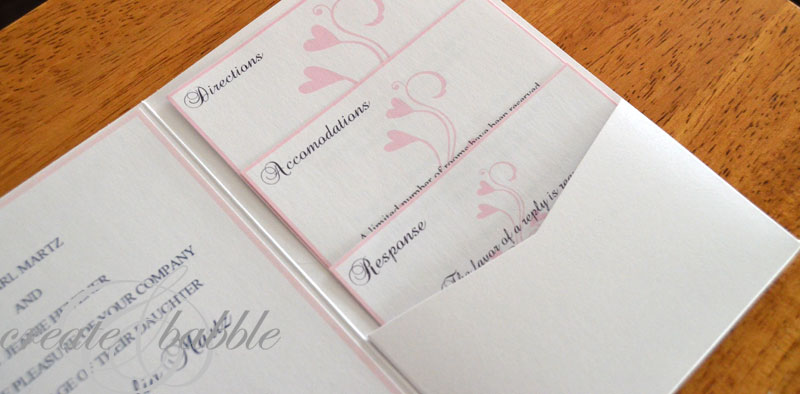
- response card
- directions card
- accommodations card
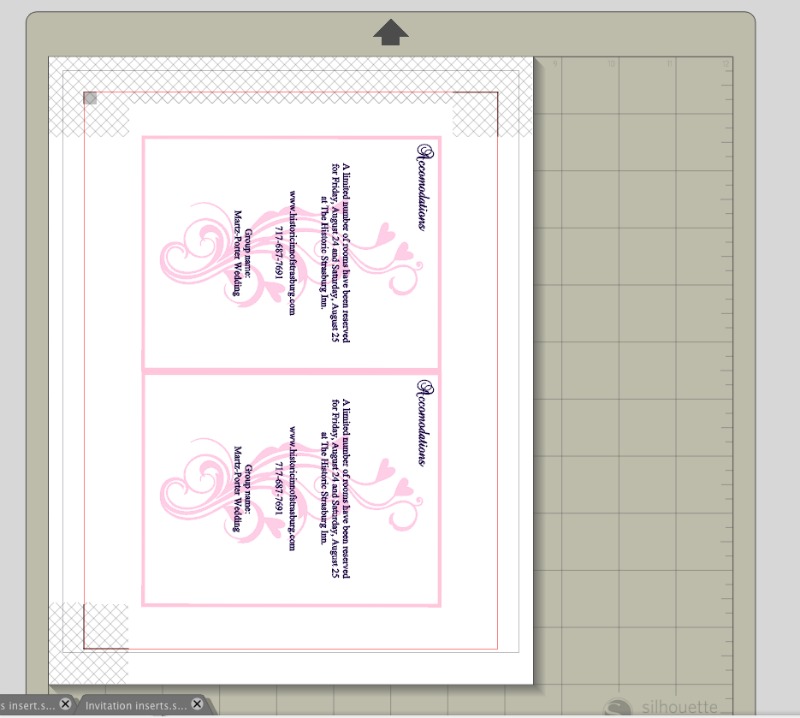
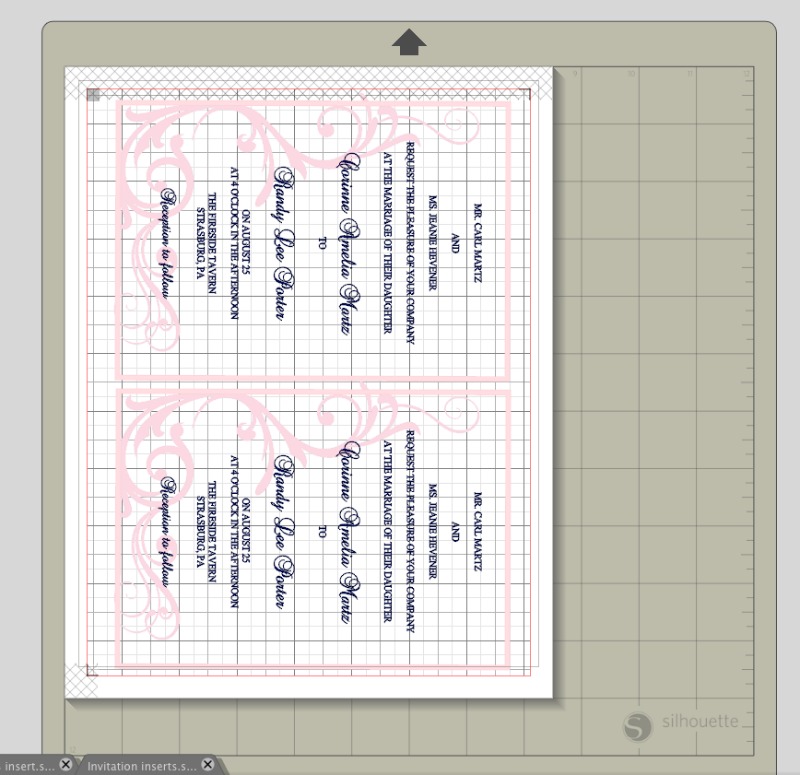
- After determining the size that each insert needed to be to fit inside the folder, I created rectangles of those sizes in the Silhouette Studio software.
- I played around with the wording, fonts, shapes and sizes until I got it just right.
- I filled the color of the text and swirly shapes with the wedding colors using the color picker.
Then it was time to use my favorite Silhouette feature: Print and Cut. The print and cut feature is AMAZING. Can you tell I love print and cut? What is print and cut? Well in this instance it means that I can create my design in the Silhouette software, print it, then run the paper through the Cameo and have it cut the shape I want it to cut. Since I only wanted the rectangle cut, I “turned off” the cut lines of everything in my design except for the rectangles. If you need a more in-depth tutorial about Print and Cut, there are many good how-to videos on You Tube or I highly recommend taking on-line video classes from Kerri Bradford.
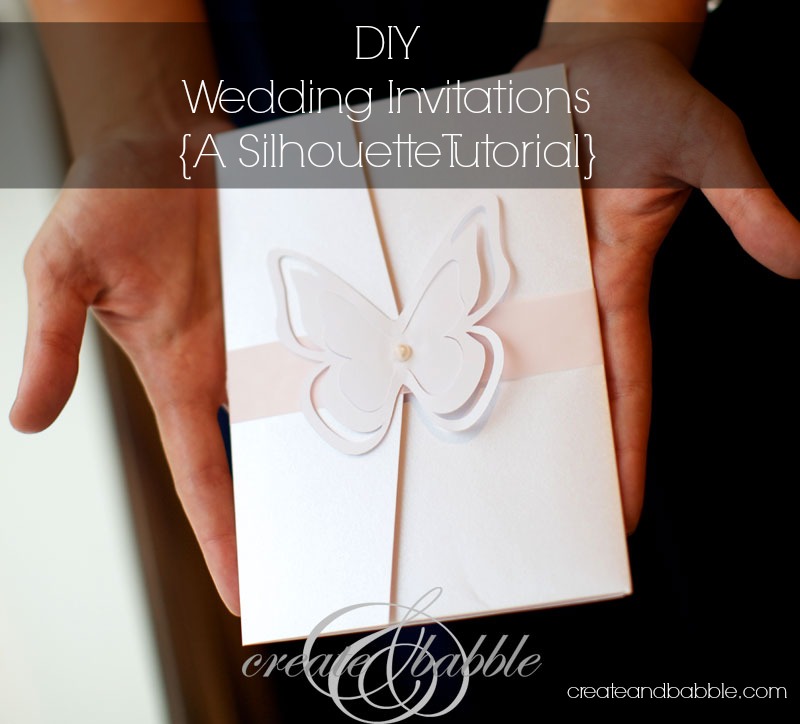
Here are the inserts and invitation, all assembled and ready to go!
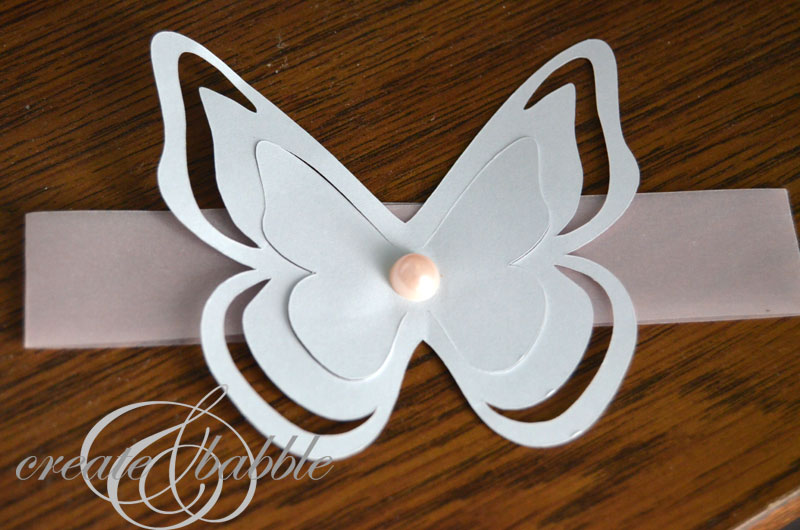
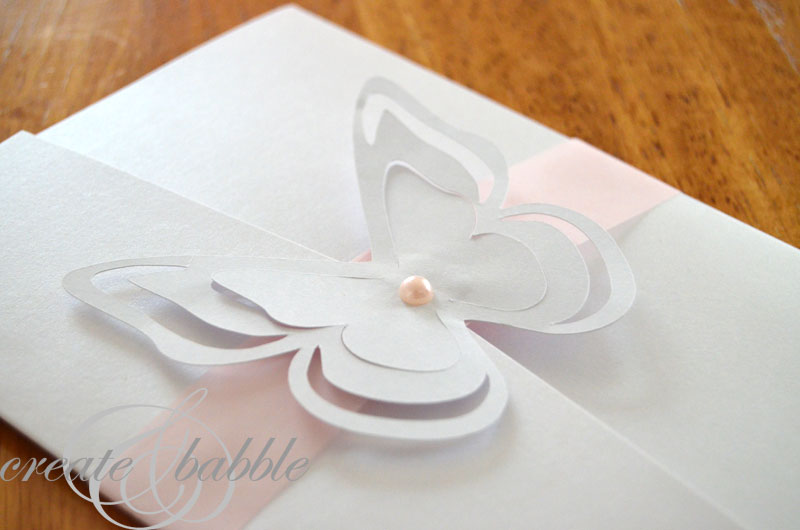
The last thing left to make was the band that goes around the assembled invitation. I used light pink vellum that I cut into 1″ strips. I cut out a butterfly shape that I found in the Silhouette Online Store and added a little pink self-adhesive pearl to it. Perfect!
We received tons of compliments on the invitations and were so happy with how they turned out.
Here is a list of the products that I used to make these invitations:
- Silhouette Cameo
- Pocket Cards from Paper & More
- Envelopes and card stock from LCI Paper
- Scotch Advanced Tape Glider
- Pink vellum
To see more more wedding DIYs, click here.
Do you know about the tradition of a cookie table at wedding receptions?
This post is part of The Silhouette Challenge, a monthly collection of Silhouette projects made by members of the Silhouette Challenge Facebook group. Please see their projects below:
Using Silhouette Studio as a Graphics Programme by Get Silvered
Hymn Art by Unoriginal Mom
Pow! Superhero Party Decorations by Lil Mrs. Tori
Family Photo Tile & A Free Cut File by My Favorite Finds
They said yes! Bridesmaid Proposal Box by Everydaypaper
Home on the Range: An Accent Pillow by Suburble
“Keep Calm” Onesie by The Thinking Closet
August Silhouette Challenge Project by Give Me a Paintbrush
Fancy Powder Room Sign by Joy & Gladness of Heart
It’s Time to Try a New Craft Medium by Tanya’s Creative Space
Milk Jug Crayon Bucket by It Happens in a Blink
The Gold and Beautiful by The House on Hillbrook
My First Silhouette Project: A Vinyl Chicken Decal by Life After Laundry
A Stache Bash Part 1 by Home at Eight
One Shoe Can Change Your Life by An Elegant Touch
Washi Tape Wall Art by Tried & True
Washi Tape & Vinyl Sign by Tossed Salad Life
How to Organize Cards & Photos by Super Sweet Life




Jeanie, these are SO BEAUTIFUL. I just think they are the greatest thing ever. I haven’t done much of anything with my Silhouette other than vinyl but now card making is on my list of things to defiantly try.
Stephanie! Thank you so much, how sweet of you to say!
So cute!! Thanks for sharing 🙂 I’m planning my wedding for next year and these would be perfect!
Thanks so much! Have fun planning your wedding! I almost wish I had another daughter so I could do it again!
The invites turned out gorgeous! I love the print and cut feature too!!!
Thank you Tori! Print and cut rocks!!!
These are lovely! Makes me wish I had a Silhouette when I was doing my wedding invites 2.5 years ago…
Thank you Meredith. I can’t imagine crafting without my Silhouette. I guess I’m spoiled!
These are exquisite. What a beautiful design you came up with for your daughter.
Thanks so much Pam! We were so pleased with how they looked. Gotta love the Silhouette Cameo!
This is so beautiful and elegant. The band adds so much dimension.
Thanks Tanya. The band was my favorite part!
Jeanie, thanks so much for sharing this! I am planning to make my own wedding invitations too. When Lauren sent out the post titles on Saturday, I couldn’t wait to see yours. And thank you for sharing your paper supply sources. Your daughter’s invitations came out beautifully. I’ll be sure to check out your other wedding DIYs.
Thanks Valerie! We were so happy with how they turned out. Good luck making yours, I’m sure they’ll be perfect!
I’m so impressed! They are stunning. I can’t believe you did them with your silhouette!
Thanks Emily! Our guests couldn’t believe it either!
The invitations are beautiful. I just purchased a SC and have no clue how to use it. Let the learning curve begin.
Oh Shalana, you will love it! Let me know if I can help…I’d be happy to get you started!
My favorite line: “And the best part: my daughter’s wedding invitations would be one-of-a-kind, just like her ; )” Way to make a girl tear up in the first paragraph! Seriously, though, these are simply stunning. I love how professional you can take projects with a Silhouette machine. When I got married 4 years ago, I made my own wedding invitations, but I didn’t have a Cameo, and I used some textured paper that the ink didn’t stick to, so it ended up being a huge debacle. In fact, I have a post on the subject coming up soon! But it’s great to see that not ALL d.i.y. wedding invitations are disastrous. Some are huge successes. Like yours.
Thanks for another inspirational and innovative Silhouette Challenge project, Jeanie!
Warmly,
Lauren
The Thinking Closet
Thank you Lauren, you are so sweet. It was definitely a labor of love! And thank you for coordinating the monthly Silhouette Challenge. I love seeing what everyone comes up with!
I love this! I’m learning so much! You just convinced my BF to get a Silhouette, she is getting married next year.
Thank you Brenna! That’s great that your BF is getting one. Of course she will love it and will be able to make so much great DIY wedding stuff. How exciting!
These are so beautiful! So pretty and charming!
Thank you Carrie! That was exactly what the look I was going for!
I love these! They are so feminine and simple. Pinning for my bride-to-be- cousin.
Corey from tinysidekick.com
This is stunning!
Thank you Melanie!
These are simply beautiful! I love all the small details, particularly the pearl in the middle of the butterfly. I love seeing other crafter’s designs and learning new techniques {had no idea about print and cut} — this will certainly be something I’ll have to try too. Wonderful job, your daughter is one lucky lady to have such a fantastic mom!
Thank you Angela. You are so sweet! Thank you so much for the kind comments. I’m a lucky mom, too ; )
These invitations are absolutely stunning! Would love to have you share at my link party!
No wonder craft and wedding gawker accepted these! They are gorgeous! I can’t believe the products that are available to crafters these days! I think I need one of those…and I’m not really a DIY kind of gal 🙂
Thanks Nicole. If you get a Silhouette, you will love it!
This is so beautiful! Looks like it cost a lot of money and professionally done. Gorgeous!
Thank you very much!
These are beautiful! Wish I would have been this crafty when I made my own 6 yrs ago! Found your link on Whimsy Wednesday 🙂
We’d love to have you link at our SUPER SUNDAY Link Party, live now through Tuesday evening!
Lori
Who Needs A Cape?
Not Your Average Super Moms!
Thanks Lori!
wow, how elegant and beautiful is that!
absolutely stunning!
have a grat rest of your sunday~
Thank you very much Betty!
What a beautiful touch to begin the start of a newly wed’s life together! The butterfly is such a classy touch! Thanks for sharing at Project Inspired!! Pinned to our group pinboard for some extra luv! Heather
Thank you Heather! And thanks for the pin, too!
Hi, I love the invitations. One question: what happens when they go in the mail? Does it require a special envelope and additional postage to keep the beautiful buttterfly/pearl intact? thanks!
Thanks Lisa! The band with the butterfly are on the inner envelope that holds the invitation. That envelope goes into the outer envelope that is addressed for mailing. And it did not require additional postage. I mailed one to myself first to be sure ;). The butterfly arrived unharmed : )
HI! LOVE your website!! 🙂
What is the heaviest from LCI you can cut on your Silhouette?
Thank you!
Meaning, brand and weight. Thanks!
Thanks Jodi! How sweet of you to say! Here is the paper that I used for the invitations and inserts: http://www.lcipaper.com/stardream-paper.html?sku=SD811CRY81T_CTN
I love…love…love these!!! Do you make these and sell them?? Or do you have a sample set?
Very beautiful. Wish I could identify the fonts you used. That’s the hardest part for me.
What fonts did you use? That’s what I’m having the most trouble with for mine.
Thanks 🙂
These are beautiful. Did you use the sketch feature for the text?
a one kind of ceramic tile nevertheless we all should certainly discuss the
basics regarding installing flooring as well as other varieties of
ceramic tiles below. High durability of the slate tile lies in enduring the
capacity of extreme hard wear. You do not want to slip on the fllor of yor wet bathroom floor and hittting your head or injuring
your back.
I absolutely love these and have pinned them on my wedding board. I am using my SC to create my wedding invitations for our wedding in May. I love this tutorial and its exactly what I have been looking for. Can you tell me the size that you made the inserts for the directions, accommodations, and response card? I would love to know thank you so much.
Hi, Just FYI the link has changed above. It’s now at : https://www.kerribradford.com/category/classes/
In preparation for my cousin’s wedding, I’m planning on getting her custom stationery design for her wedding invitations. This article gives me design ideas that I can easily do myself! Thanks!
Oh I’m so glad it’s helpful for you!
Have you ever considered writing an ebook or gguest authoring
on other websites? I have a blog based on the same ideas you discuss and would really like to have
you share some stories/information. I knw my visitors would value your work.
If you’re even remotely interested, feel free to shoot me an e-mail. http://domfo.ru/redir.php?http://dreamwedding.zohosites.eu/
this pocket style of invitation by Create and Babble is a perfect choice.So it is good platform to all people…
In preparation for my son’s wedding, I’m planning on getting custom stationery design adding wedding quotes on invitation. This article gives some ideas that I can easily do myself! Thanks!
Hello, is anybody here interested in online
working? It is simple survey filling. Even $10 per survey (ten minutes duration).
If you are interested, send me email to hans.orloski[at]gmail.com
Social:www.facebook.com/posh.co
Great list of tips, thank you! These days, many processes can be stressful. The hardest part was finding the right photographer. Firstly, some of them were busy for our dates, while others did not suit their style or portfolio. Fortunately, we found the ideal photographer for ourselves on the site https://artweddingphotography.eu/
This tutorial is so inspiring! I love that you made the invitations yourself to create something unique for your daughter. The idea of using a Silhouette Cameo to get creative sounds like a fun and personal touch.